Log in
Open the app and sign in with the same email and passcode you use for BathyMaps on the web. Tick I accept the Terms of Service and the Log in button lights up pink — tap it and you're in.
No account yet? Tap Register, or View plans & pricing to see what's included. Forgotten your passcode? The Forgot? link sorts you out.
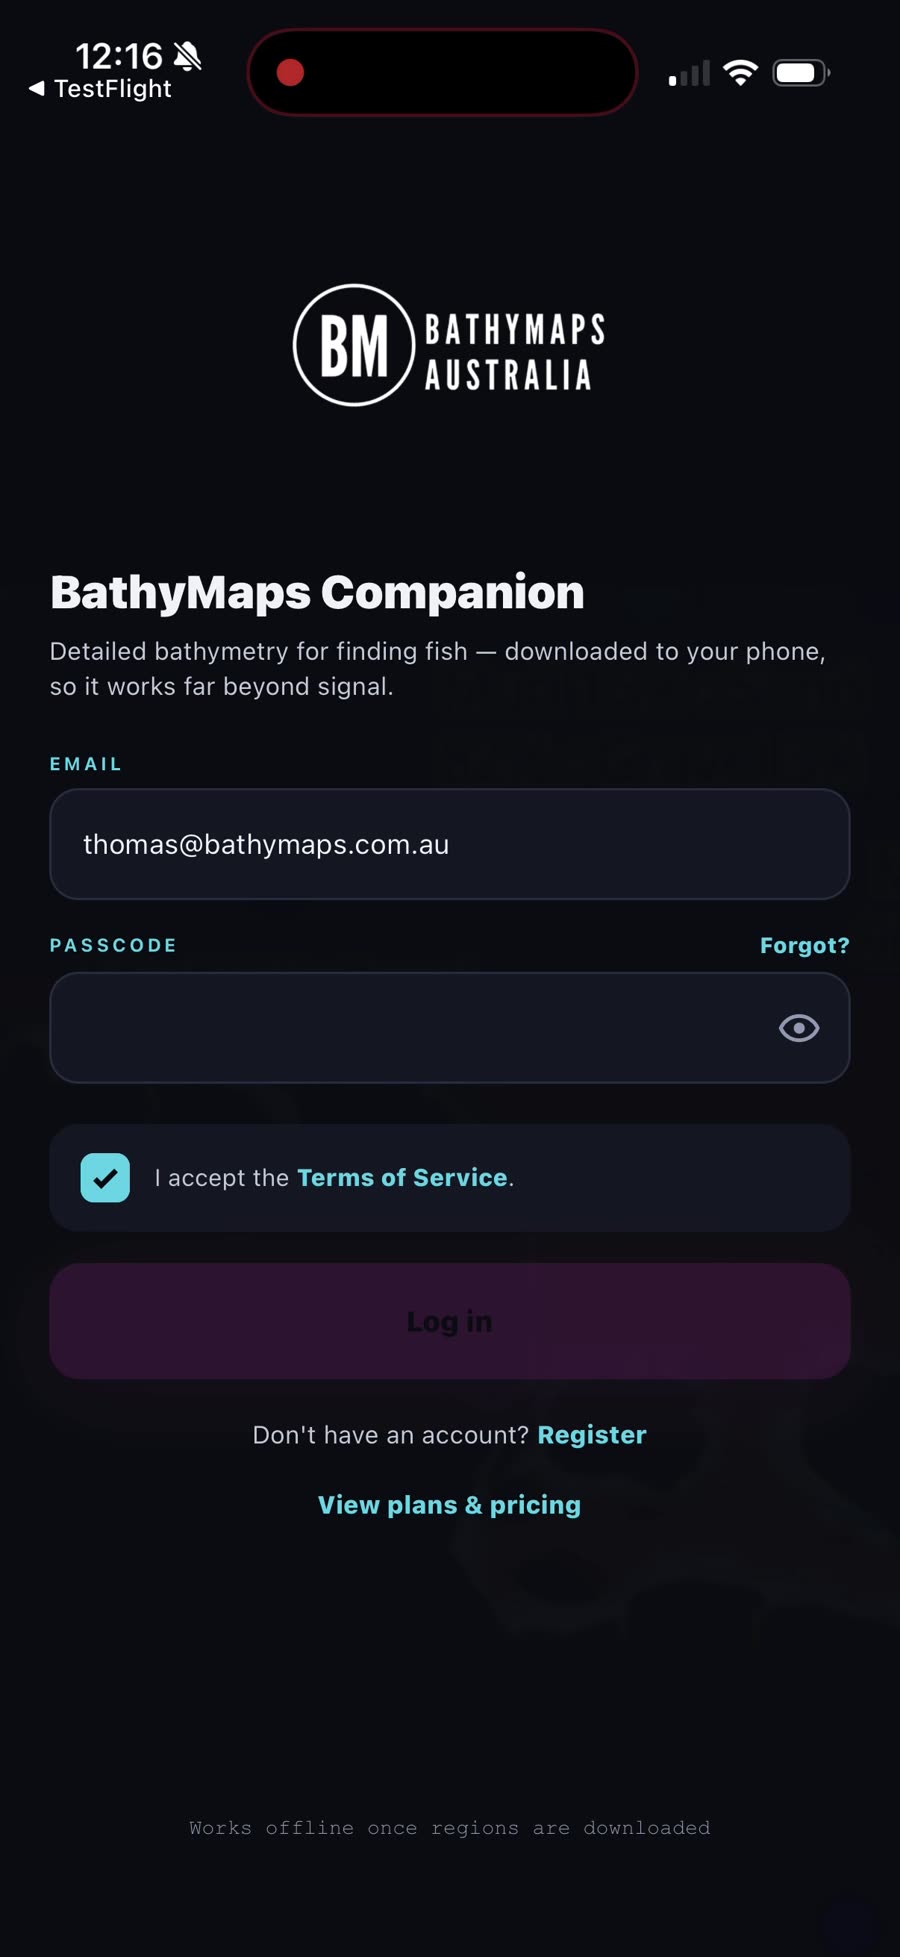
Allow location access
First launch, the app asks for your location. This is what puts your position, waypoints and tracks on the map, so you can see where you are and save your journey.
Tap Continue, then choose Allow While Using App when your phone asks. Without it the maps still work — but the app can't show you on them.
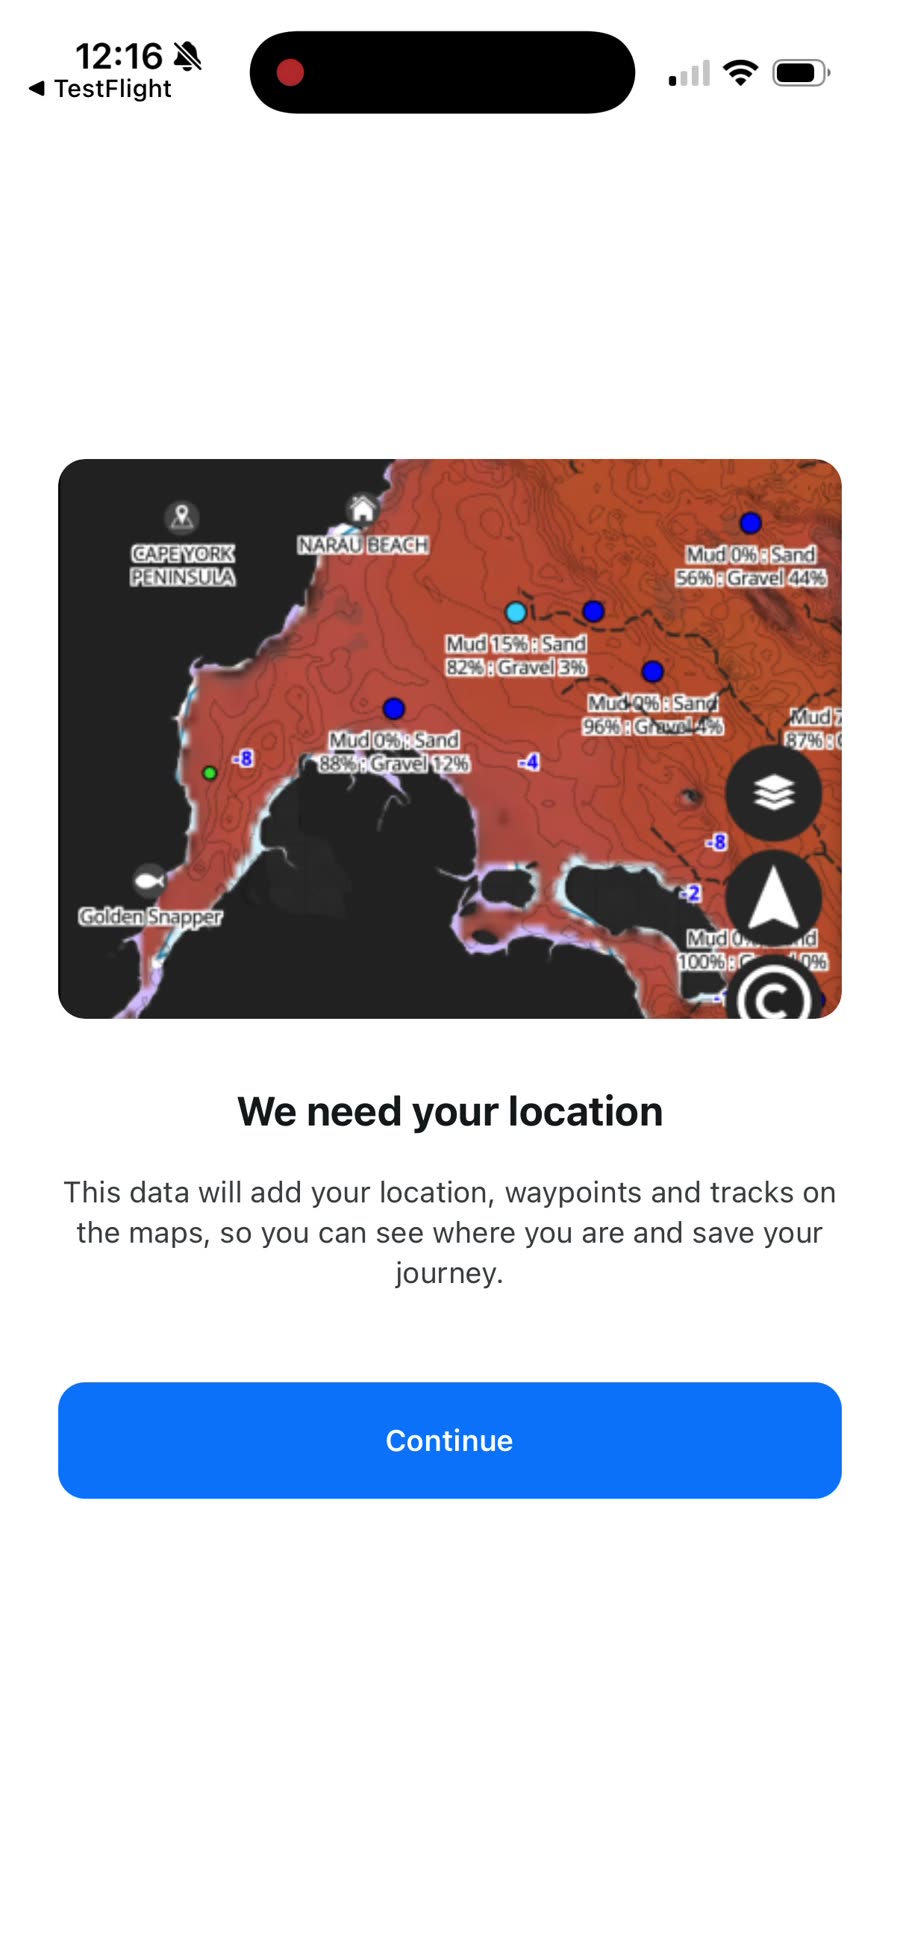
Let the base maps land
The moment you're in, the app starts pulling down the base maps for the whole coverage area — about 600 MB. You'll see a slim progress bar across the top of the map while it works. Do this on Wi-Fi and it's done in a few minutes.
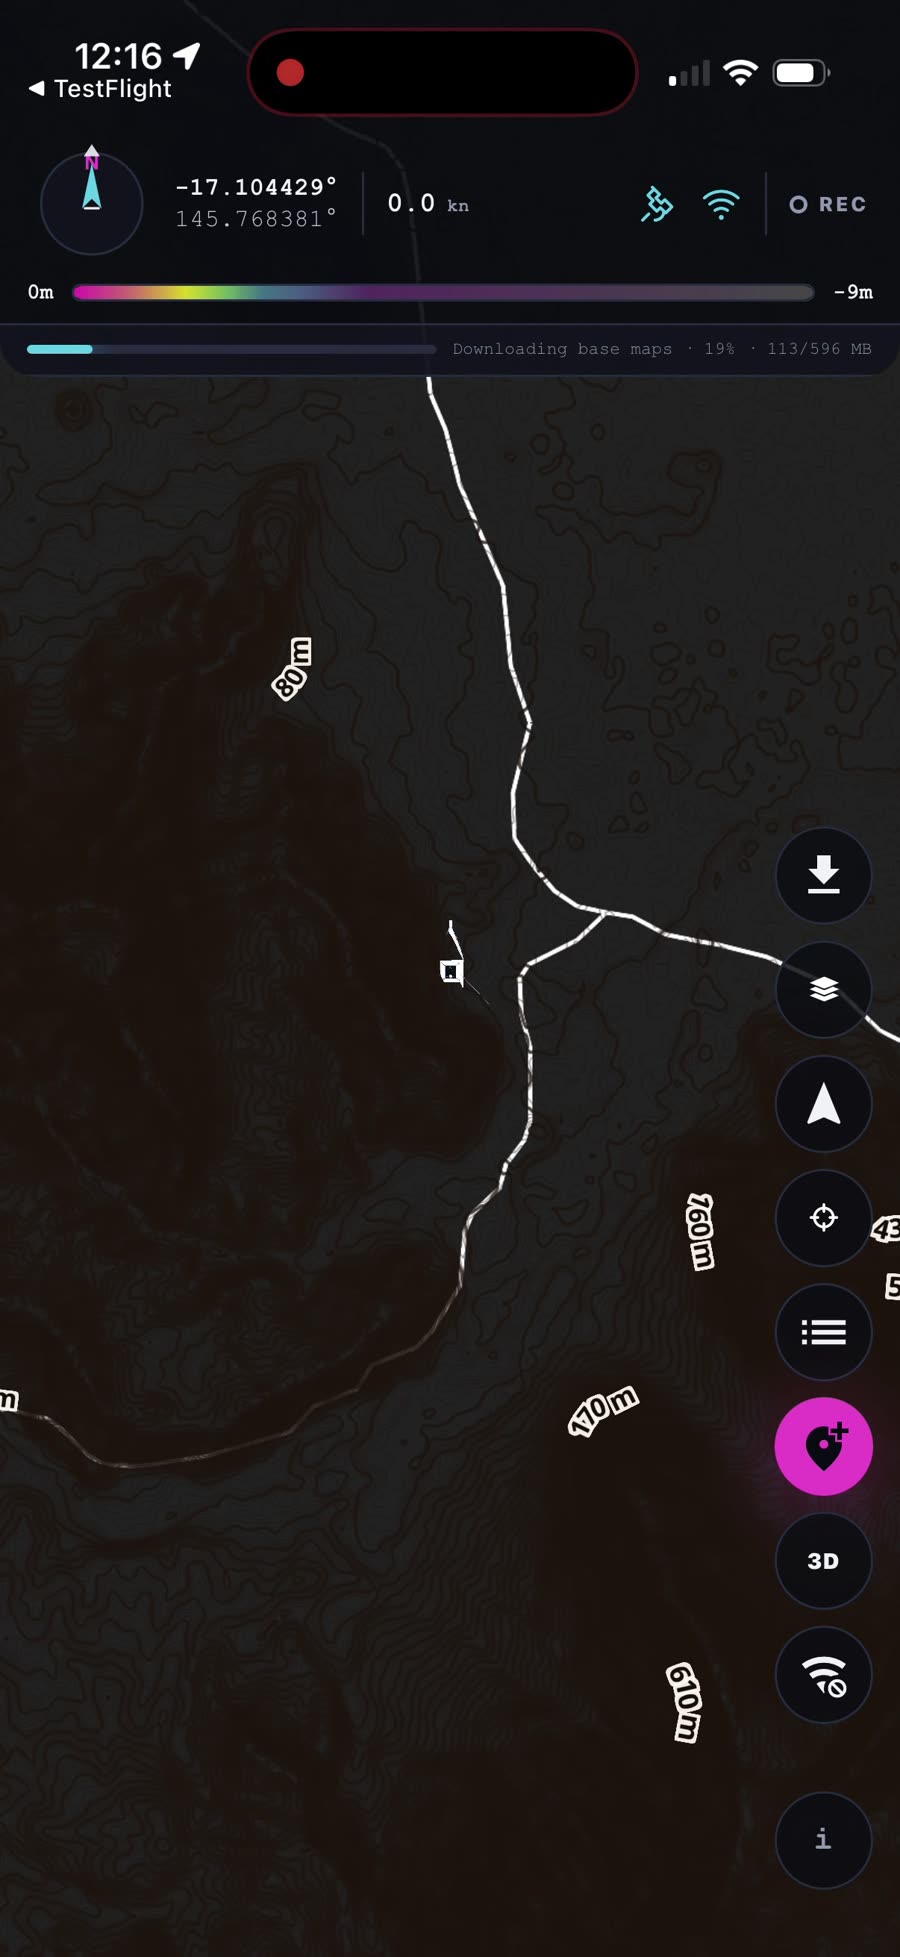
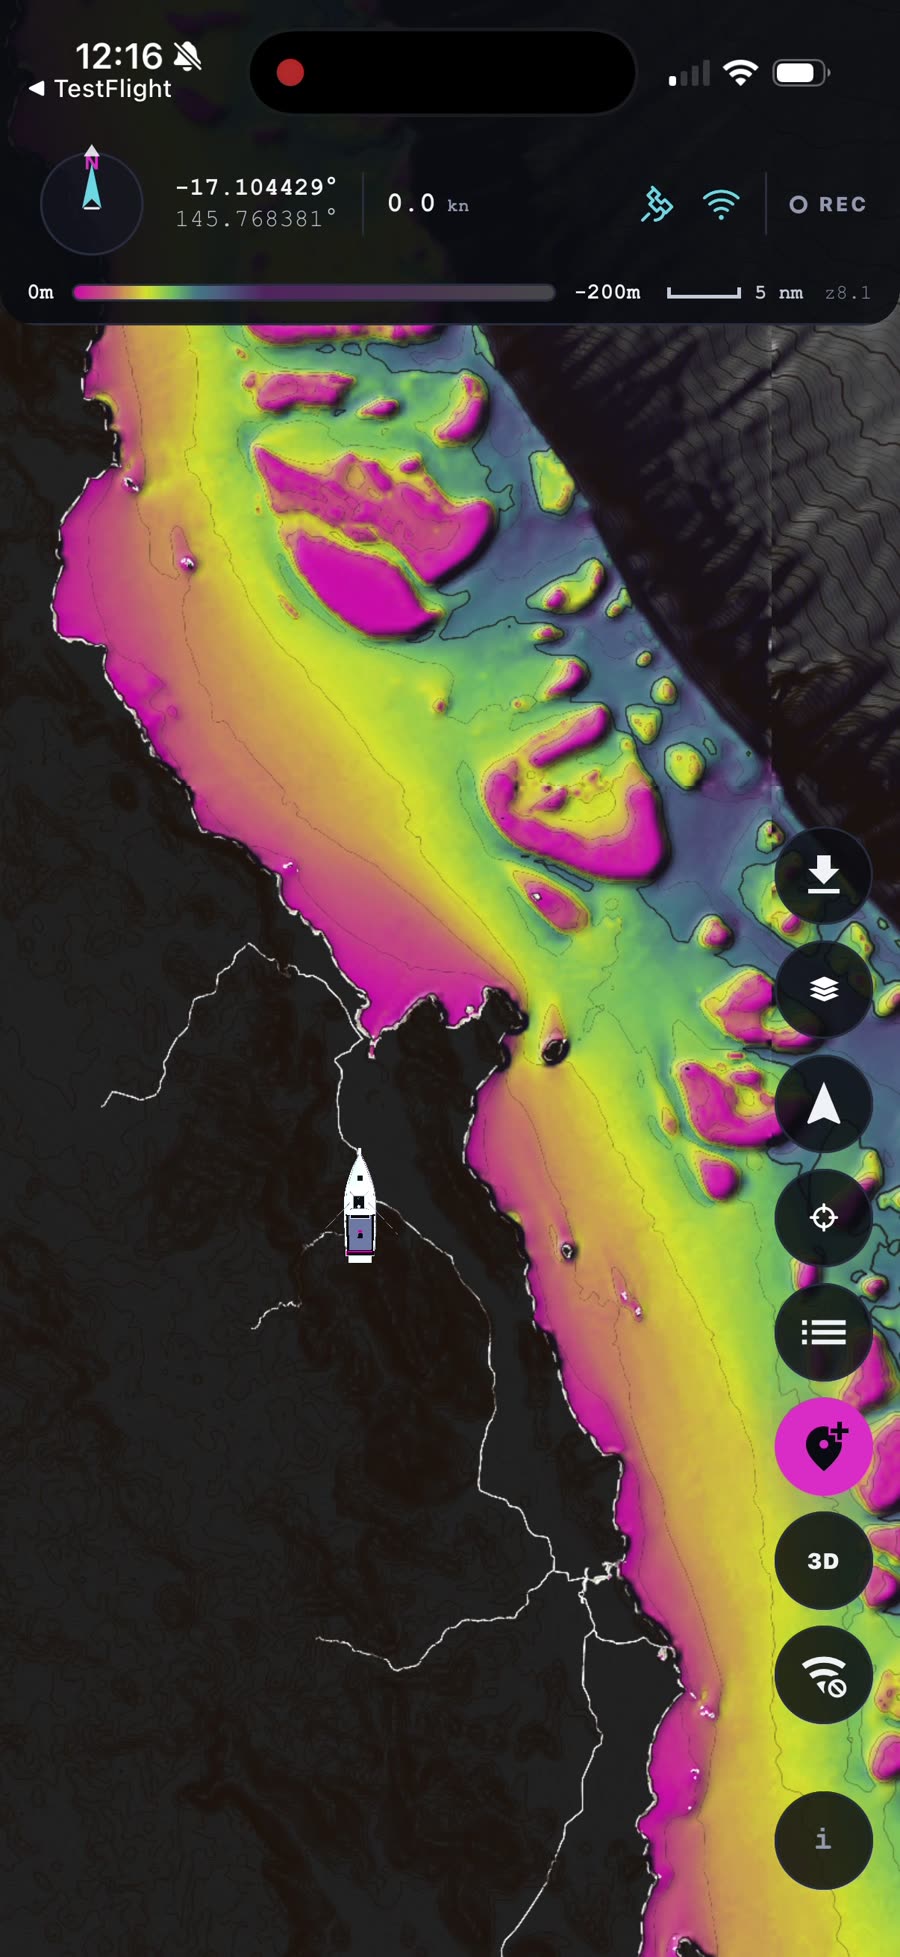
As the tiles arrive the chart comes alive: contours, depth shading and the full colour palette. The top bar shows your position, speed and heading, with the depth scale just underneath — and the toolbar down the right side is where everything else in this guide happens.
Set the map up your way
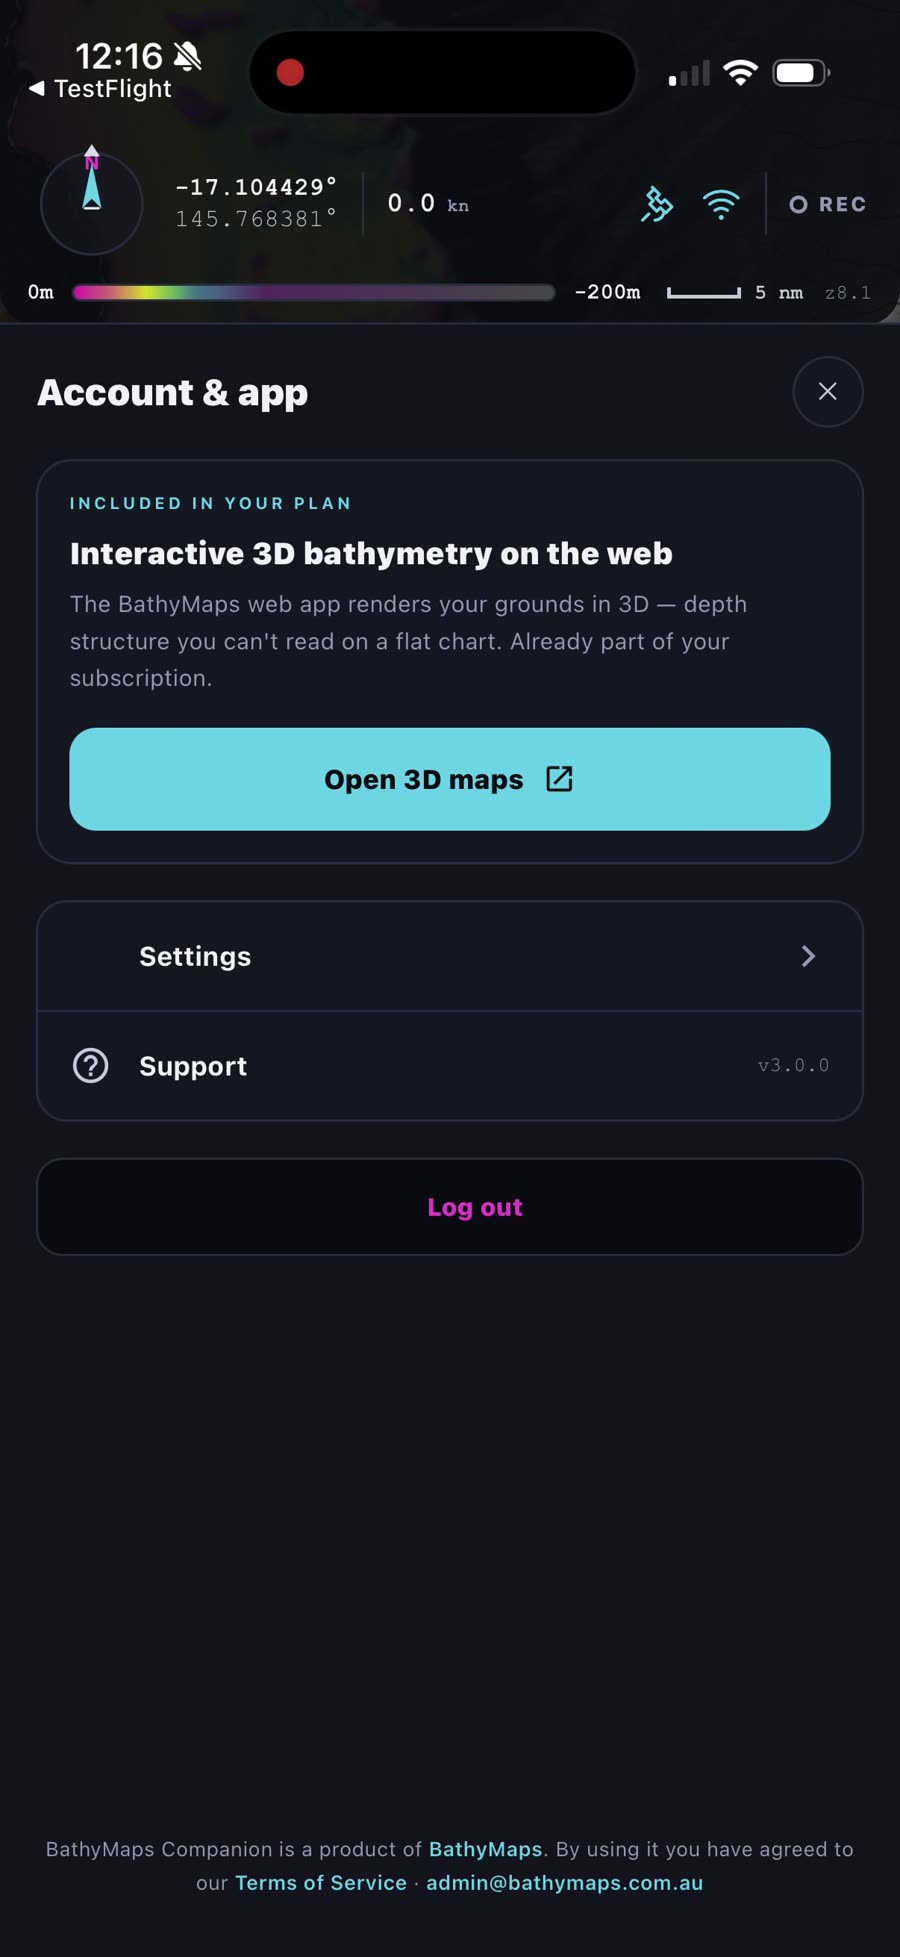
Tap the menu to open Account & app — home to Open 3D maps (the web app's interactive 3D bathymetry, included in your plan), Support, Log out and, the bit we want, Settings.
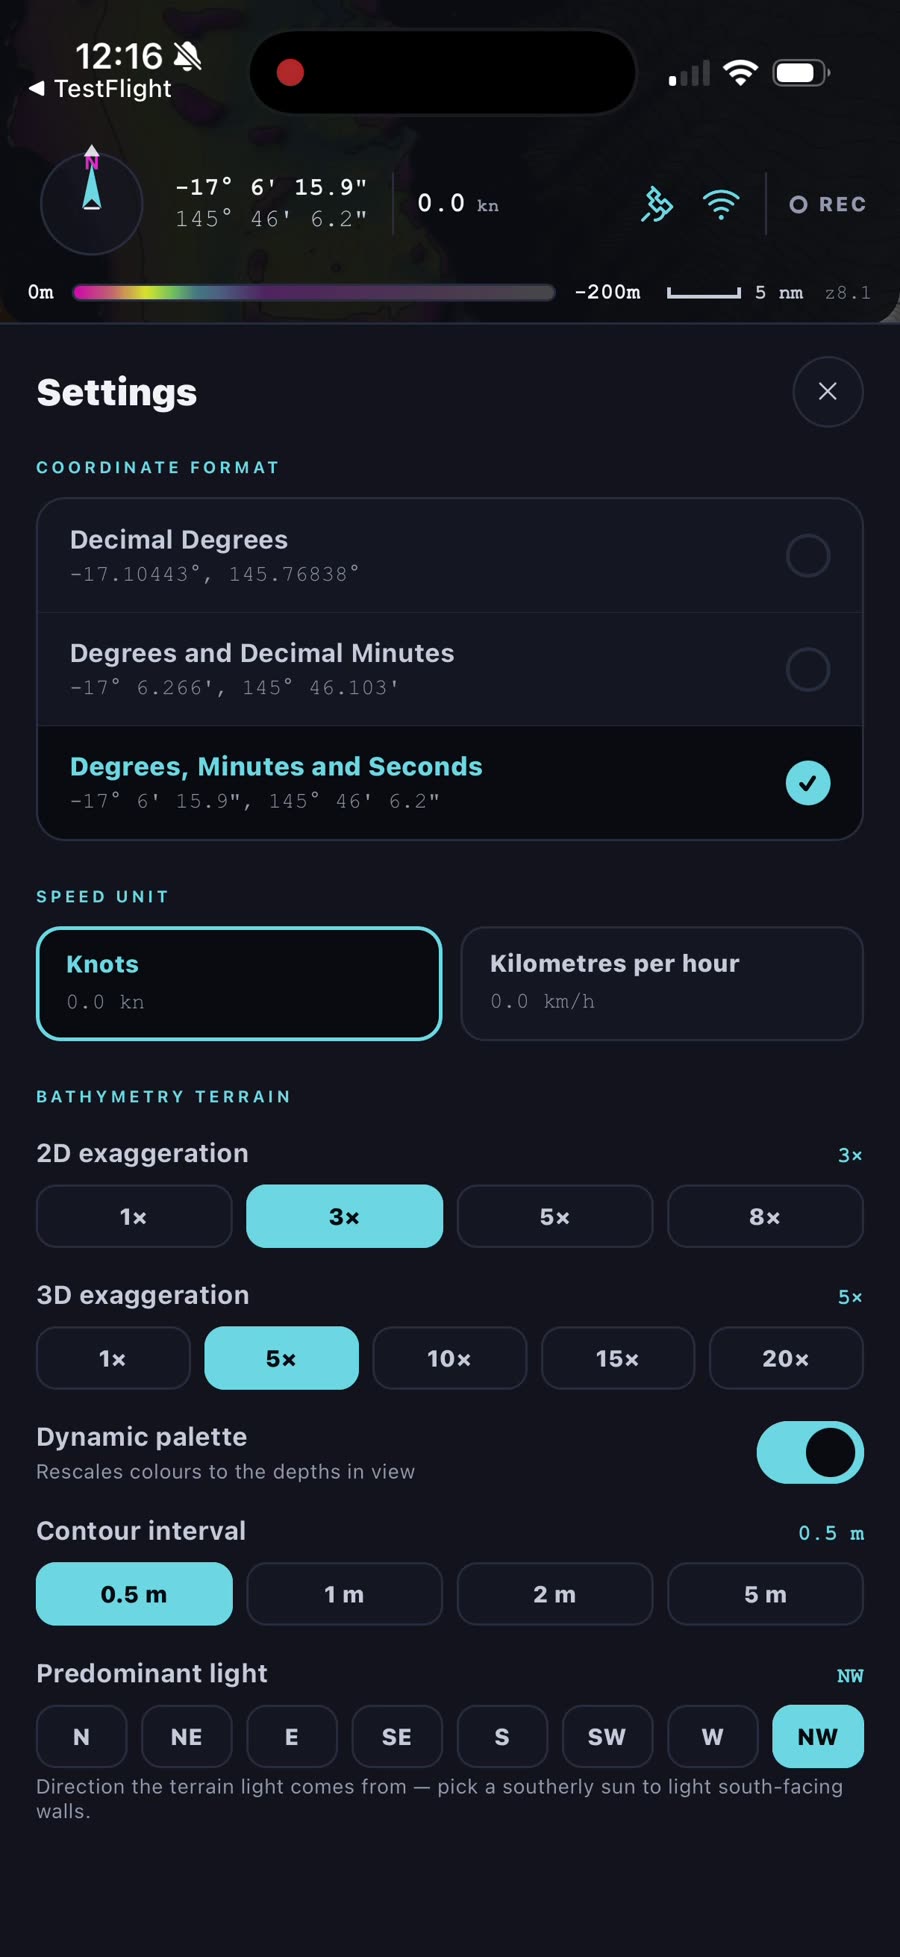
Settings is short and worth a minute:
Coordinate format — decimal degrees, degrees & decimal minutes, or degrees-minutes-seconds; the readout at the top updates instantly. Speed unit — knots or km/h. 2D & 3D exaggeration — how strongly the terrain shading pops. Dynamic palette — rescales colours to the depths in view. Contour interval — from 0.5 m to 5 m lines. Predominant light — the direction the terrain light comes from; pick a southerly sun to light south-facing walls.
Download your first offline region
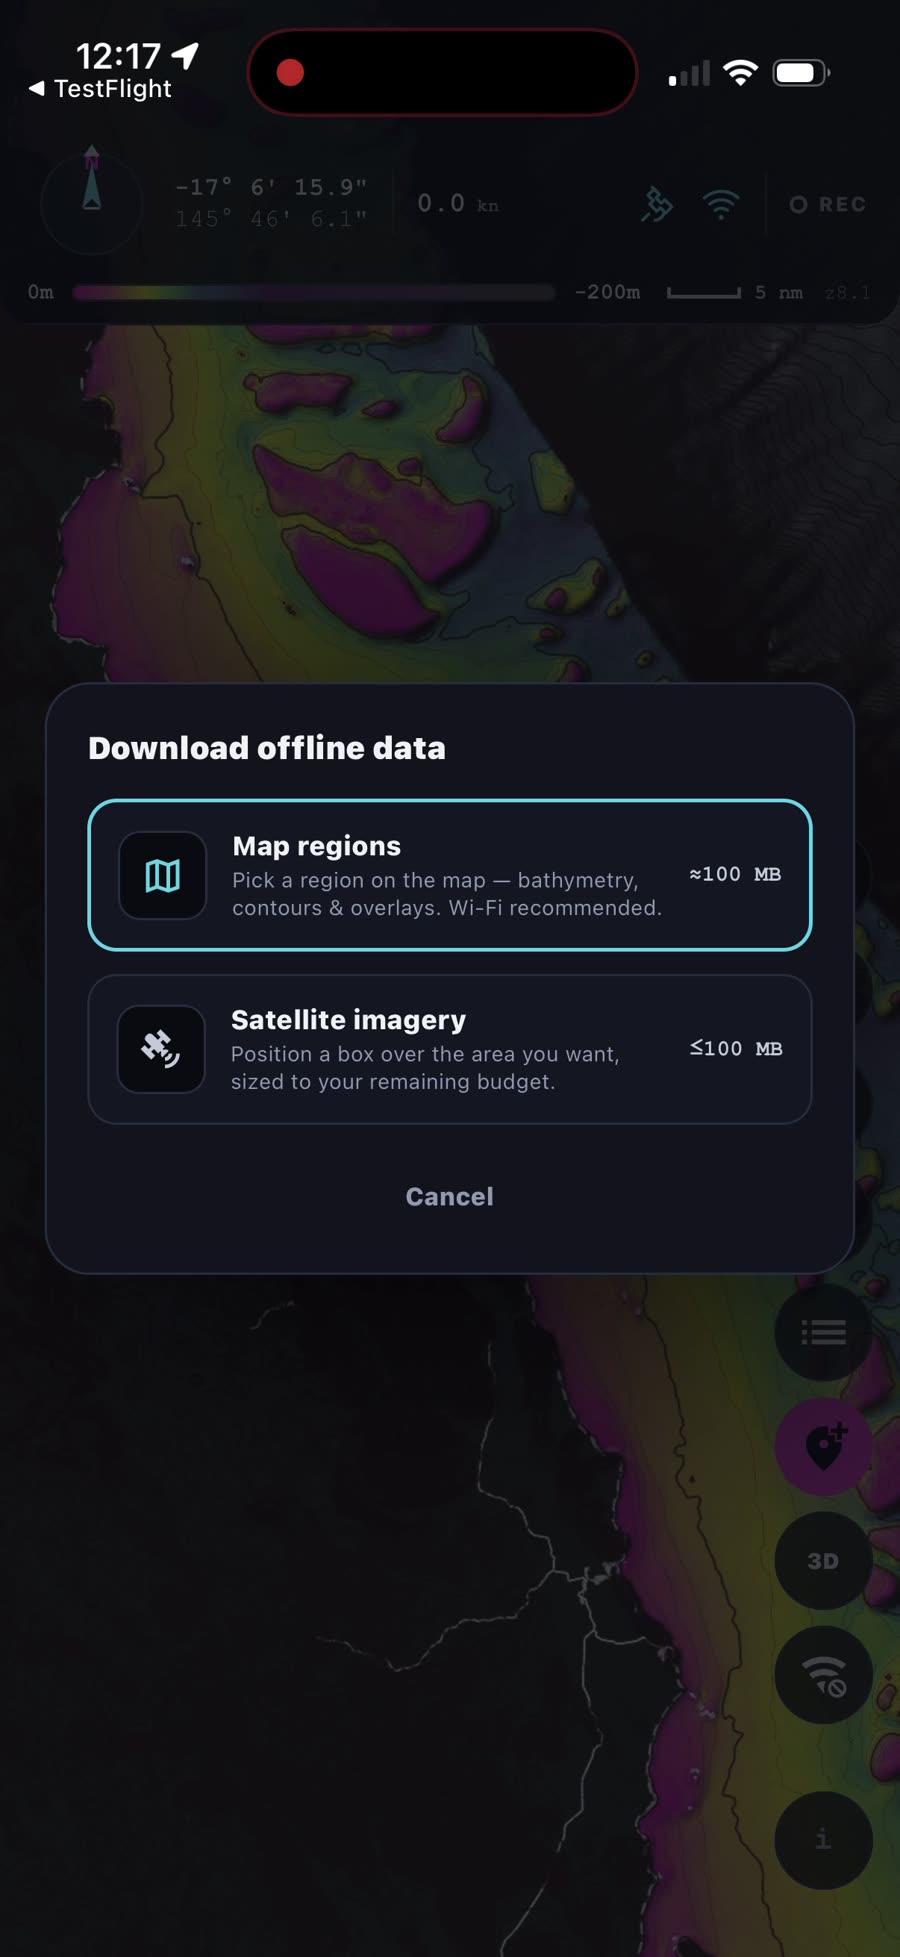
This is the Companion App's party trick. Tap the download button (top of the right-hand toolbar) and choose what to save:
Map regions — bathymetry, contours & overlays for a region you pick on the map. Satellite imagery — position a box over the area you want, sized to your remaining budget. For your first download, go with Map regions — we'll come back for satellite imagery in step 7.
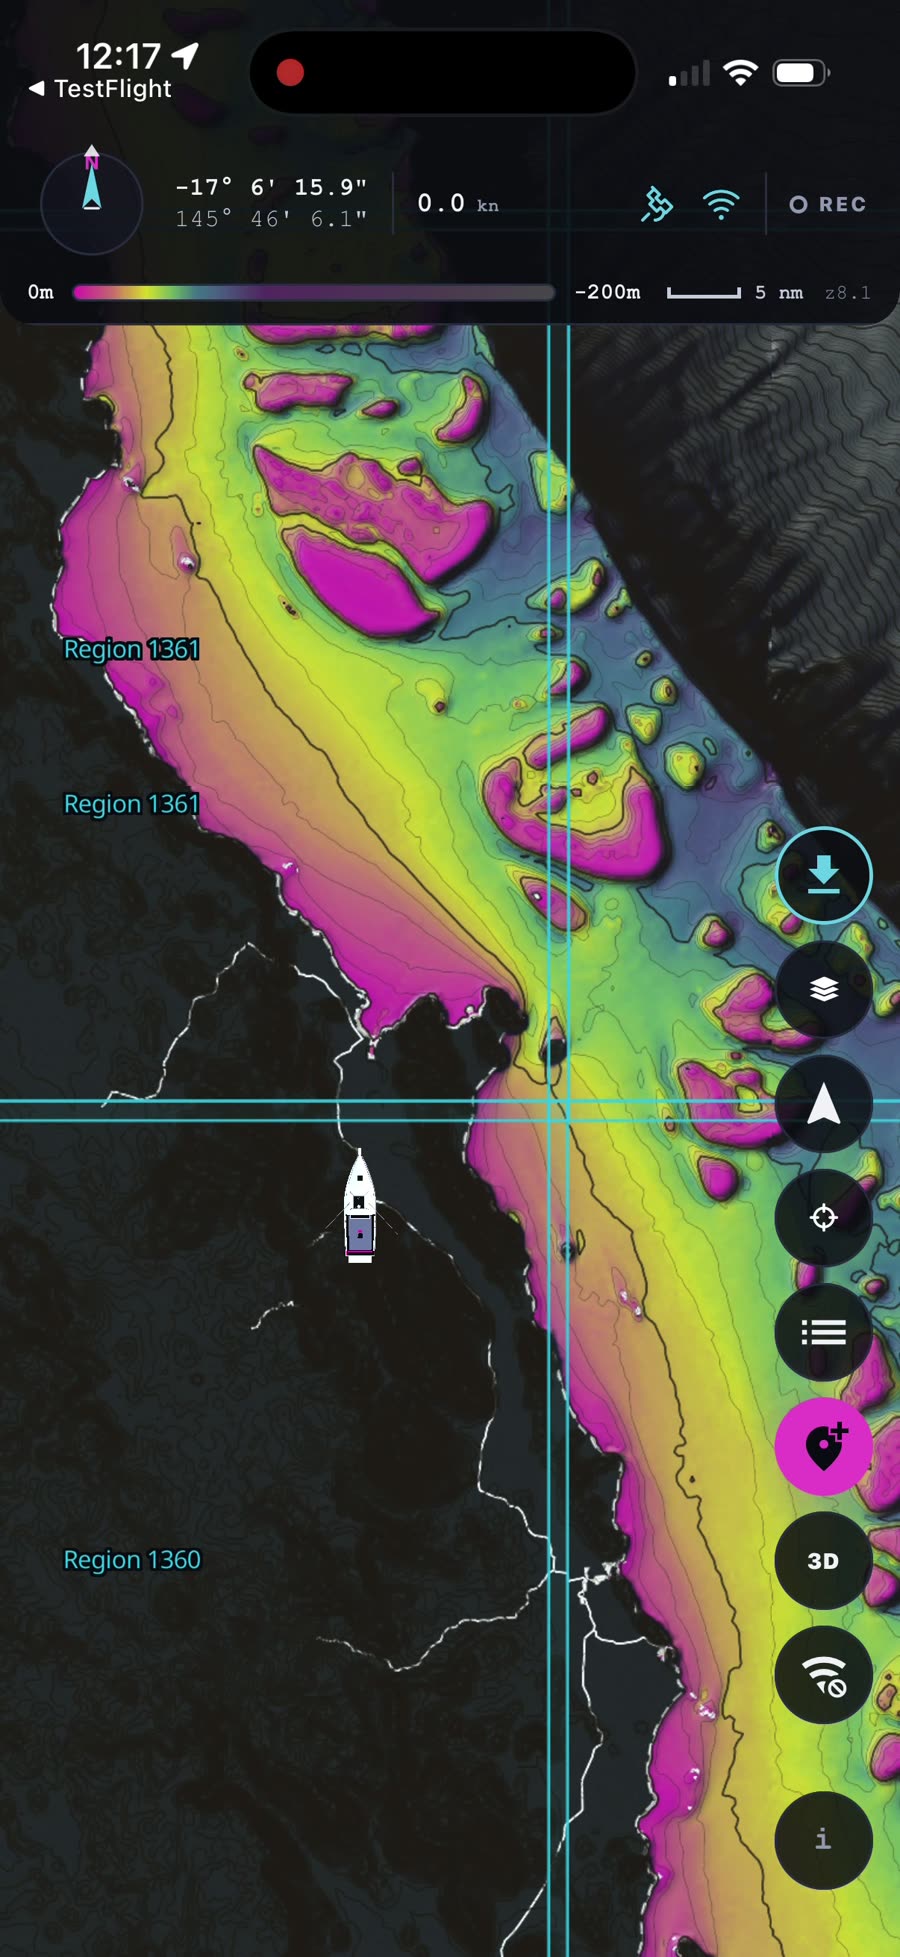
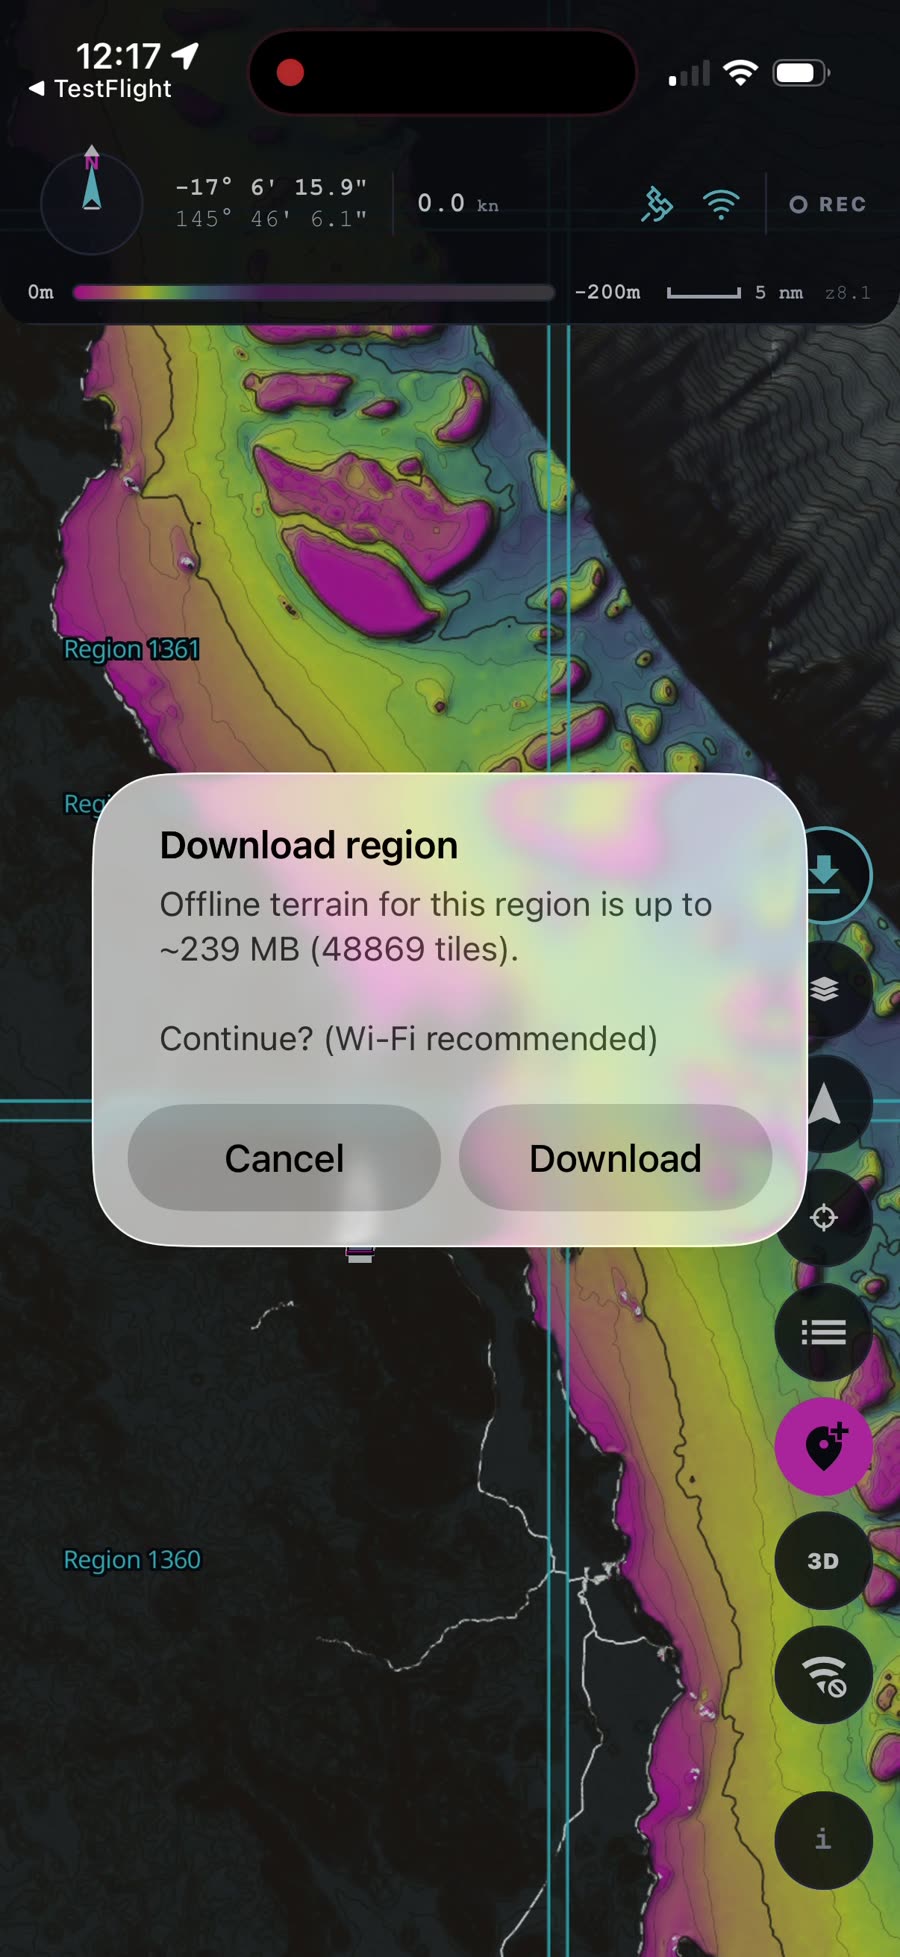
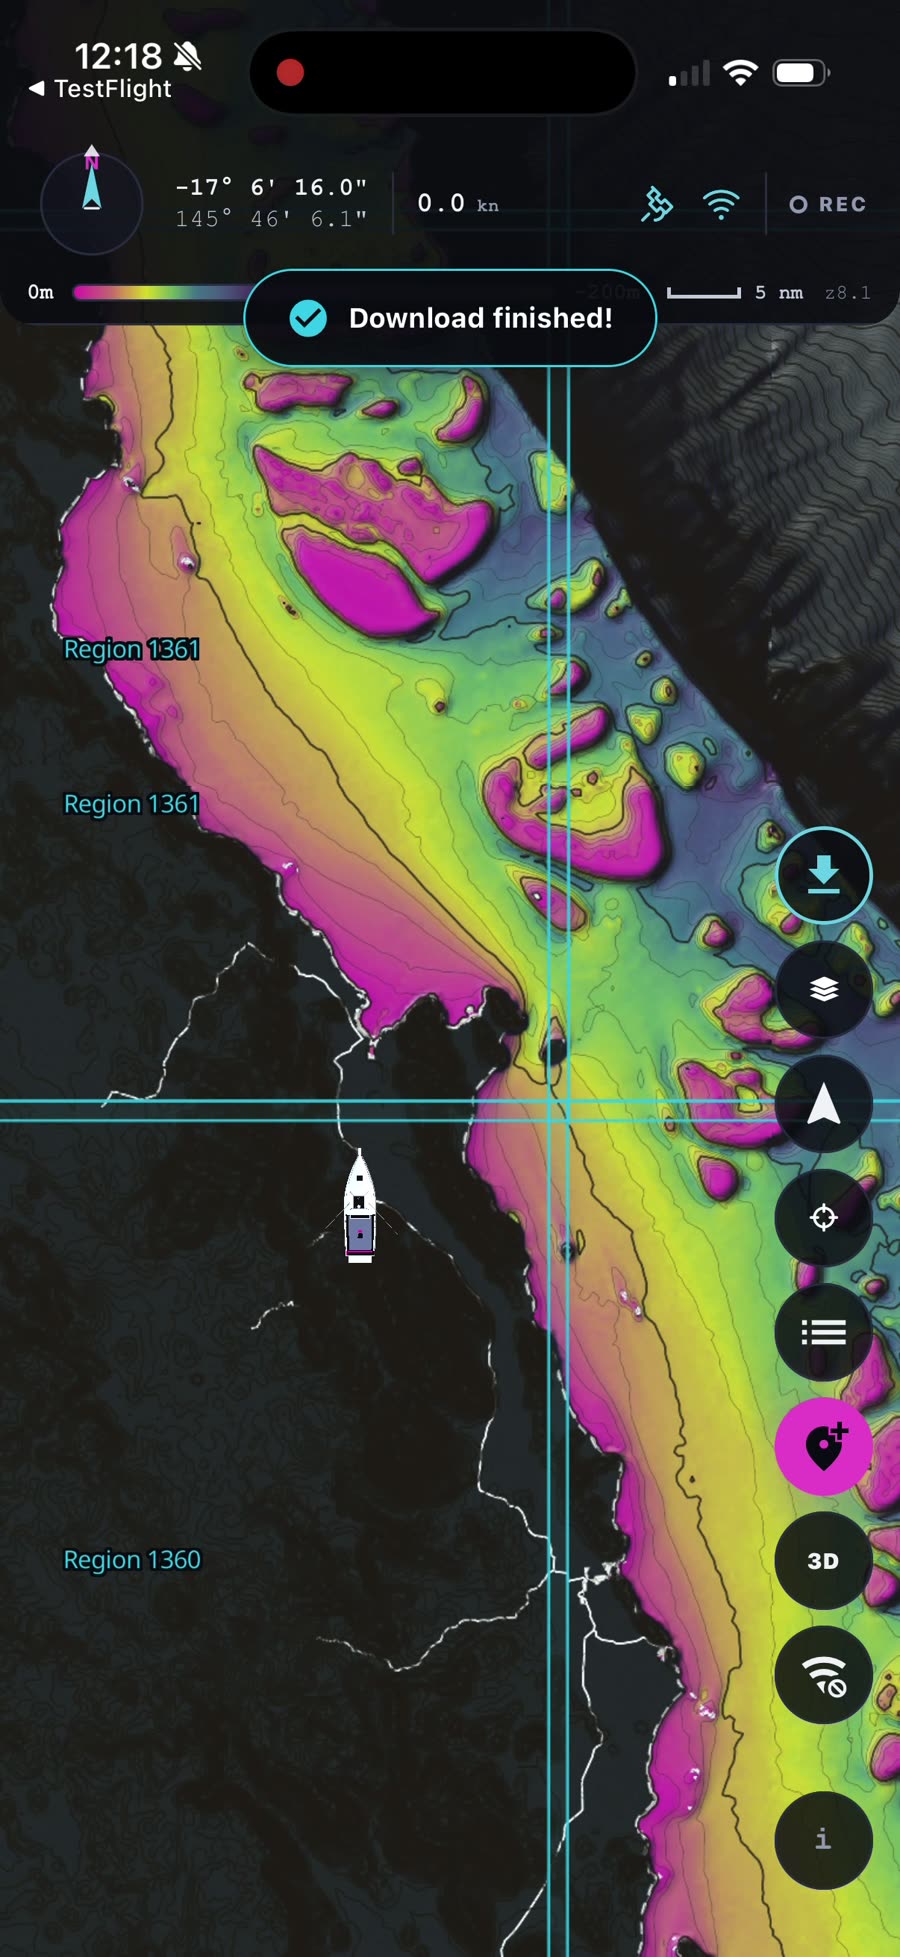
A grid appears over the chart. Pan to the water you fish, tap the region you want, and the app tells you exactly what you're in for — here about 239 MB of offline terrain. Tap Download and watch the progress bar do its thing until the Download finished! tick pops up.
Check what's on your phone
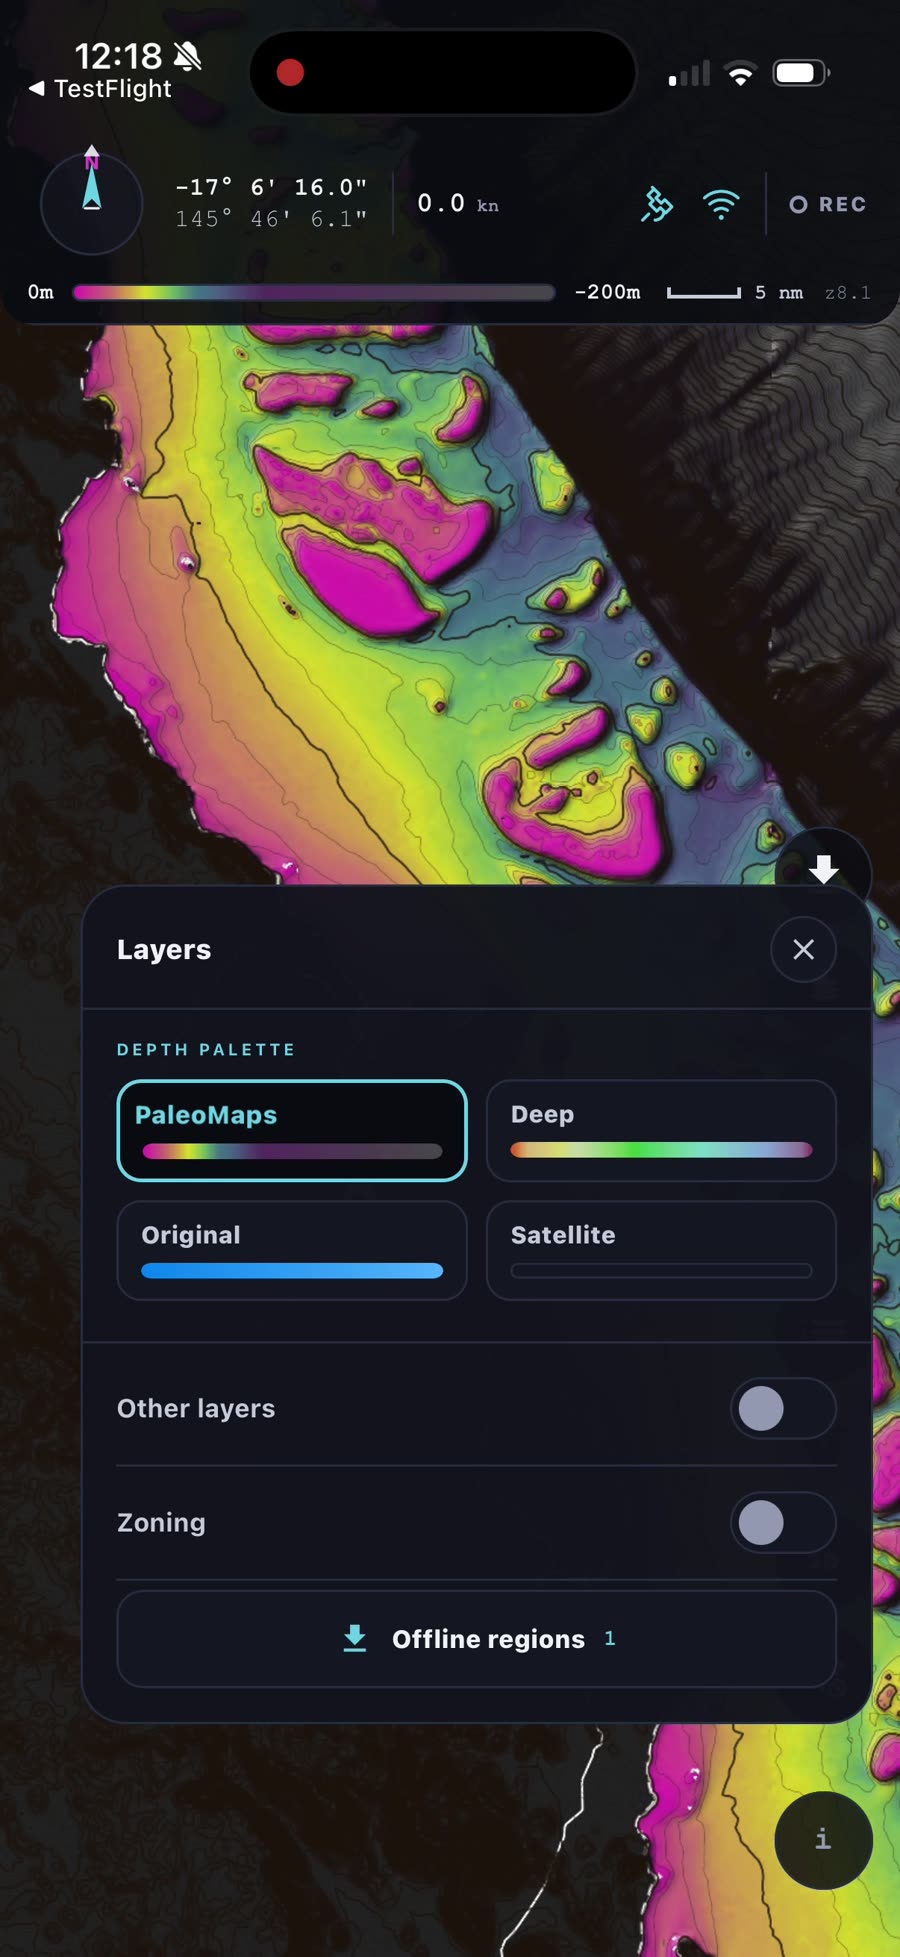
Open the Layers panel from the toolbar. Alongside the depth palettes (PaleoMaps, Deep, Original, Satellite) you'll find the Offline regions button with a count of what you've saved.
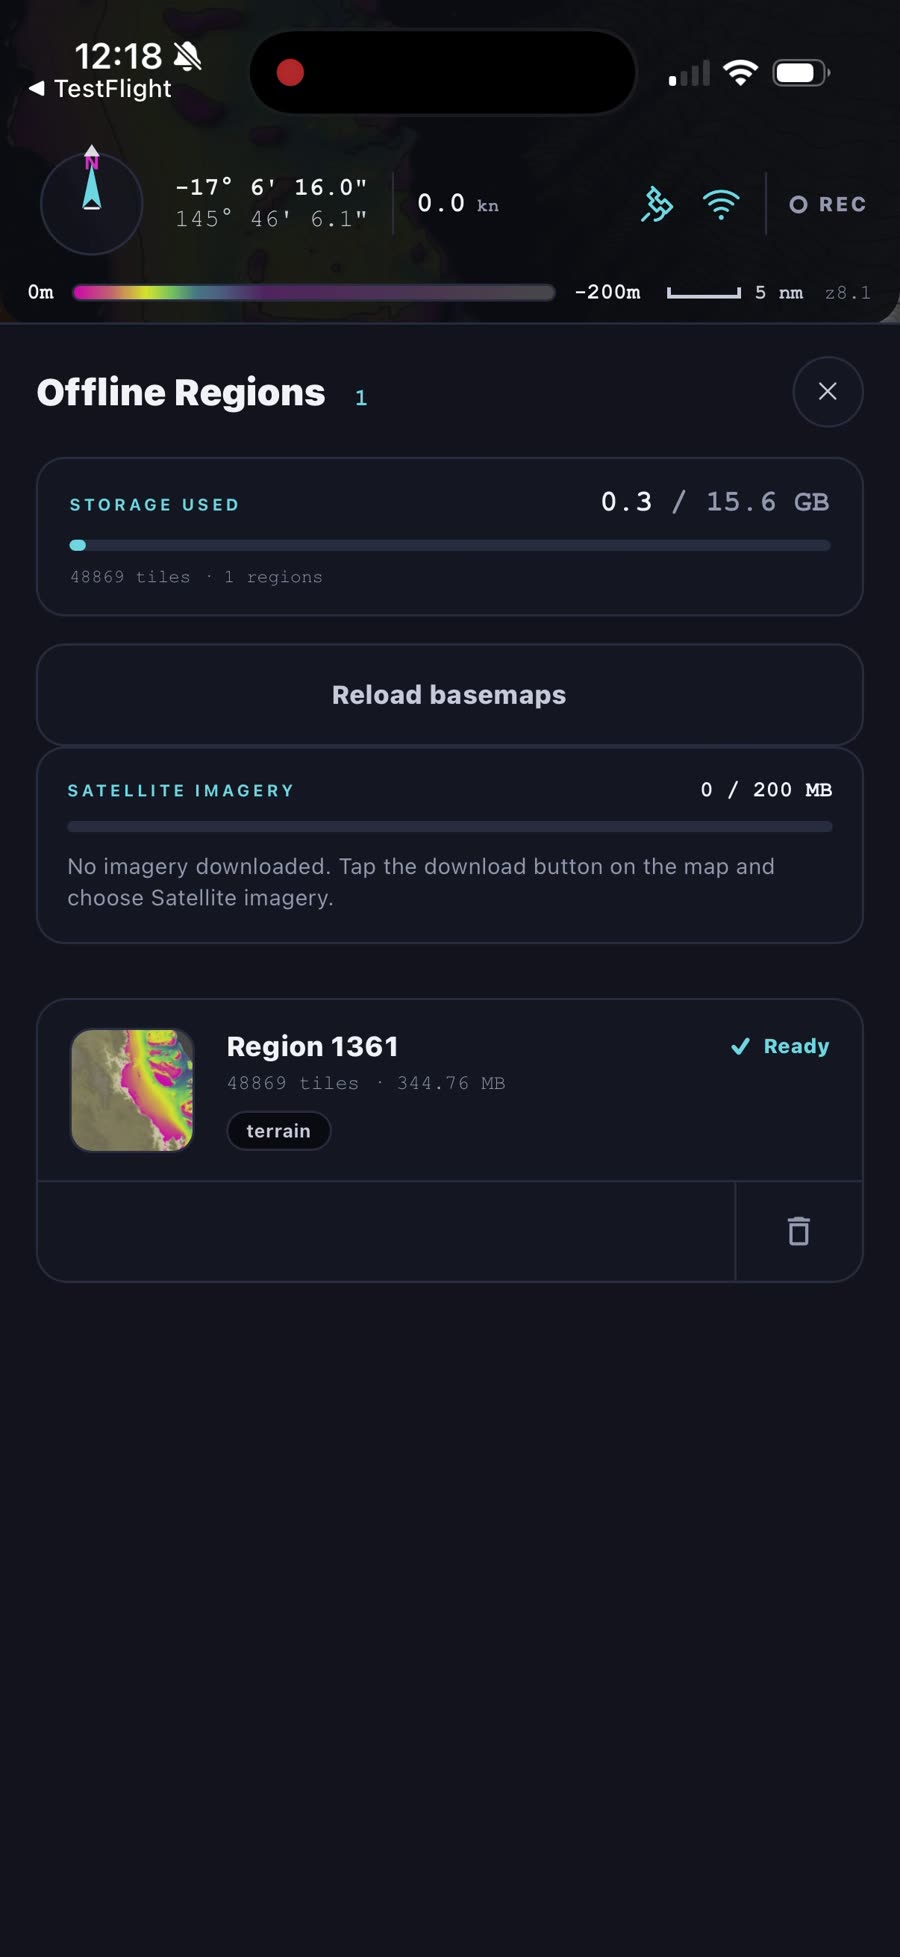
Inside, Offline Regions shows your storage used, your satellite imagery budget, and every saved region with a ✓ Ready badge, its tile count and size. The bin icon removes a region if you need the space back, and Reload basemaps refreshes the base charts.
Add satellite imagery for your spots
Bathymetry tells you what's under the water — satellite imagery shows you what's on top: reef edges, sand patches, channels and bommies you can line up by eye. Tap the download button again and this time choose Satellite imagery.
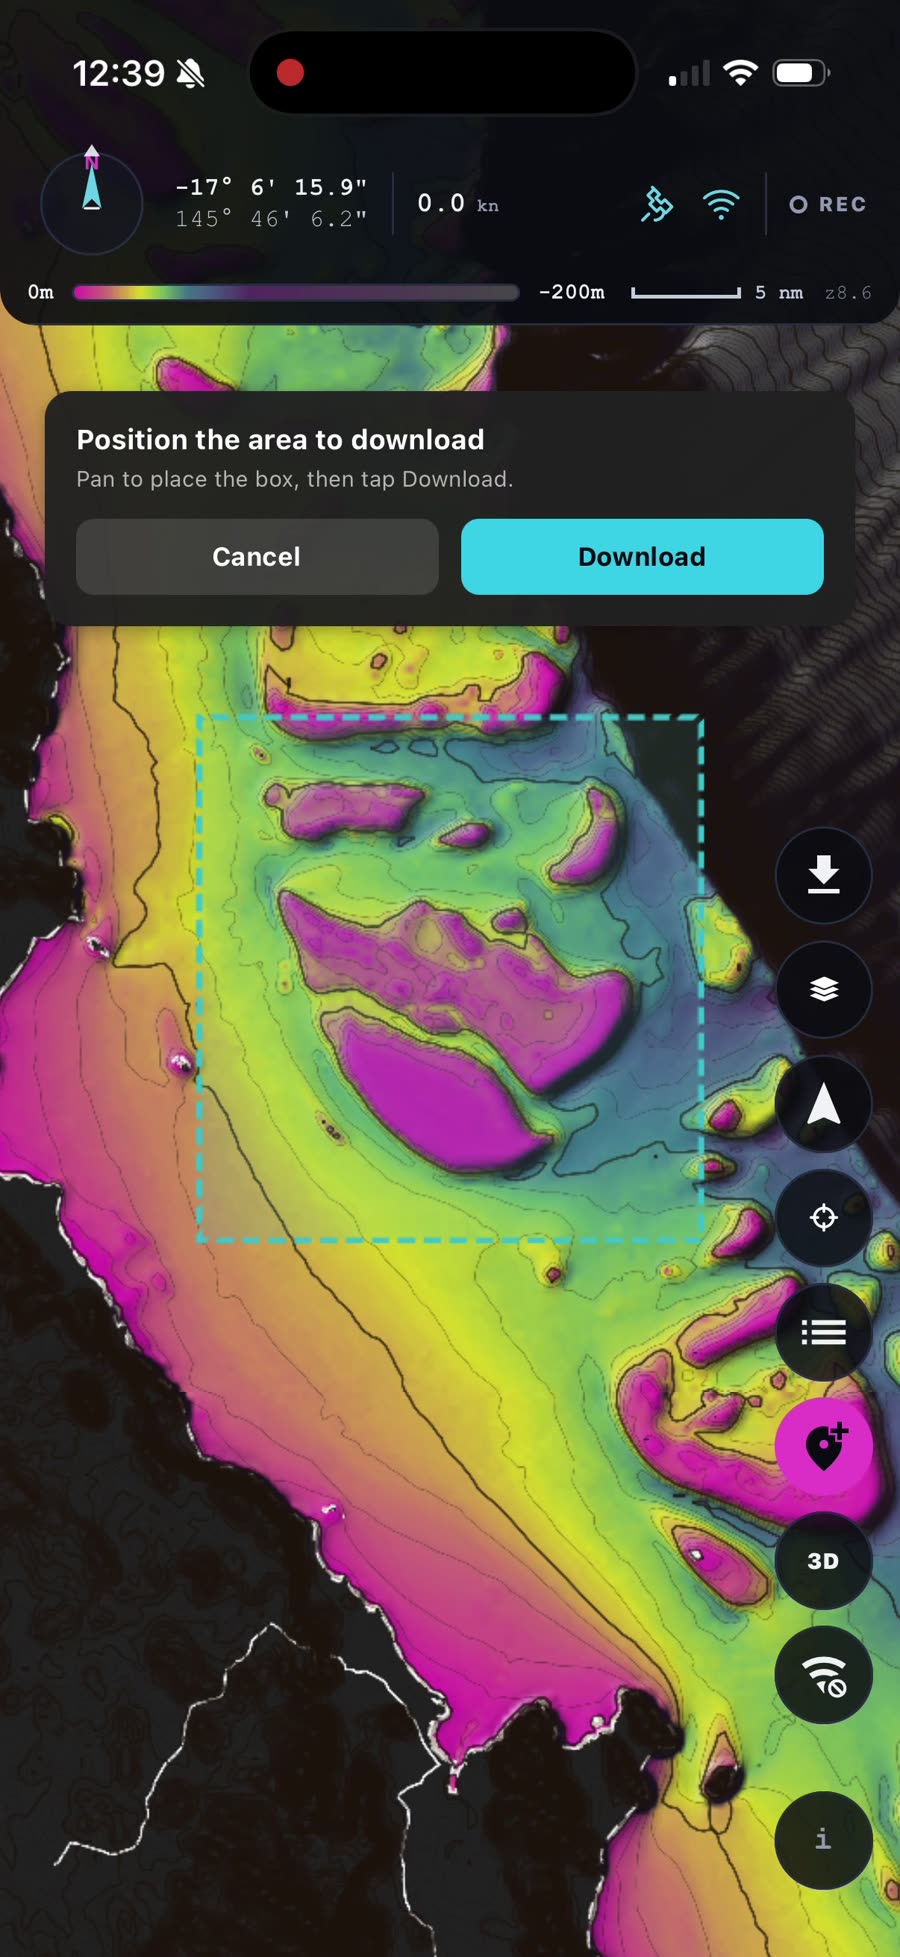
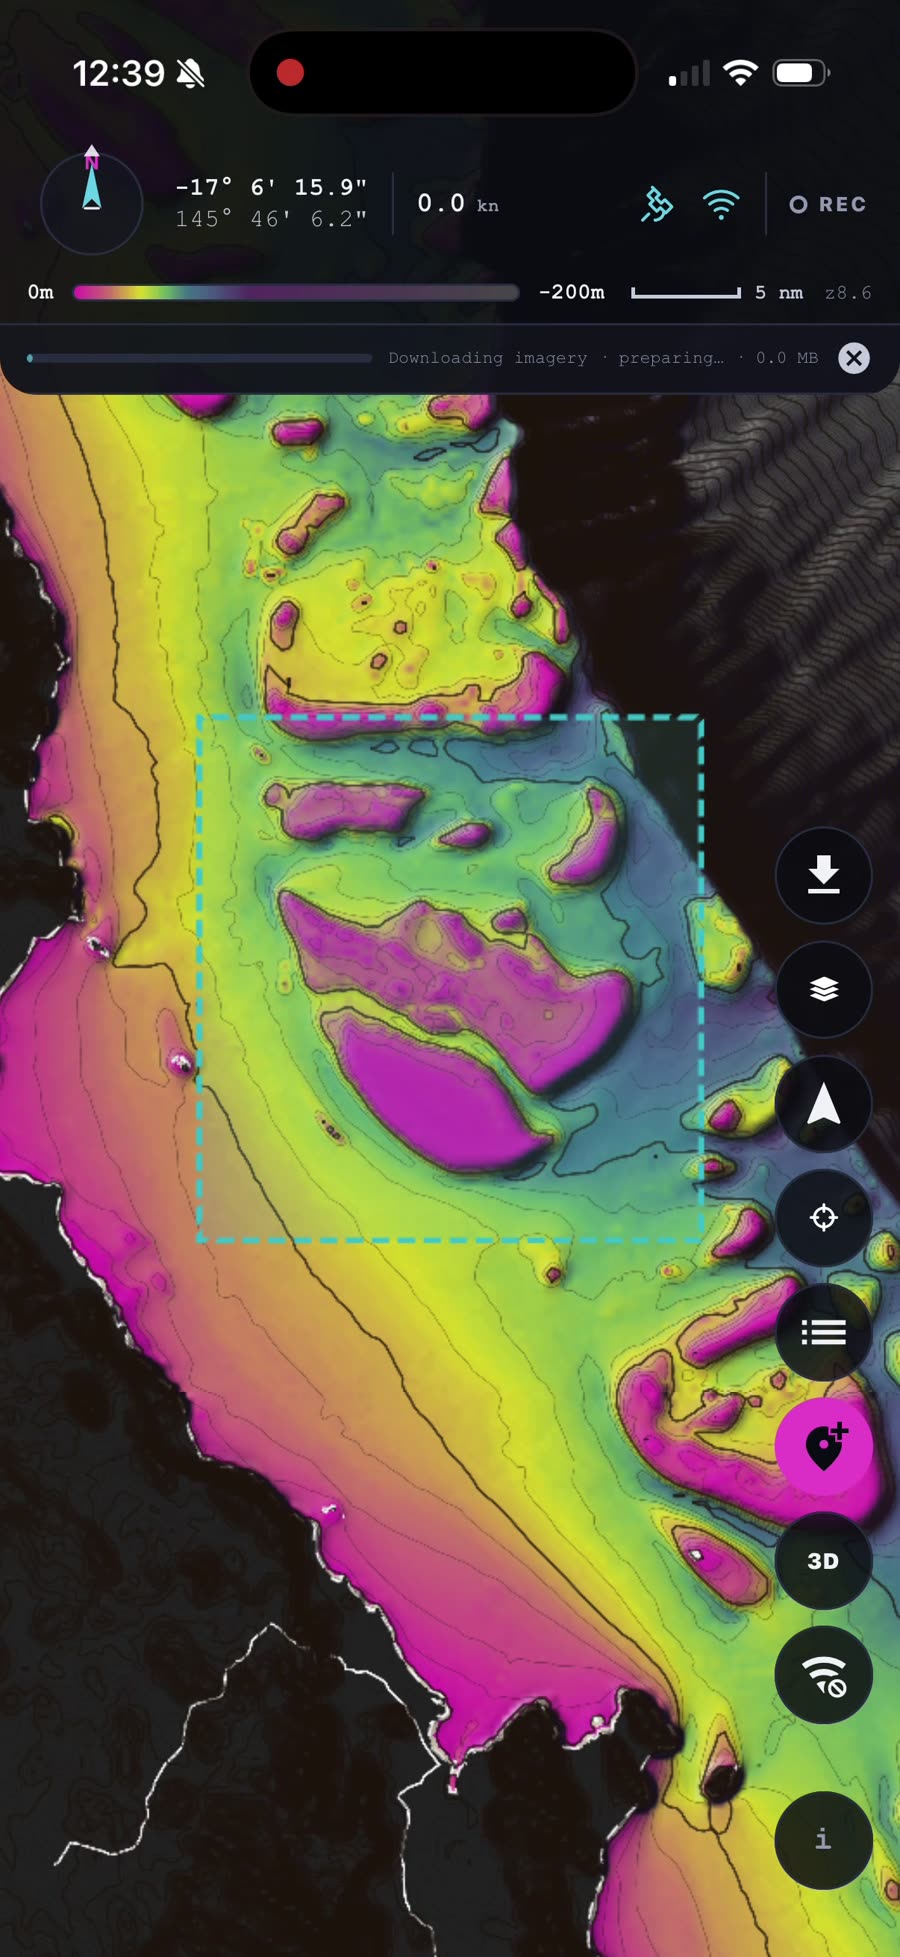
A dashed box appears over the map with the prompt “Position the area to download”. Pan and zoom until the box sits over your spots — the box is sized to your remaining imagery budget — then tap Download. The app confirms the details first: here about 89 MB of high-resolution imagery (zoom 8–16) for the area. Tap Download for Offline and the progress bar runs along the top while you keep using the map.
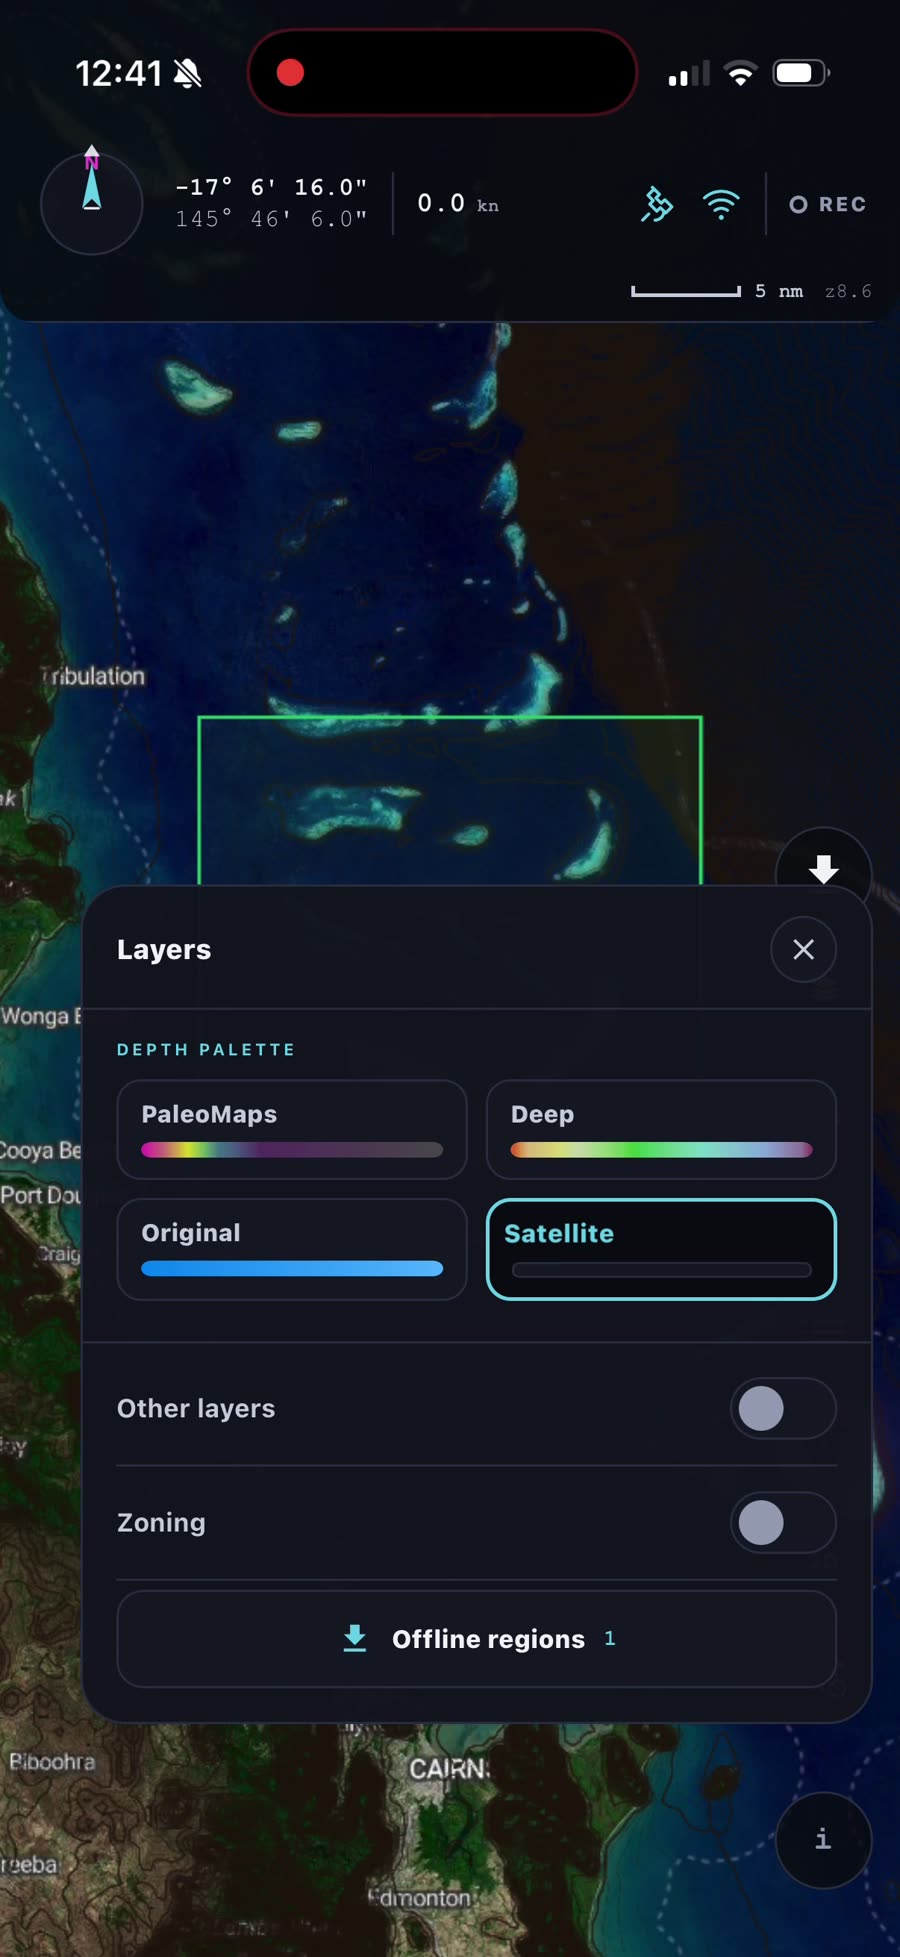
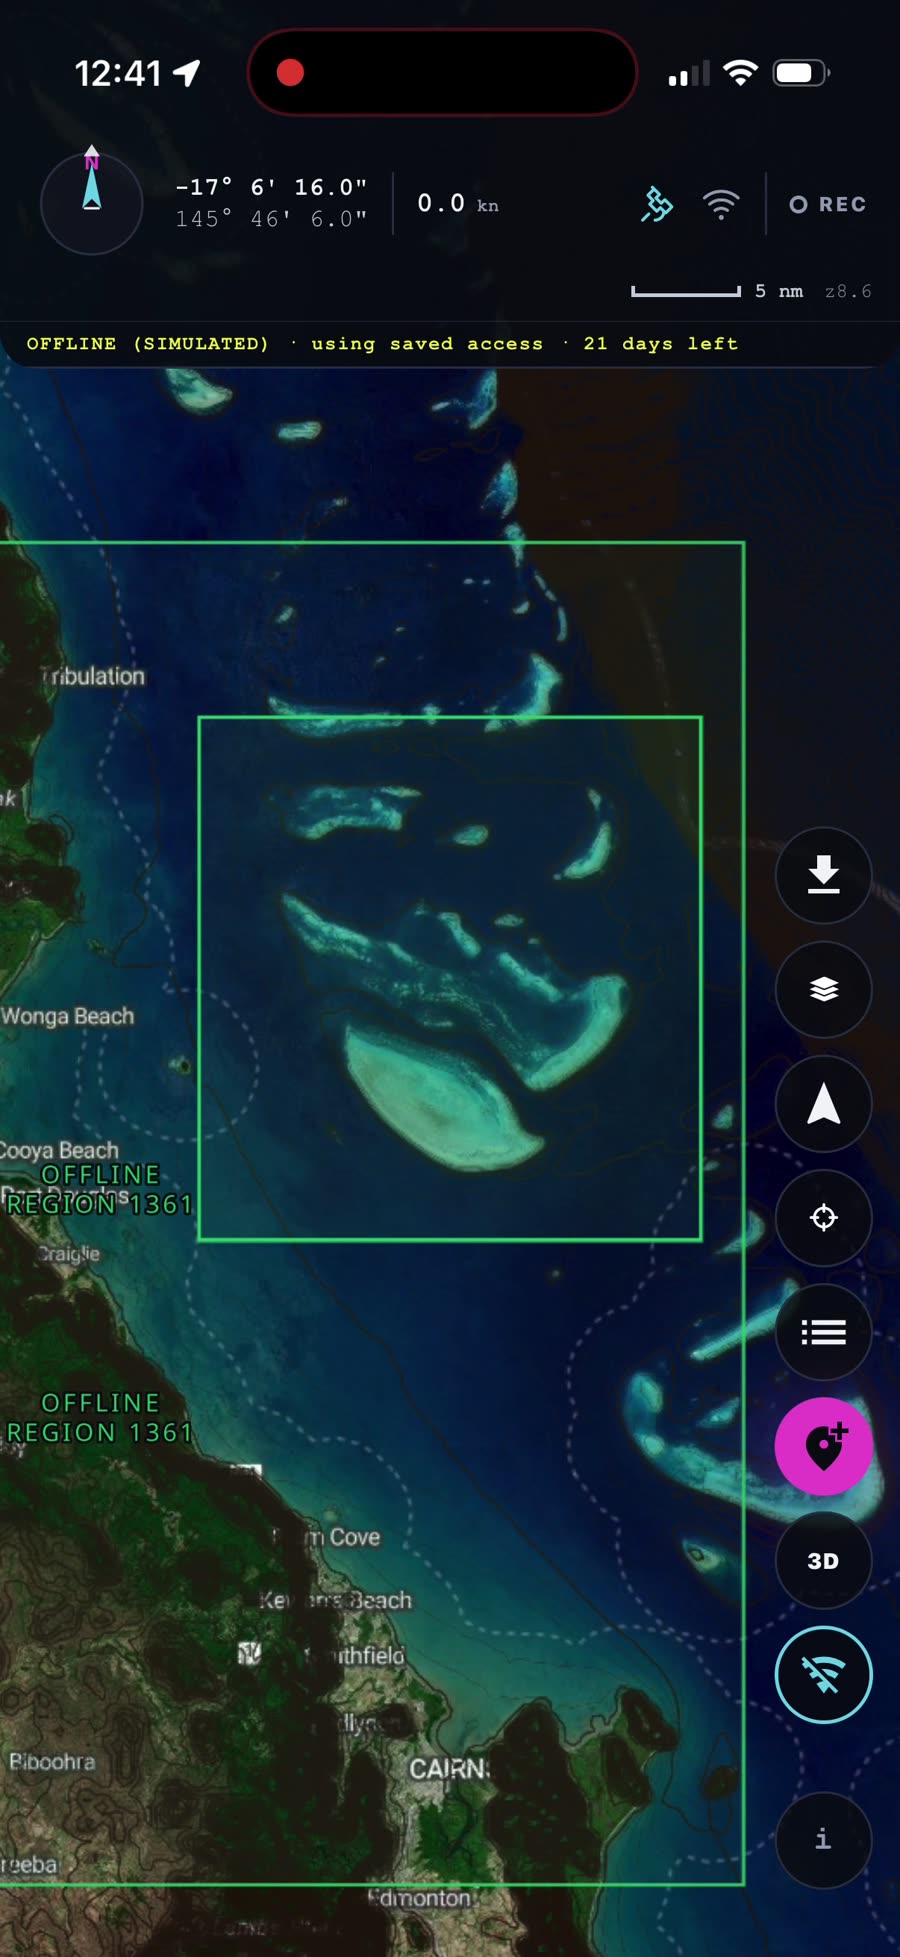
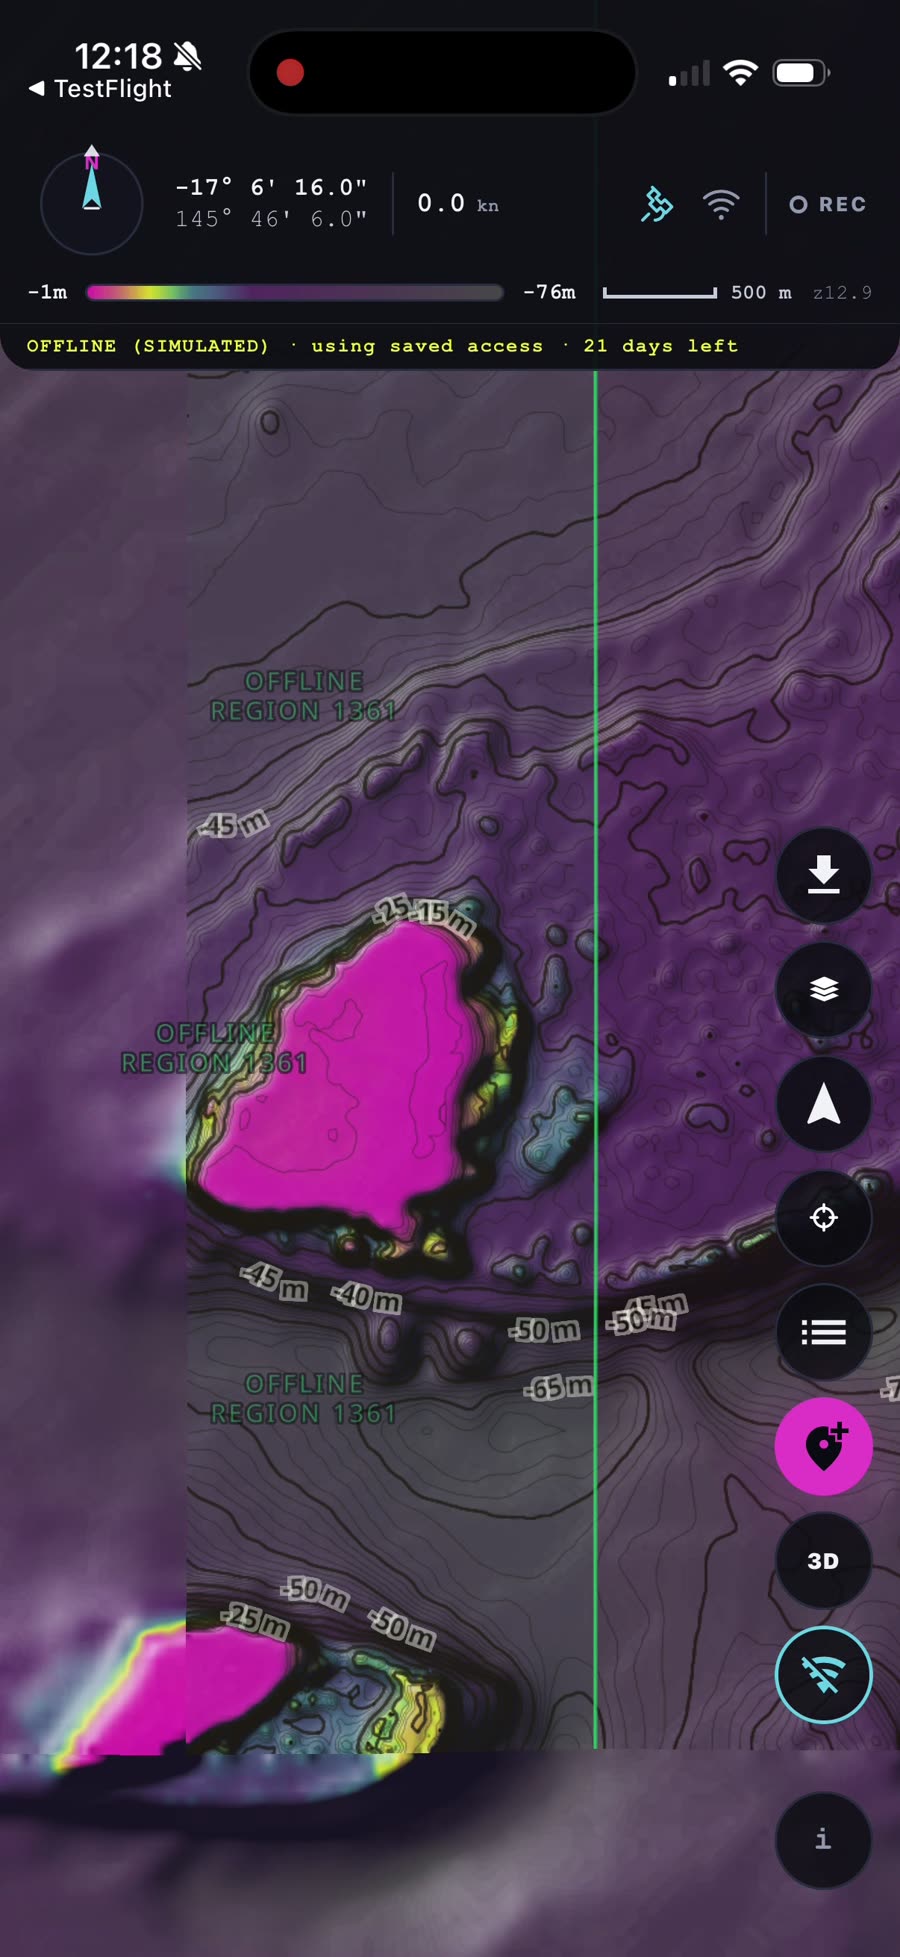
To see what you grabbed, open Layers and switch the depth palette to Satellite. The downloaded imagery area is outlined in green — and just like map regions, it stays with you offline. Flick the offline simulation on and zoom in: full-res reef imagery, no signal required.
Prove it works offline
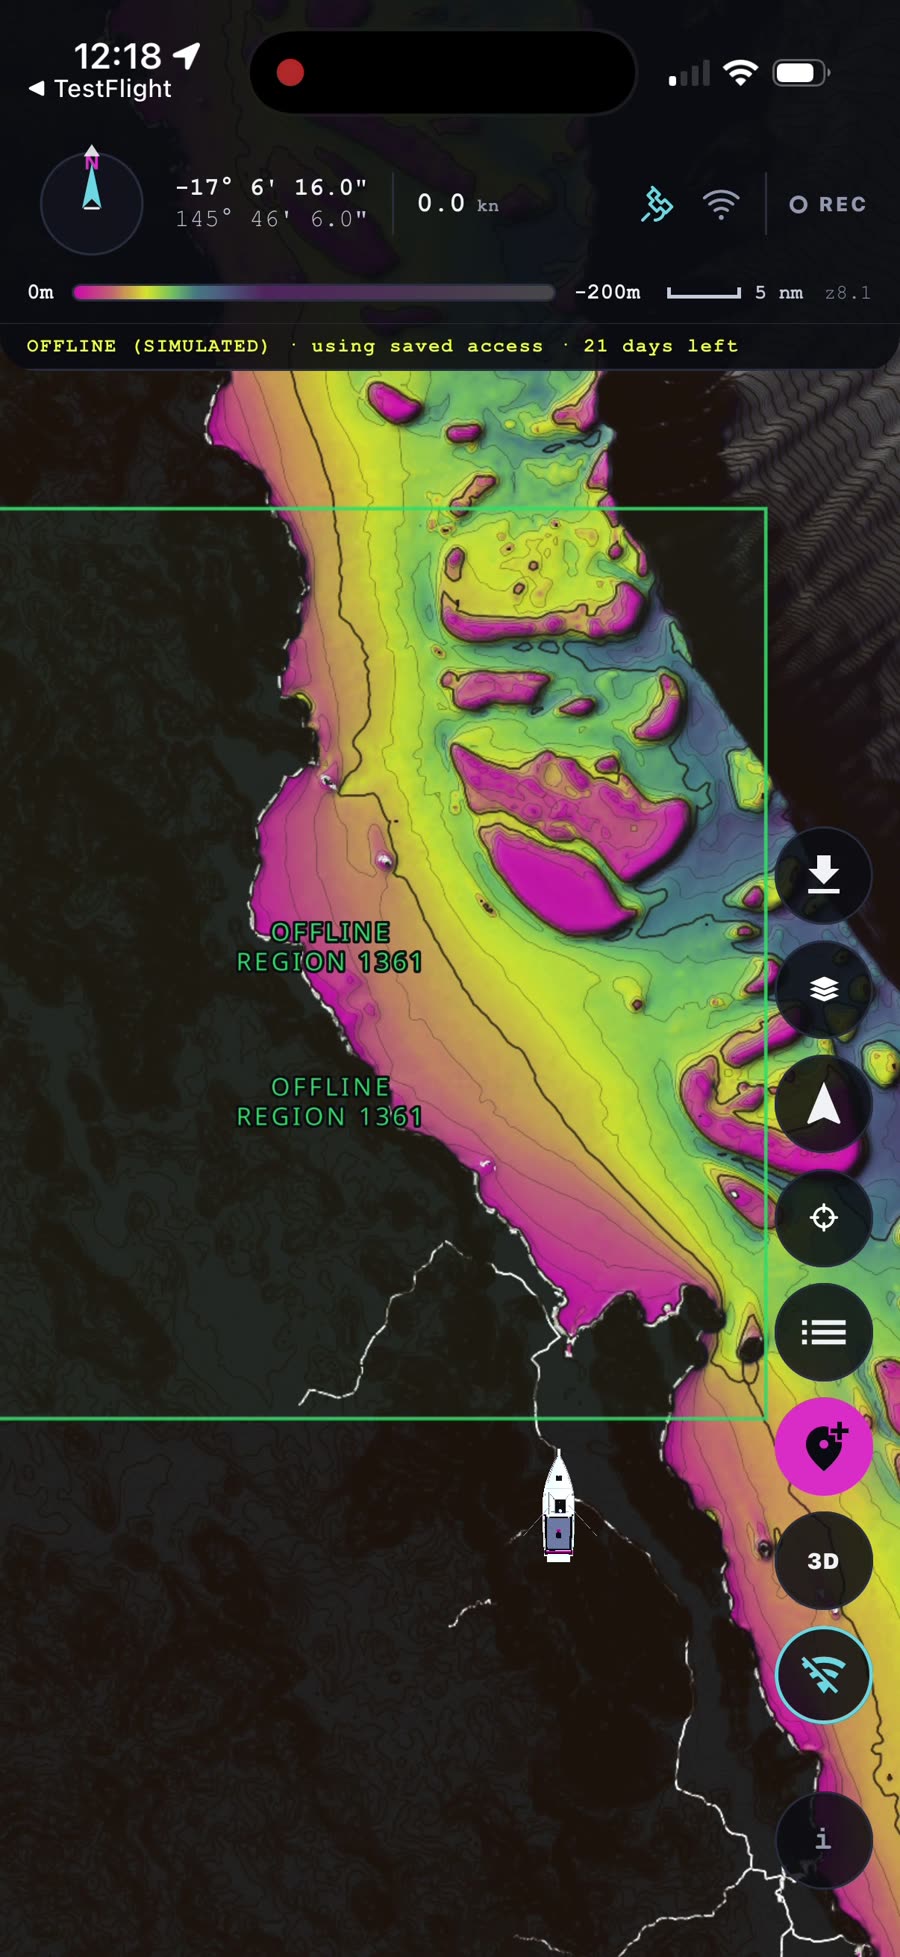
Don't wait until you're 40 km out to find out. The toolbar has an offline simulation button (the crossed-out Wi-Fi icon) that makes the app behave exactly as it will with no signal.
Tap it and a banner confirms OFFLINE (SIMULATED) · using saved access, and your downloaded region is outlined in green. Pan and zoom inside it — every contour, every colour, full detail, no internet. Tap the button again to go back online.
🛟 Before every trip
- Download on home Wi-Fi — regions run to a few hundred MB, so grab them the night before, not at the ramp.
- Mind the saved-access window — offline access is kept for a stretch (the banner shows the days left). Opening the app with signal every so often tops it back up.
- Run the offline simulation for the region you're heading to — ten seconds of checking beats finding a gap in coverage on the water.
Tilt into 3D
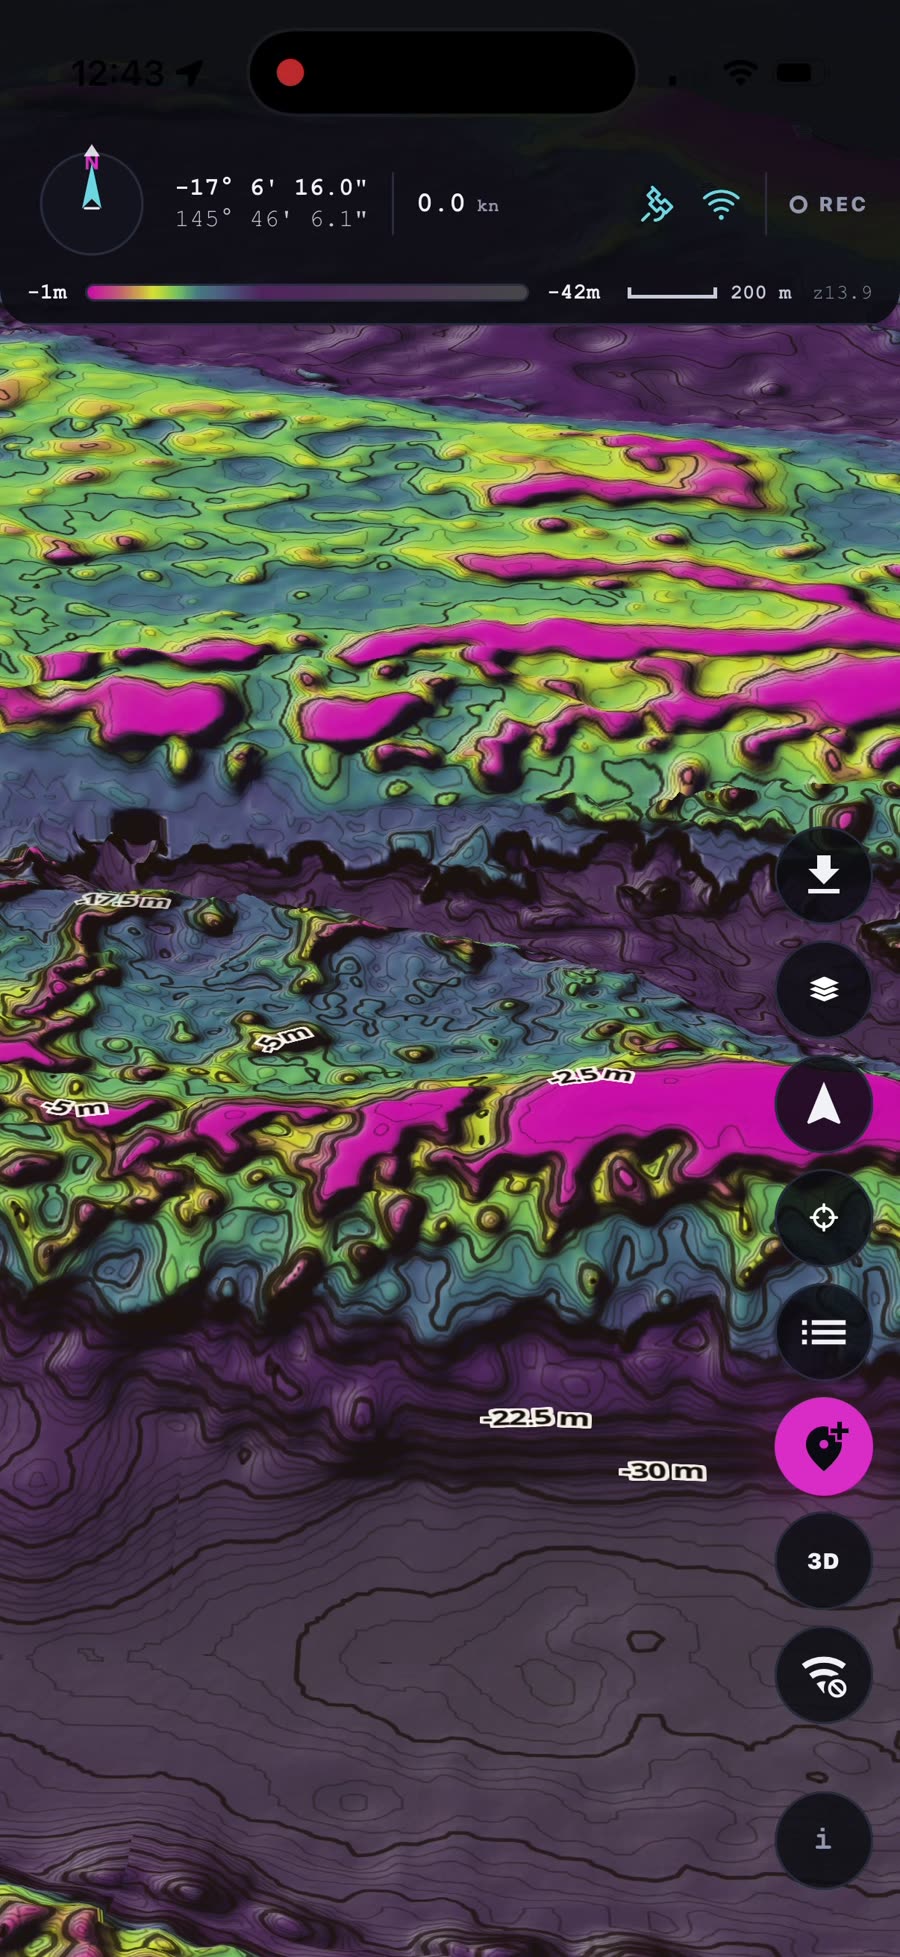
Zoomed in on a mark? Tap the 3D button on the right-hand toolbar and the chart tilts — the seabed rises into living terrain, with the contour lines and depth labels draped right over every ledge, gutter and pinnacle.
Moving around is all gestures: one finger pans, pinch zooms, and a two-finger drag or twist tilts and rotates the view so you can come at a feature from any angle. The compass up top tracks your heading the whole time. How strongly the relief pops is the 3D exaggeration setting you saw back in step 4 — wind it up to make subtle lumps jump out.
Tap the button again to drop back to the flat top-down chart — your position and zoom are kept.
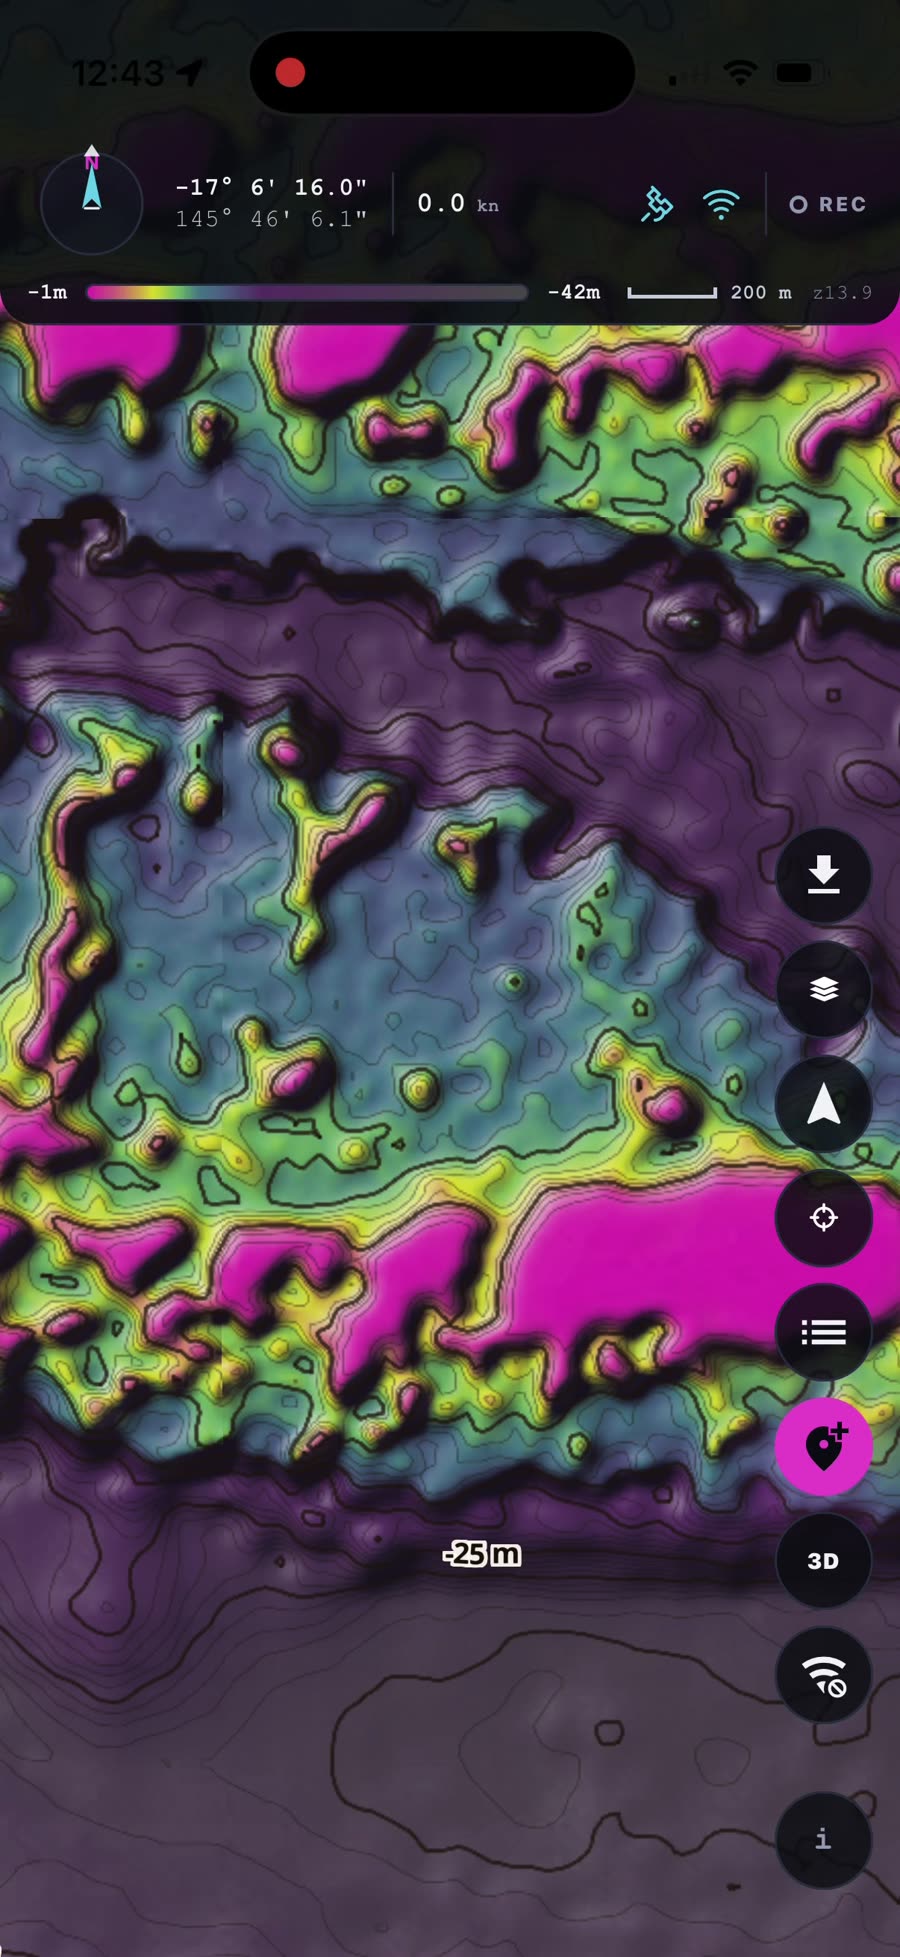
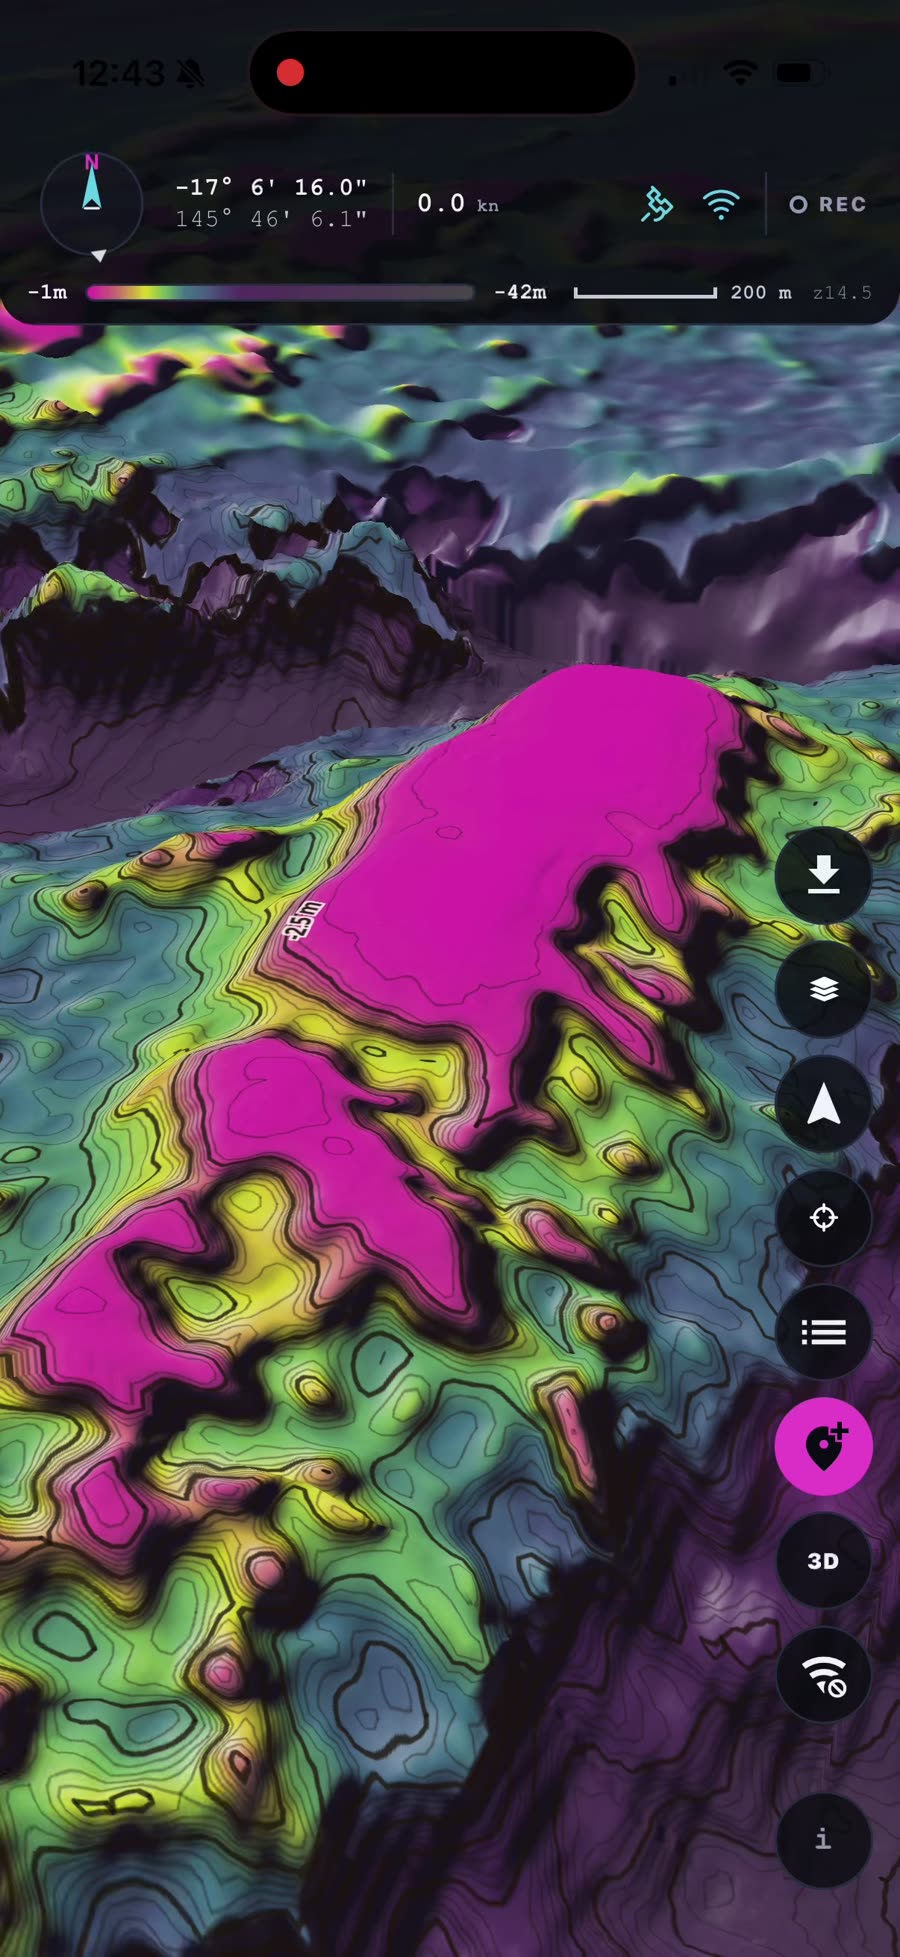
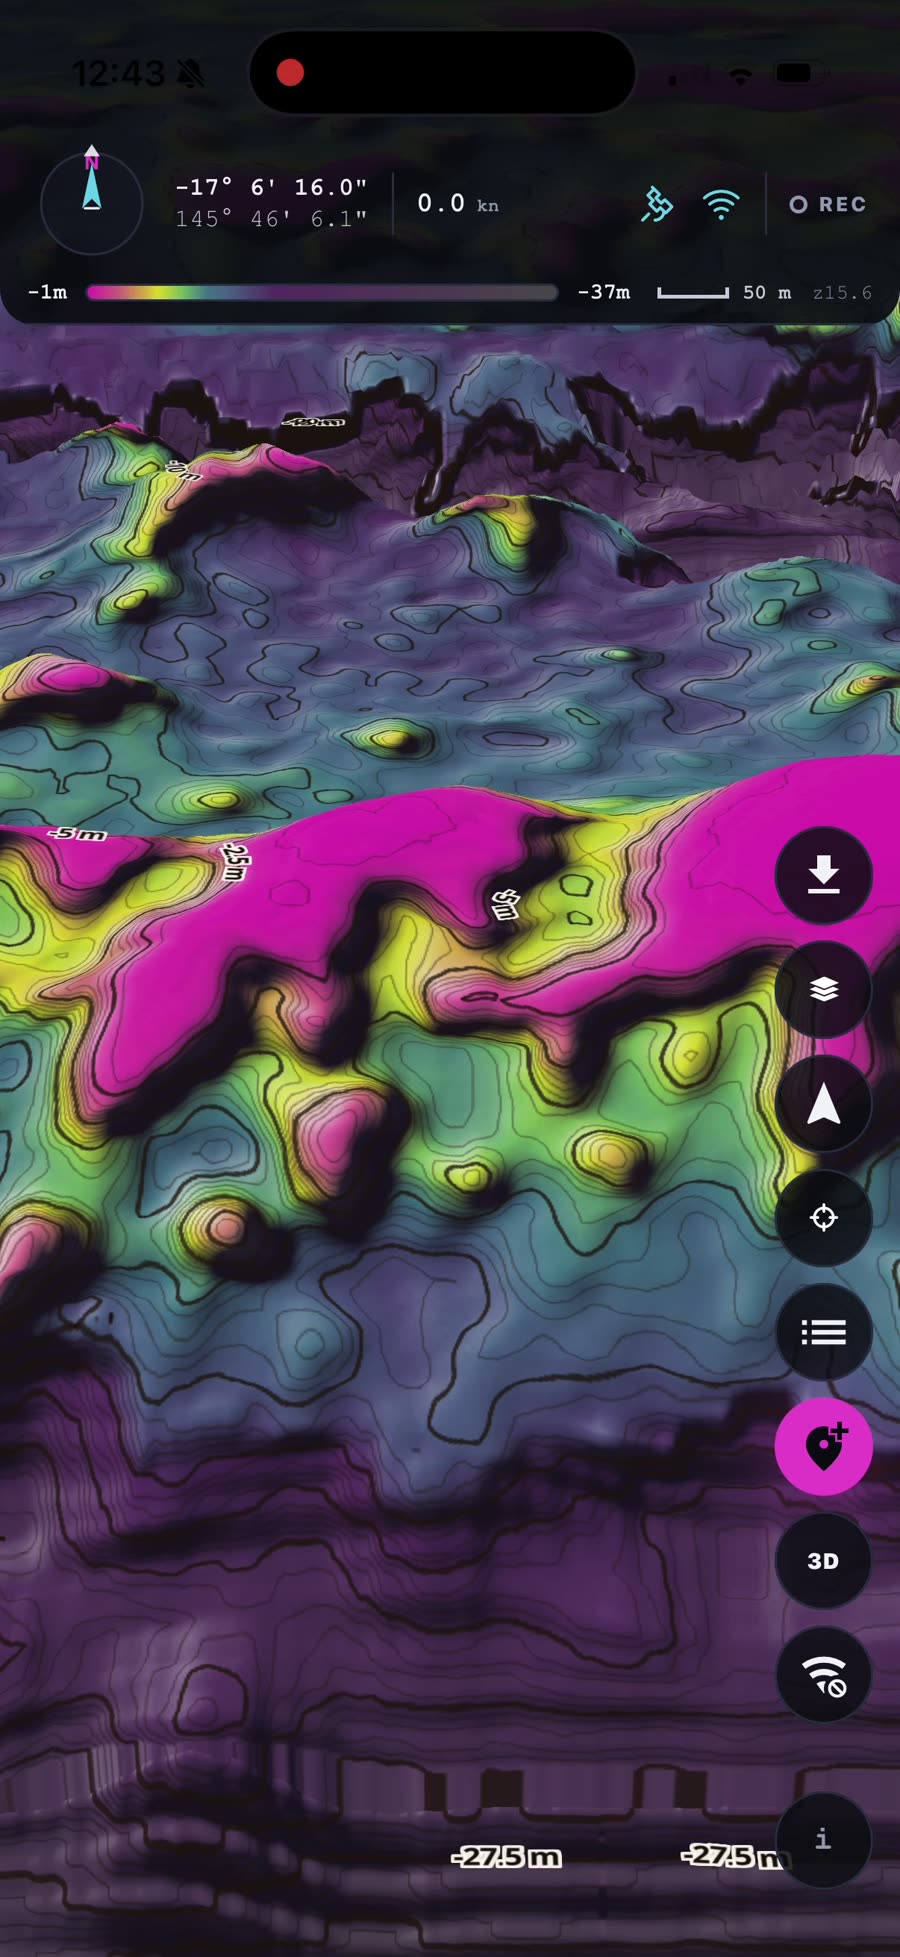
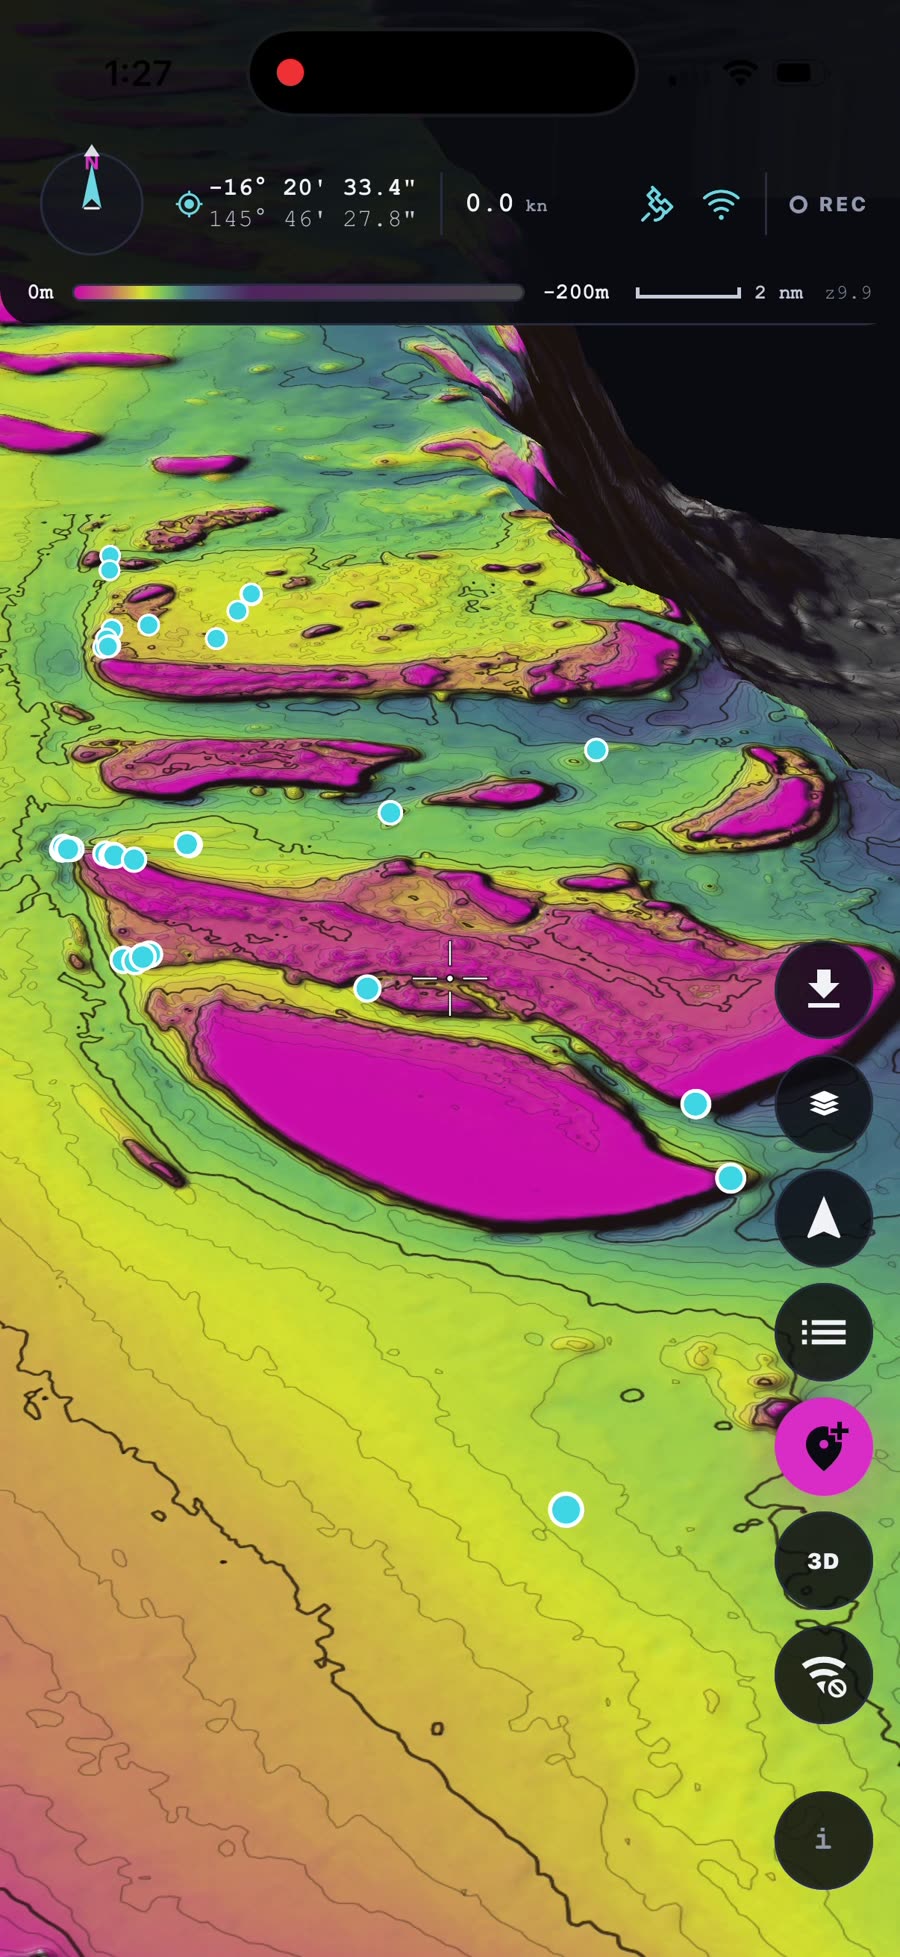
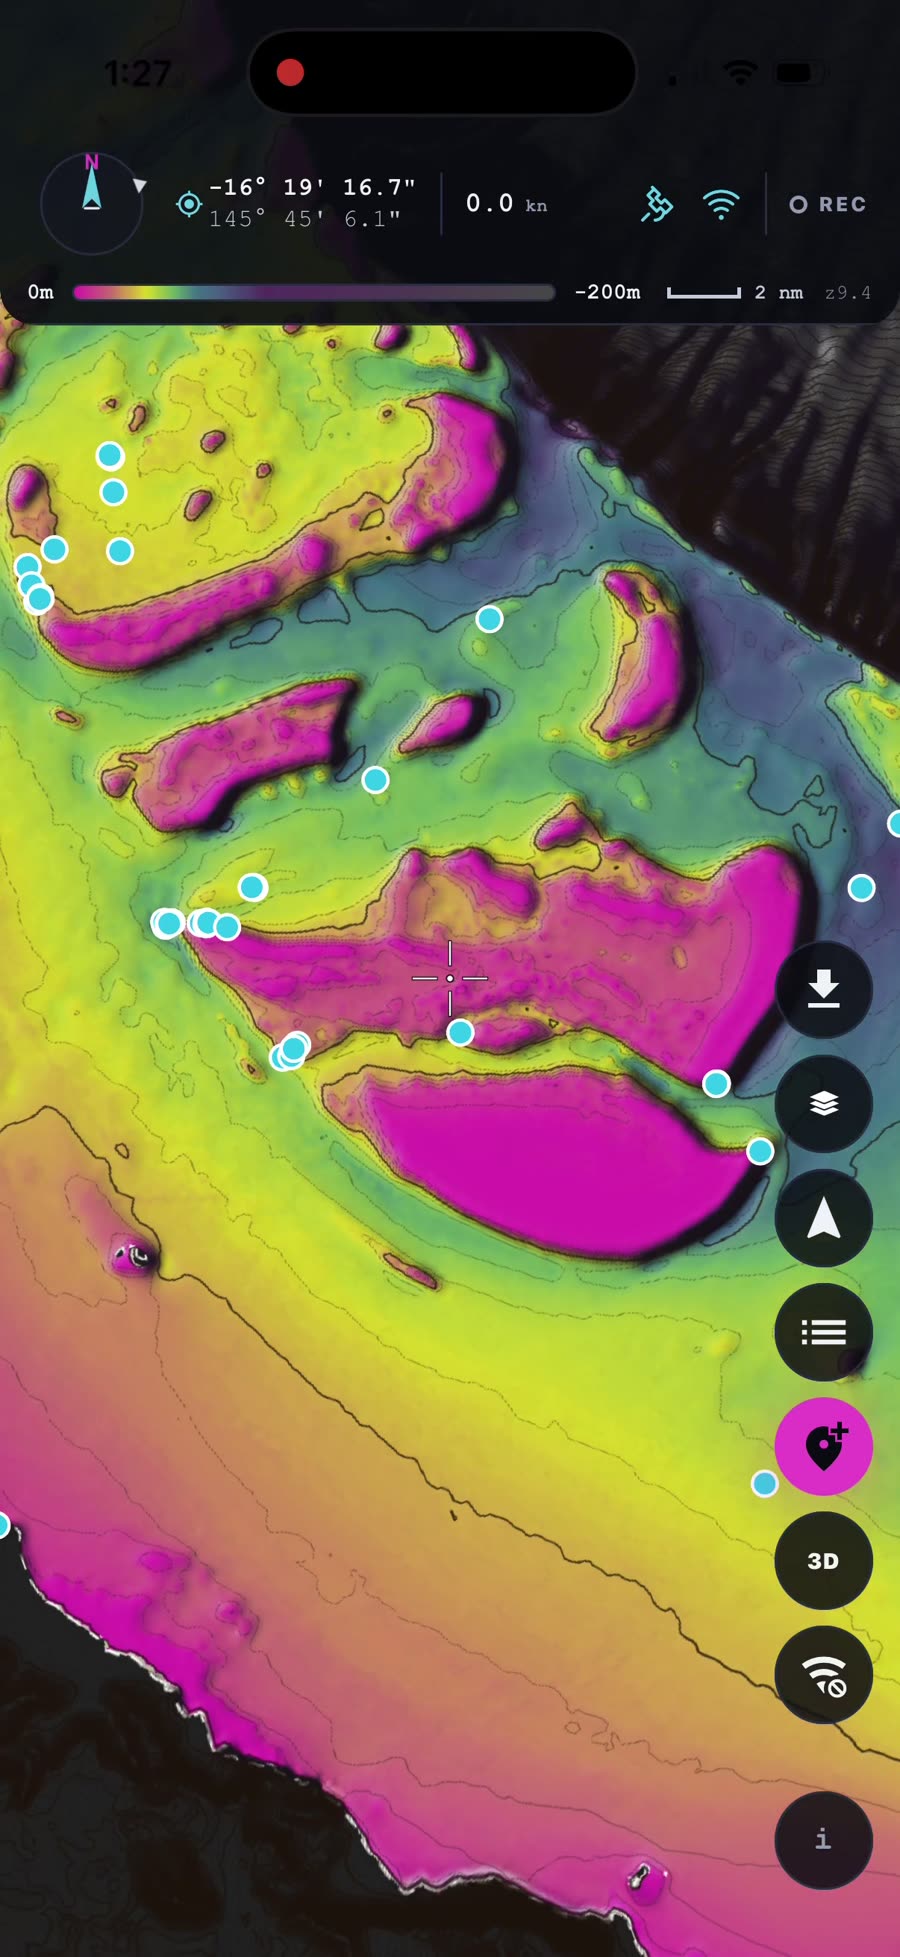
Lost your bearings after all that spinning? The compass in the top-left always shows where north is while you're rotated — and one tap on the north arrow button on the toolbar snaps the whole view back: rotation returns to north-up and the tilt levels out to top-down.
Manage your waypoints
Tap the list button on the right-hand toolbar to open the TRACKS / WAYPOINTS panel. Every waypoint from your BathyMaps account is already there — each showing its distance and bearing from where you are right now, plus its group. Search by name or notes, or flick between Nearest and Recent sorting.
Tap any waypoint for three quick actions: Edit, Zoom to (the map flies straight to the pin) and Copy coords for pasting into a message or your sounder.
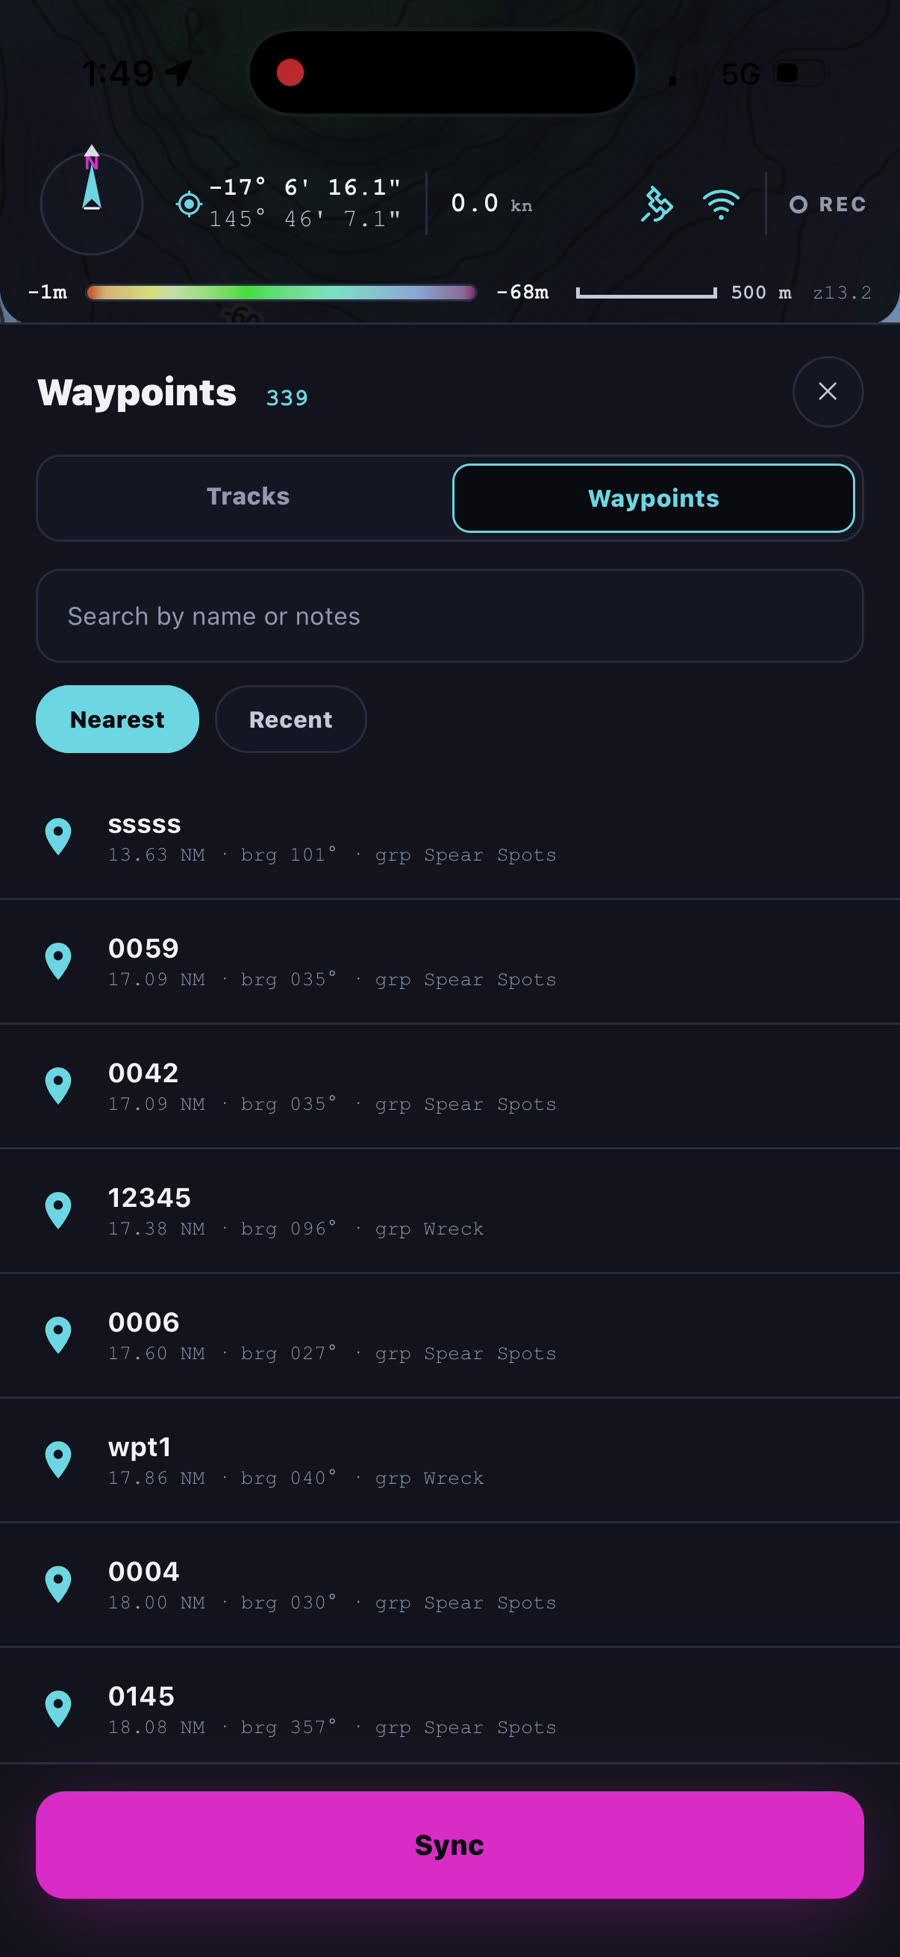
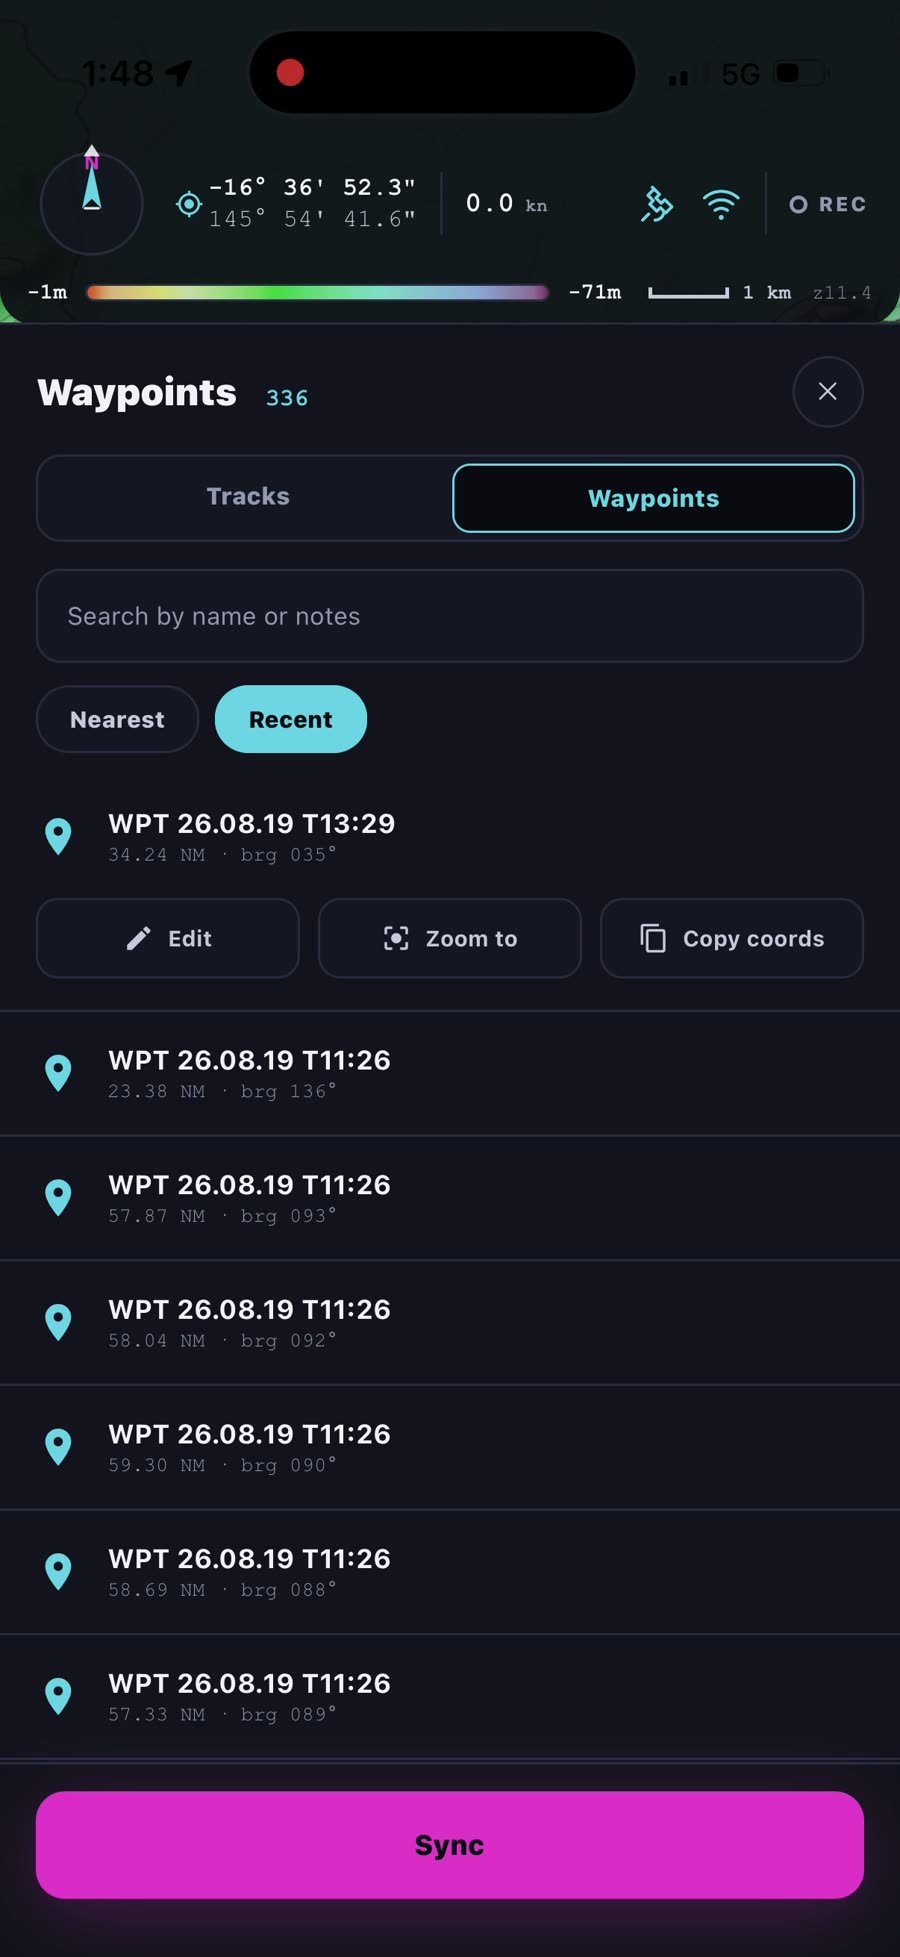
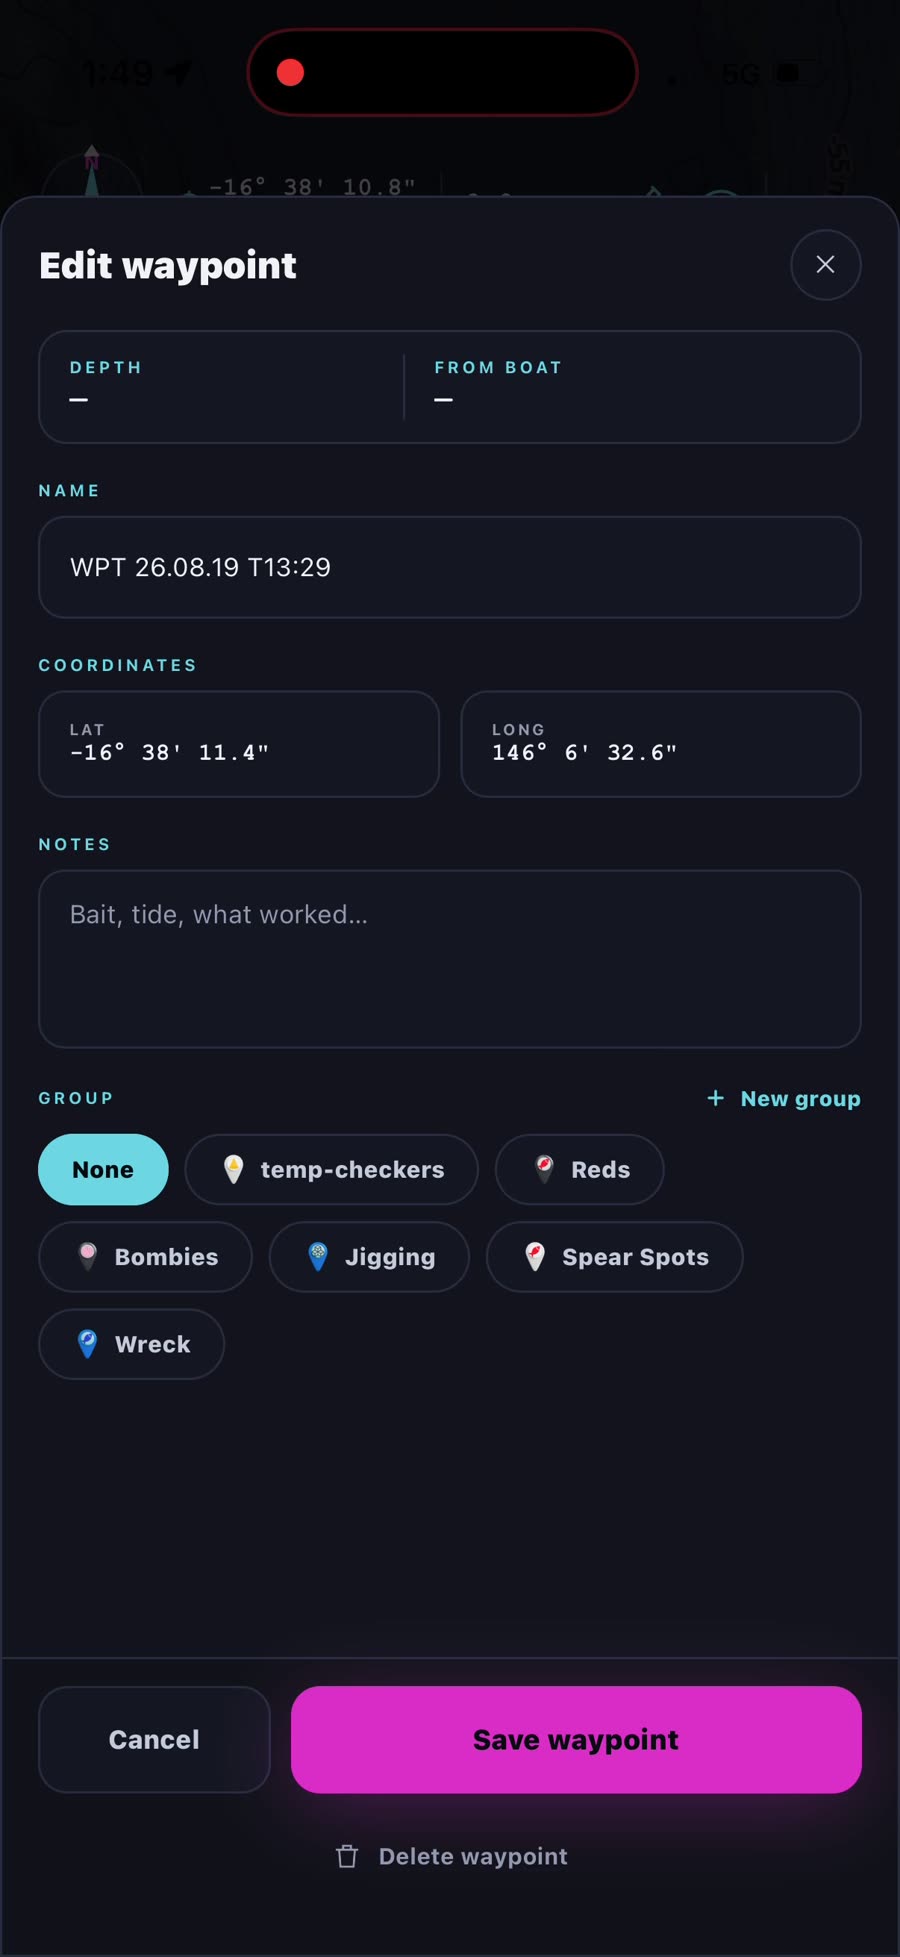
To drop a new mark, line the centre crosshair up over the spot and tap the pink add-waypoint button — done, named with the date and time. Edit opens the full card: rename it, tweak the coordinates, jot notes (bait, tide, what worked…) and file it into a group like Reds, Jigging or Spear Spots — or make a new group on the spot. Delete lives down the bottom.
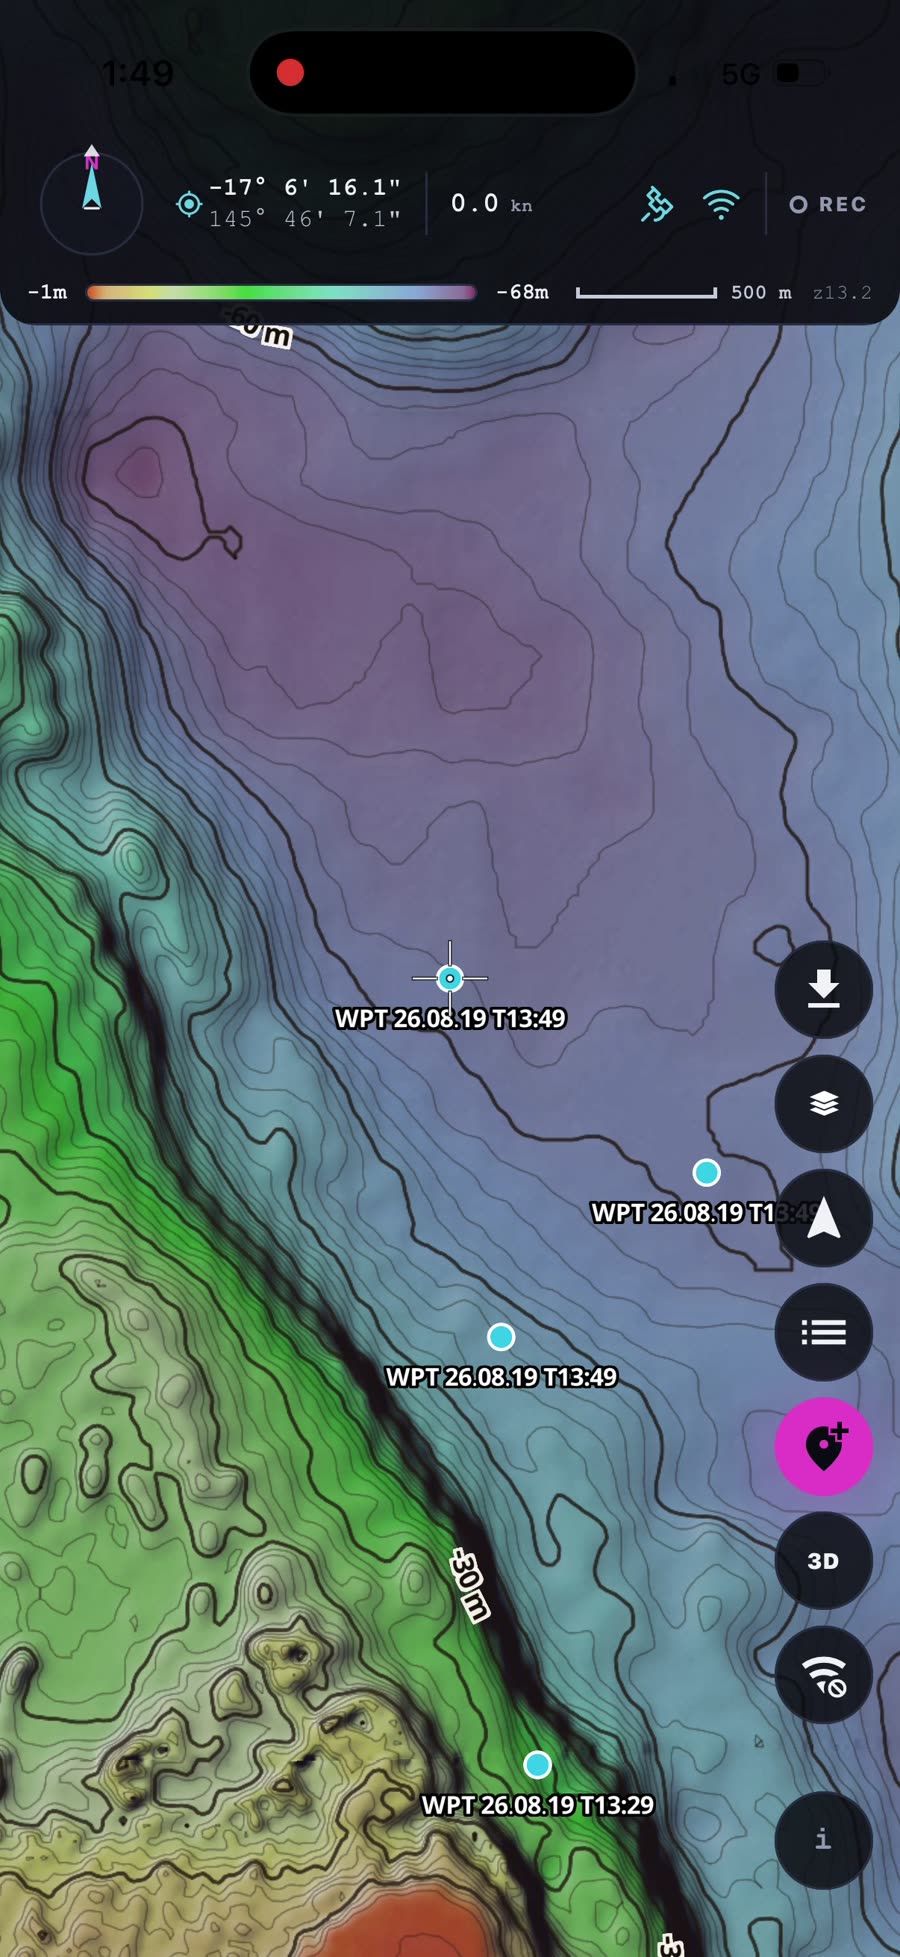
New marks made on the phone are tagged UNSYNCED until you push them to your account — an Unsynced filter appears so you can see exactly what's pending. Tap Sync, confirm, and seconds later they're on the server and waiting in the web app. Made marks out wide with no signal? They queue up quietly and sync next time you're connected.
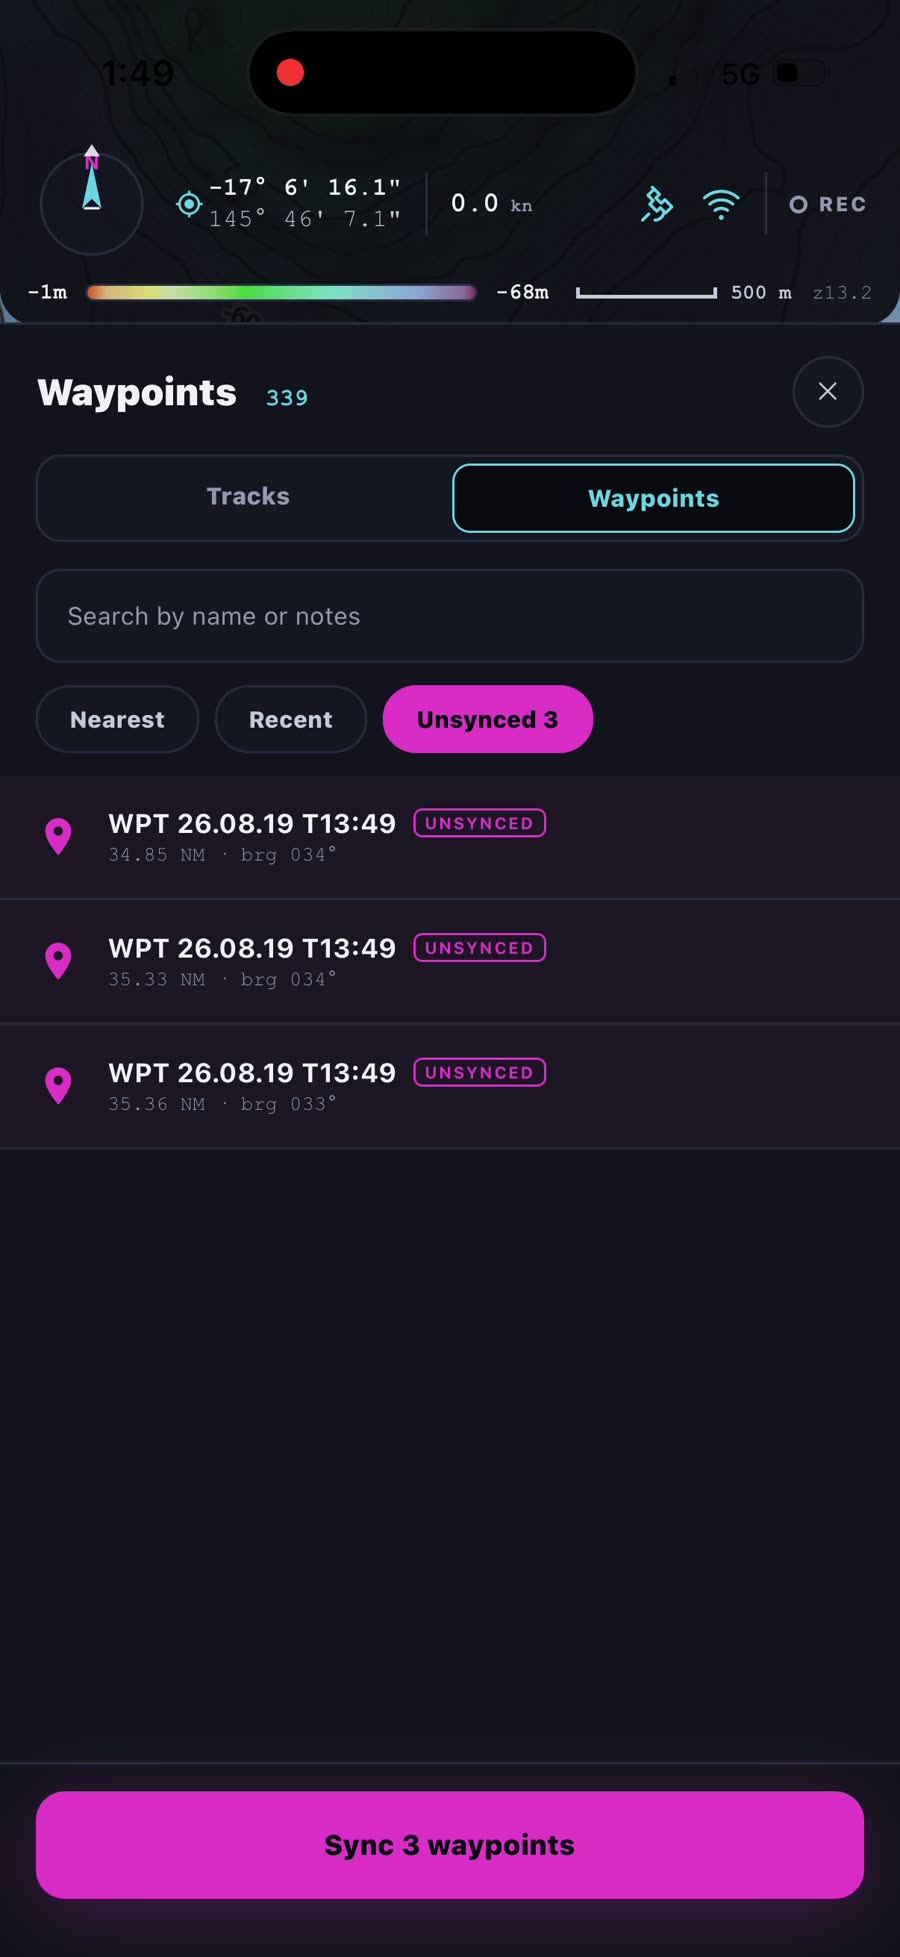
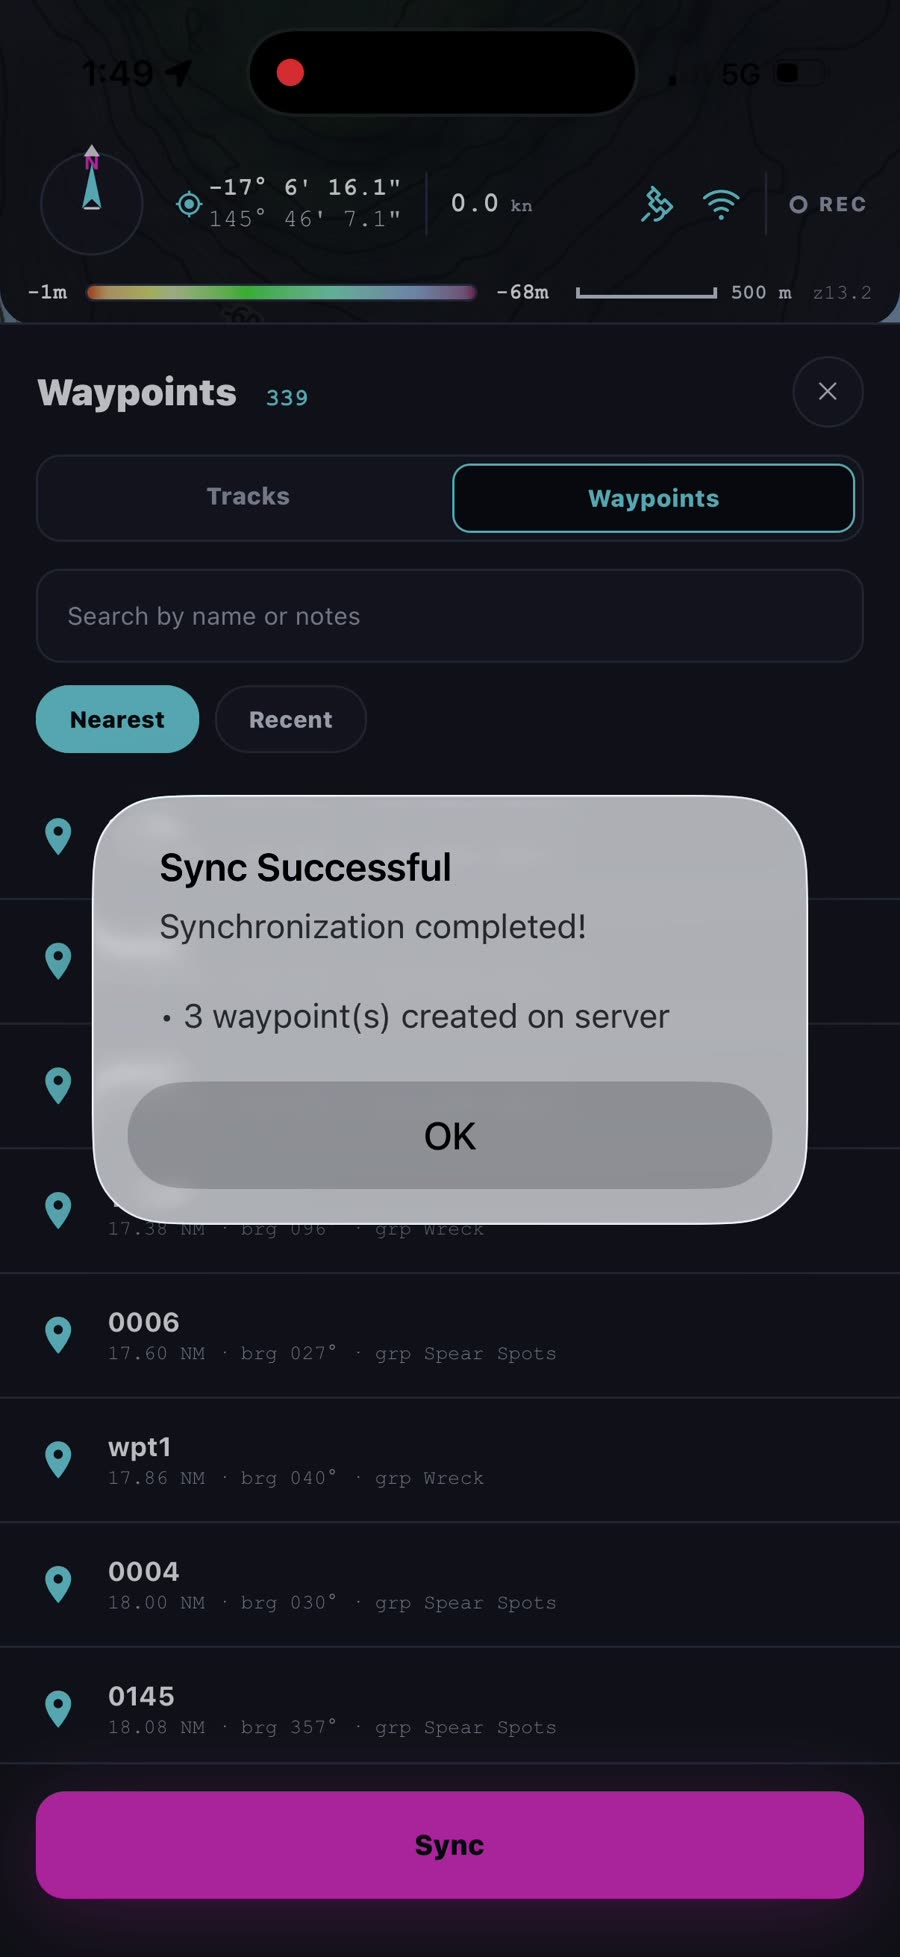
One more thing lives in this panel: the Tracks tab — that's the next step.
Record your tracks
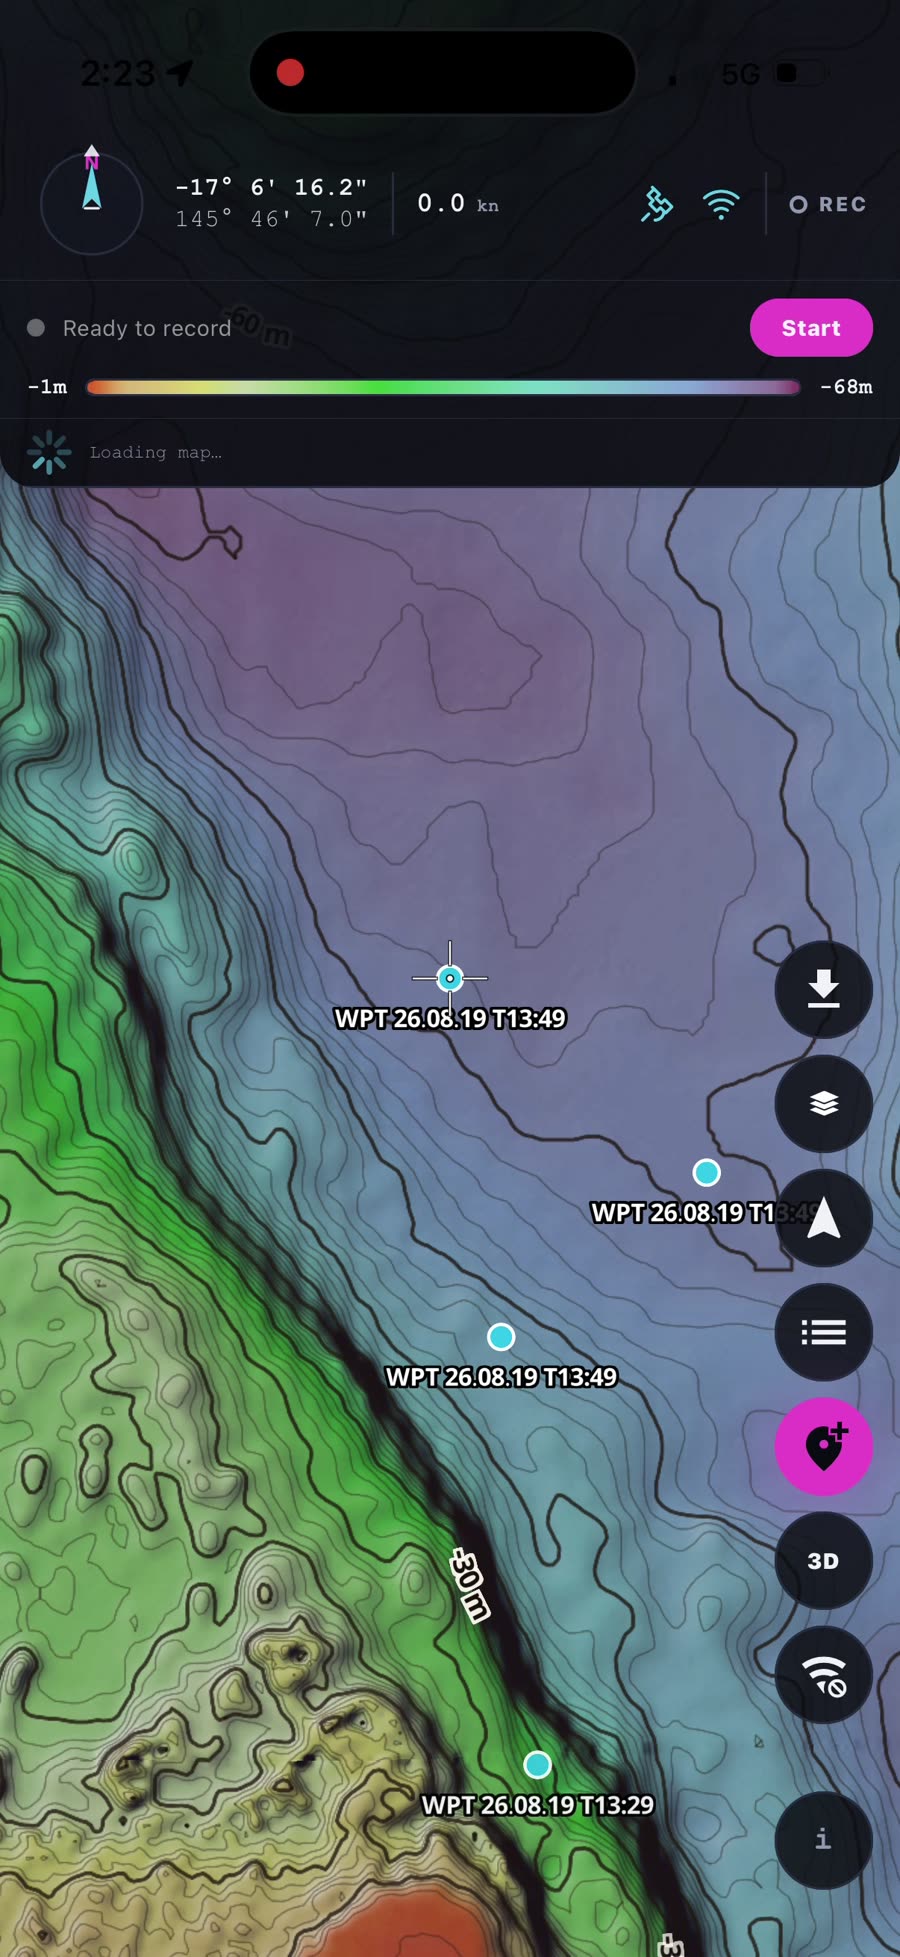
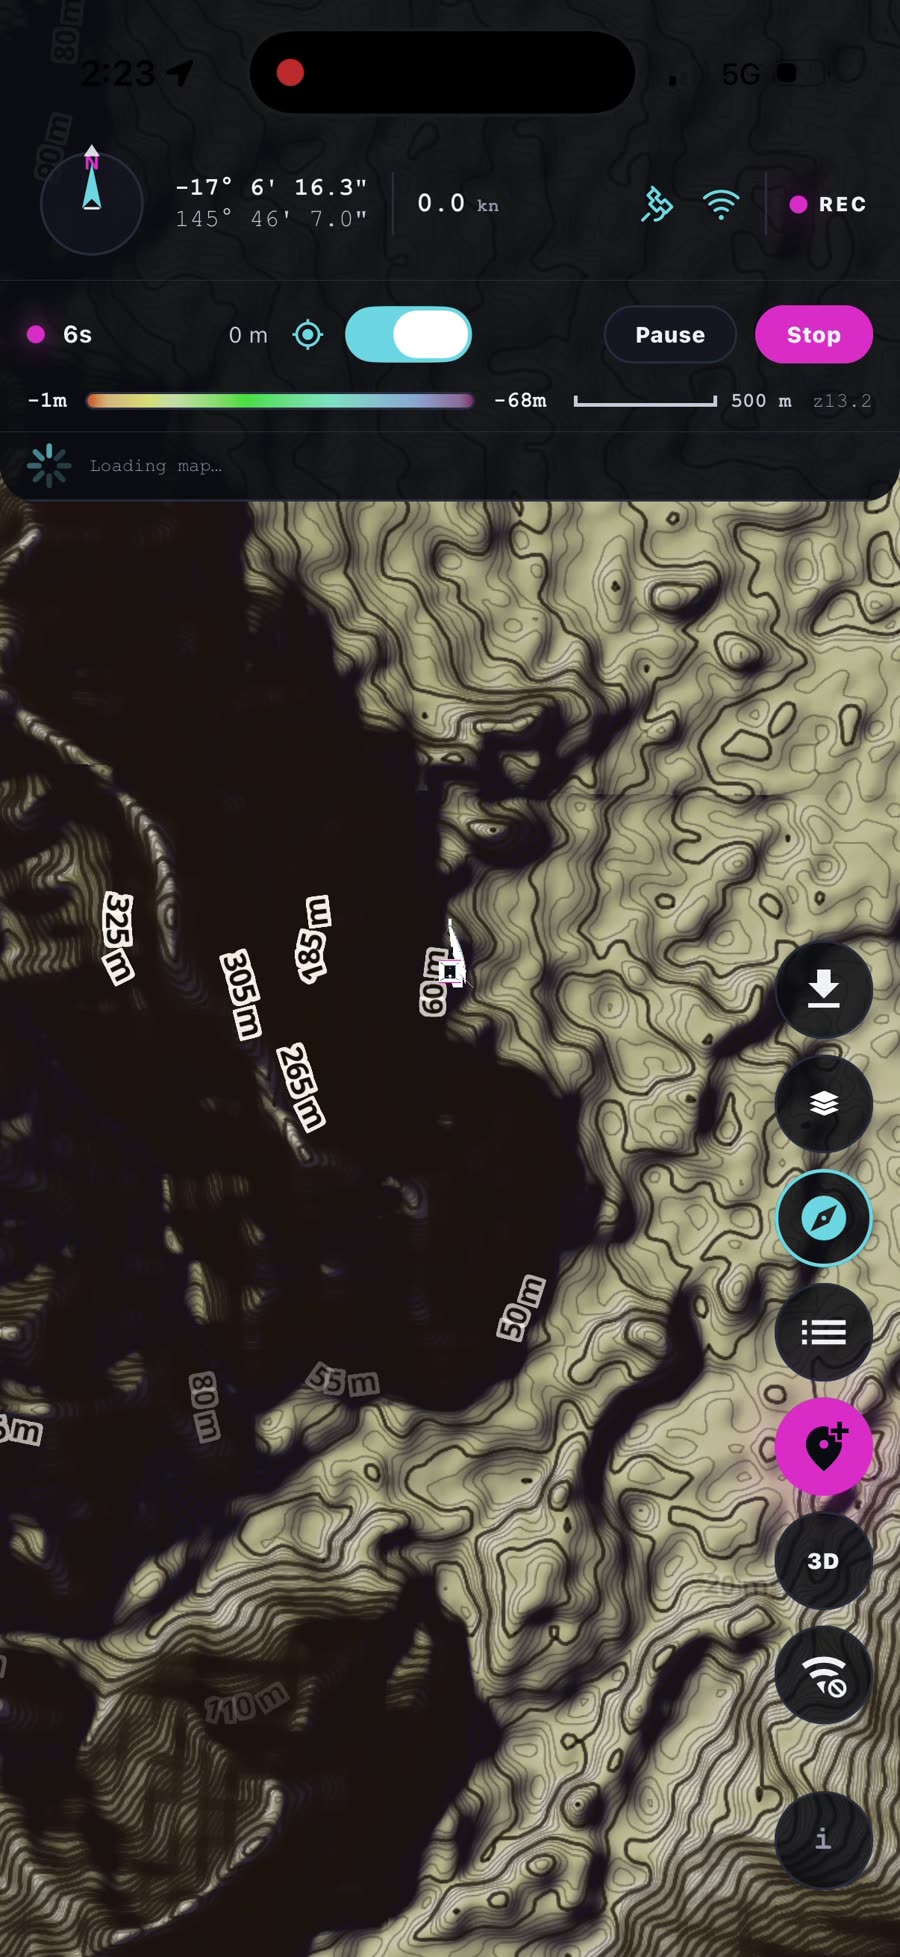
Open the Tracks tab in the same panel and hit Start recording. A recording bar slides in above the map reading Ready to record — tap the pink Start and you're logging: the bar shows a running timer and distance, and the REC light in the top bar glows pink the whole time you're recording.
The toggle on the bar keeps the map following your position as you drift or steam. Need a break mid-drift? Pause and Resume without splitting the track. When you're done, tap Stop and choose Save — or Discard if it wasn't worth keeping.
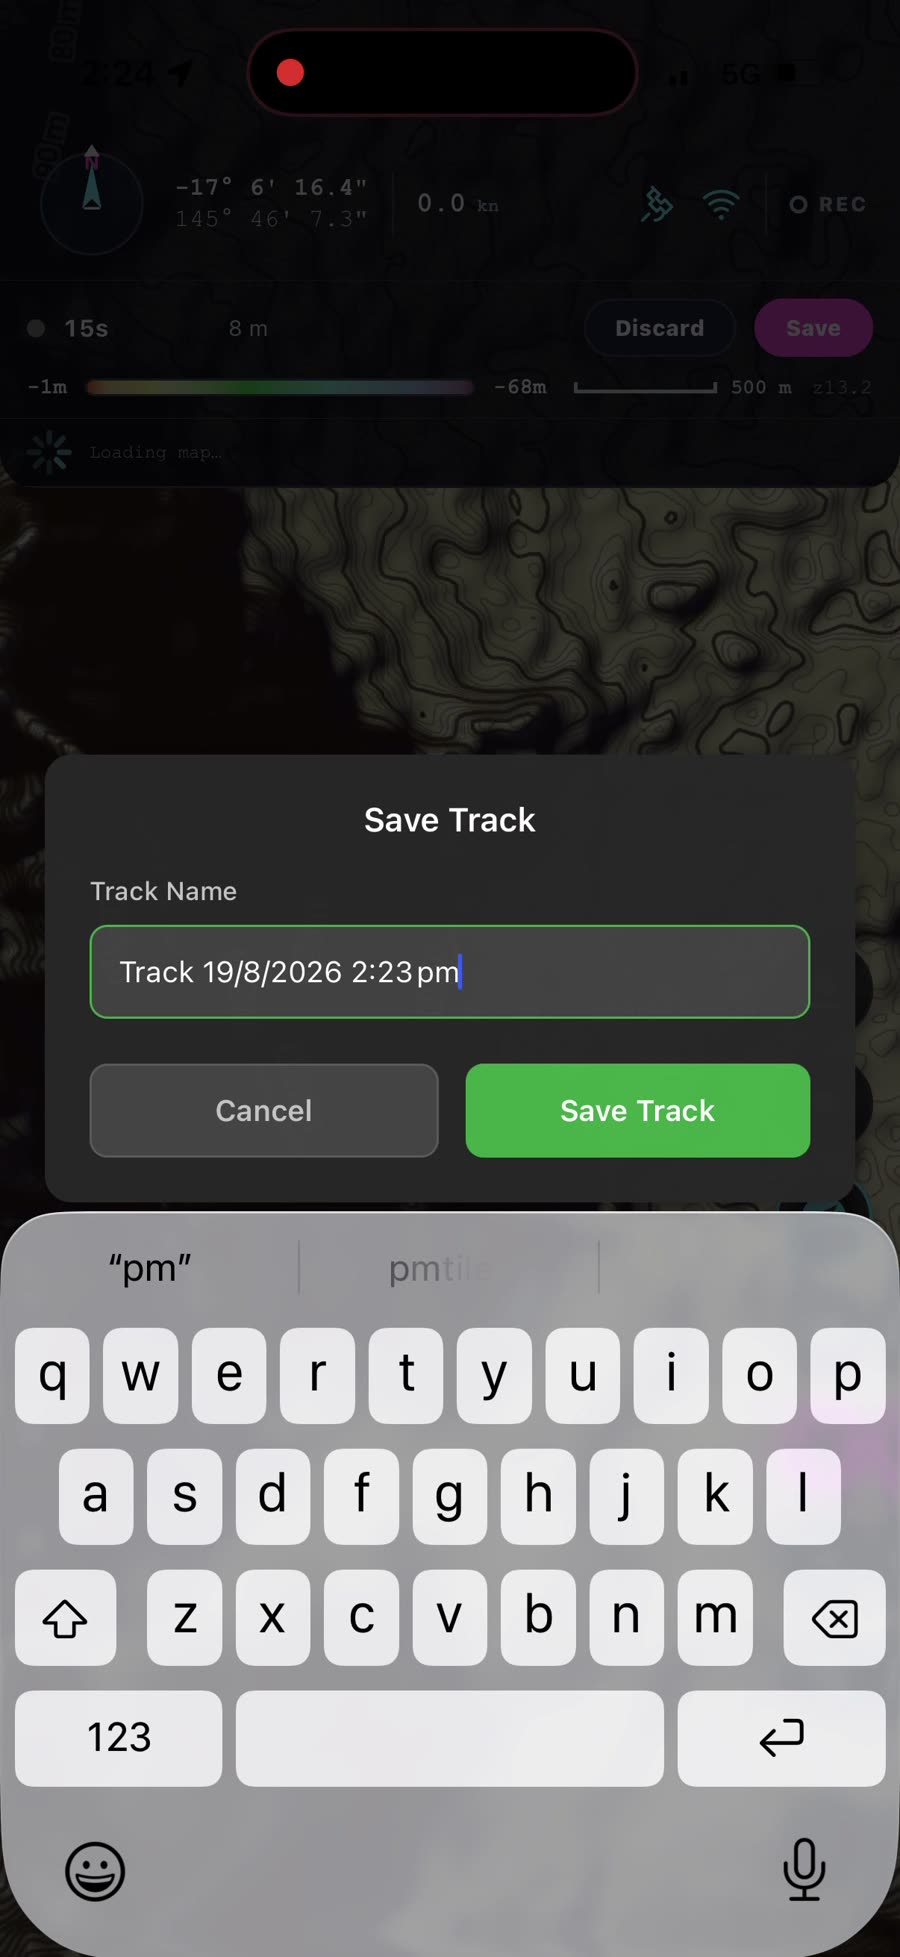
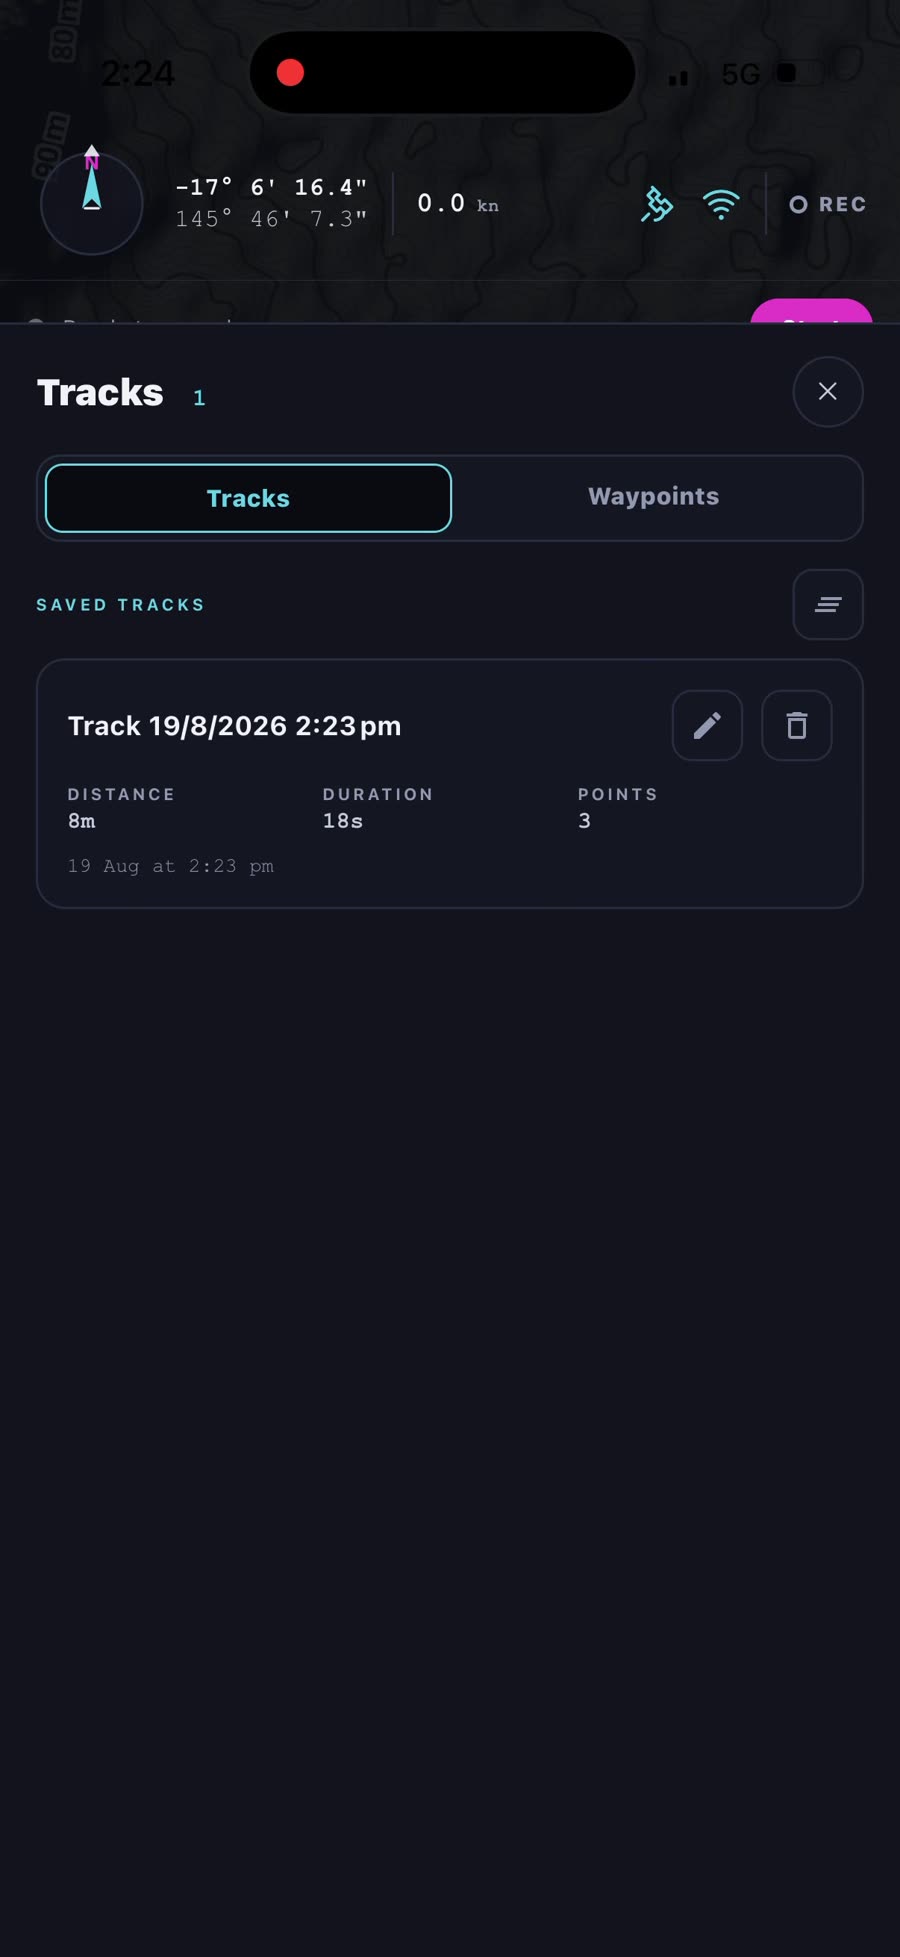
Saving pops the Save Track dialog with a name already filled in from the date and time — keep it or type your own. The track then lands under SAVED TRACKS with its distance, duration and point count. The pencil renames a track, the bin deletes one, and the menu alongside can clear the lot (it asks first — that one can't be undone).
And here's why it matters beyond your own logbook: recording contributes depth data — today's drift becomes tomorrow's contour.
Search for a location
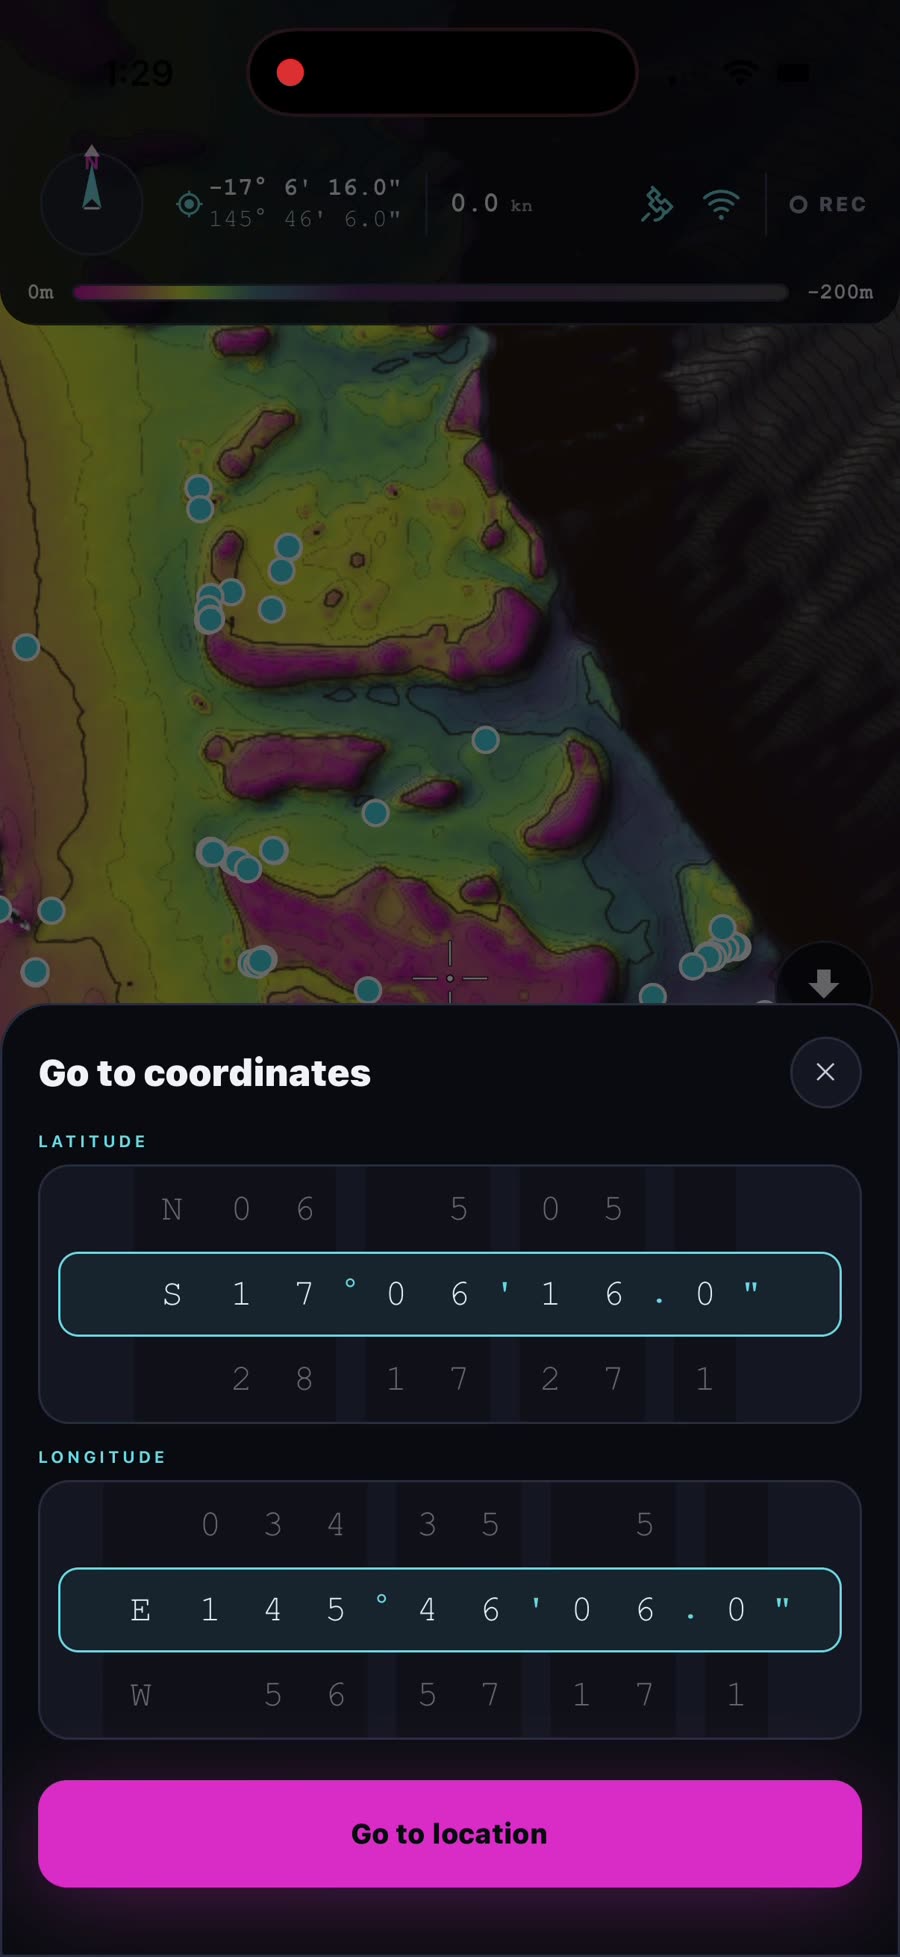
Got numbers from a mate, a magazine or your old sounder? Tap the coordinate readout in the top bar (the one with the little target icon next to your position) and the Go to coordinates panel slides up.
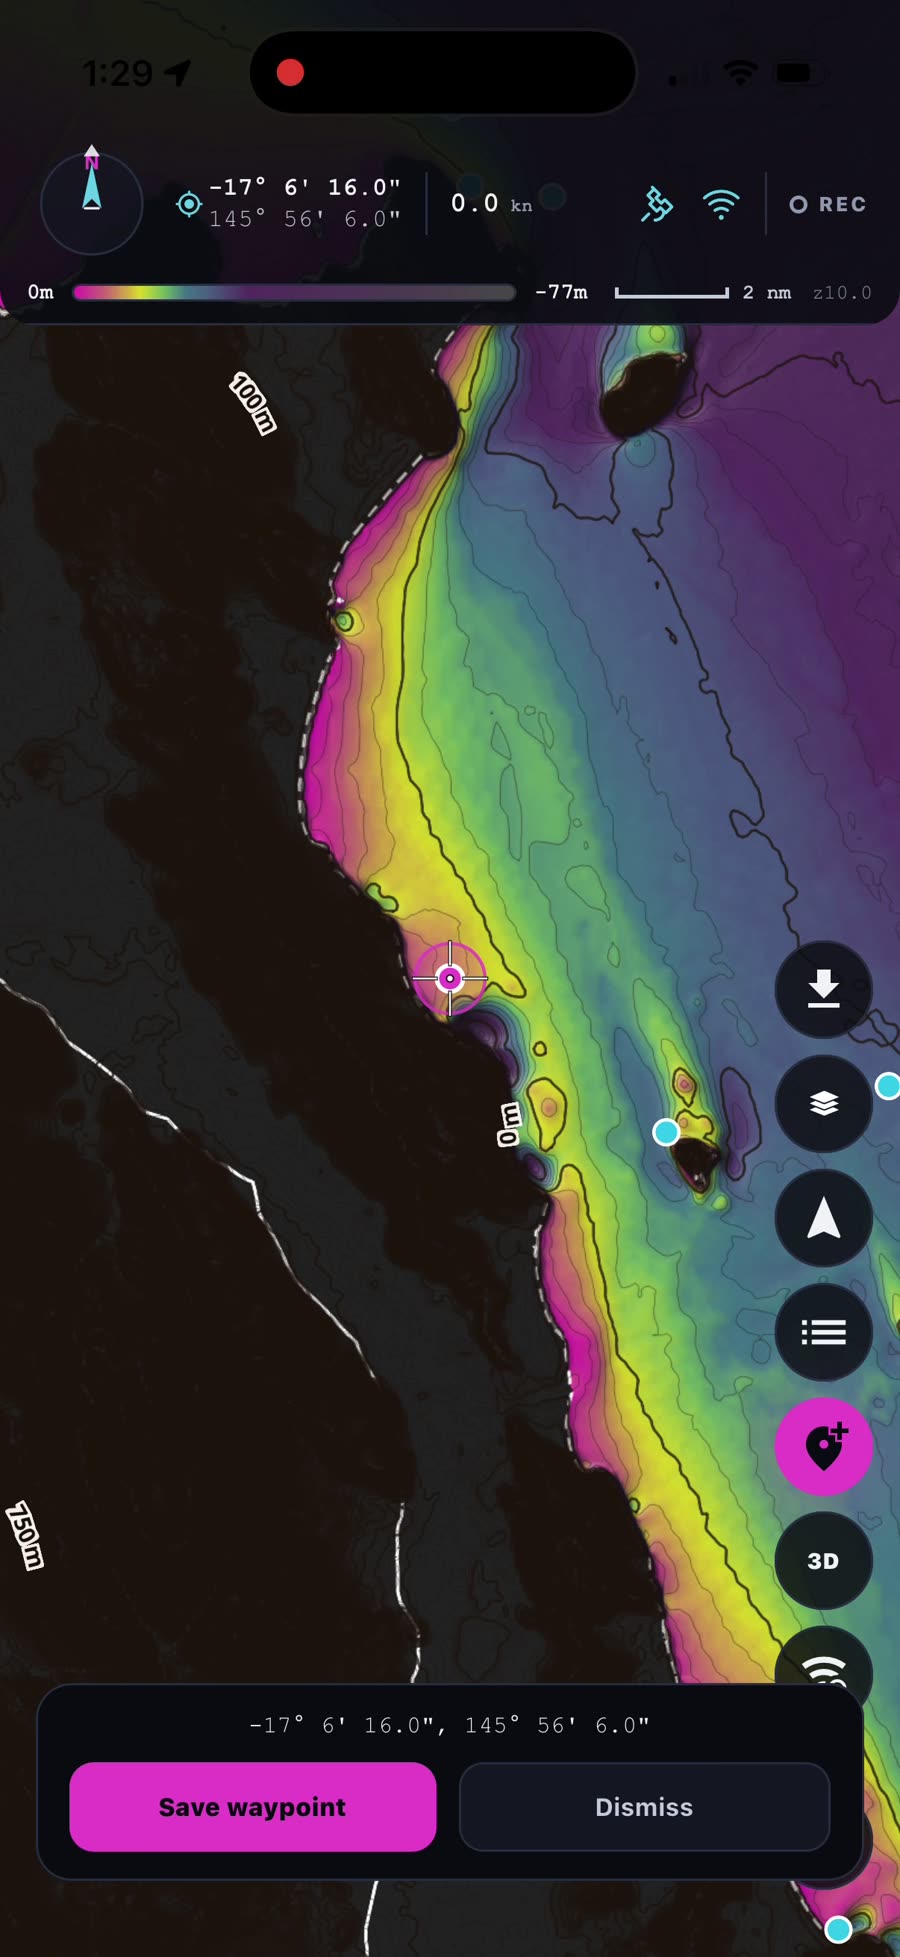
Spin the latitude and longitude wheels to dial in the spot — degrees, minutes and seconds, no fiddly typing — then hit Go to location. The map flies straight there and drops a target marker on the exact position.
A bar pops up underneath with the coordinates and two choices: Save waypoint to keep the spot in your list (it syncs to your account like any other mark, as in step 10), or Dismiss if you were just having a look.
Your BathyMart purchases, synced
Bought an ultra-high-resolution map from BathyMart? There's nothing to set up: any purchase on your account automatically syncs to the Companion App and appears on the map, right where it belongs.
You'll spot them instantly — a surveyed patch snaps into razor-sharp focus over the surrounding base bathymetry, with every bommie, rubble patch and gutter resolved. Zoom in and the detail keeps coming; tap 3D and the structure lifts off the screen like the rest of the chart.
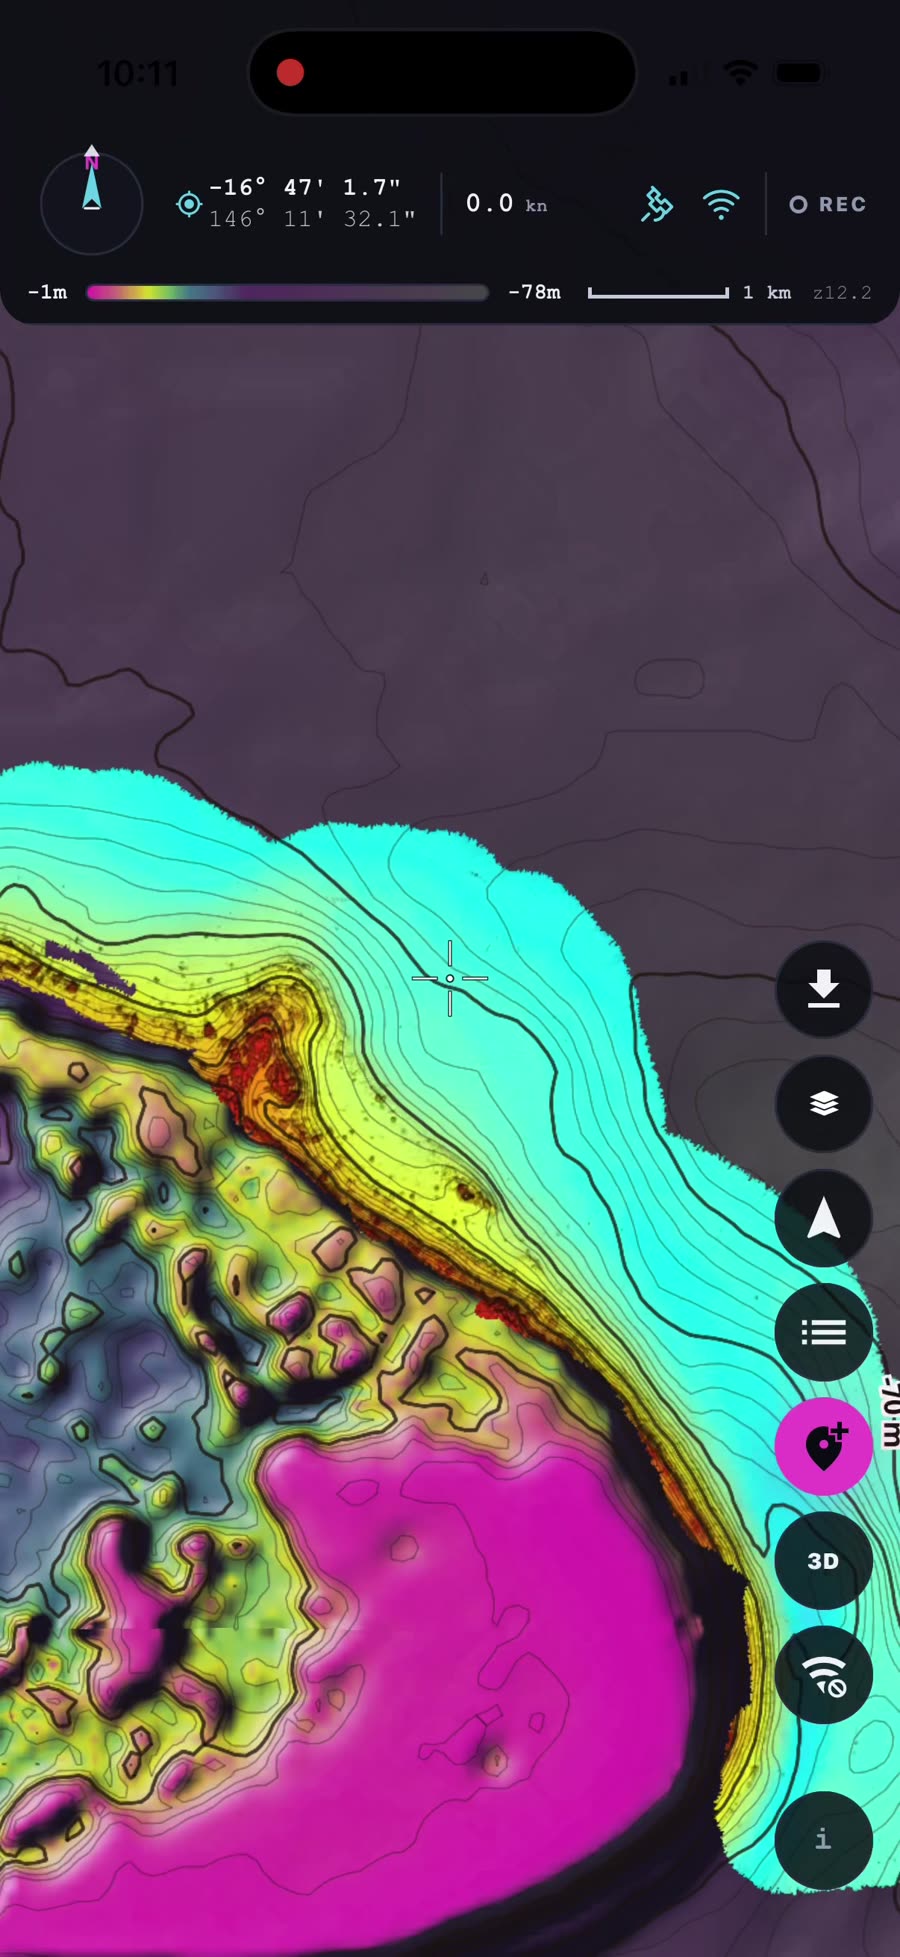
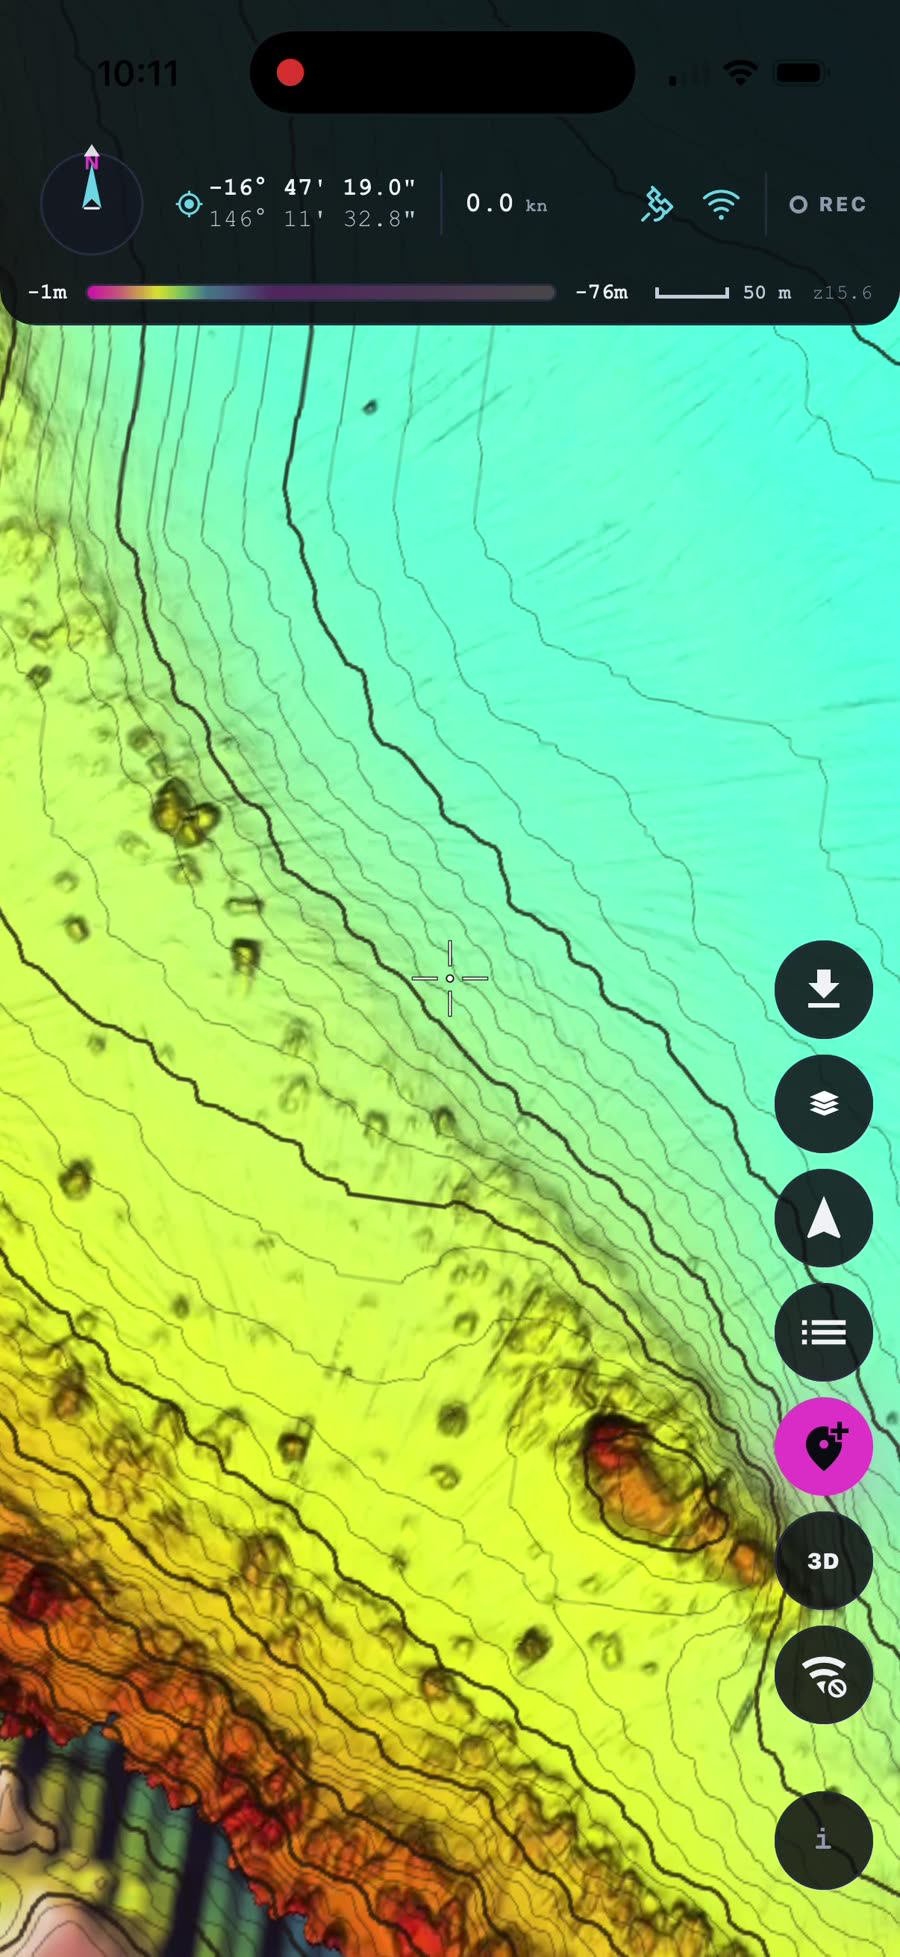
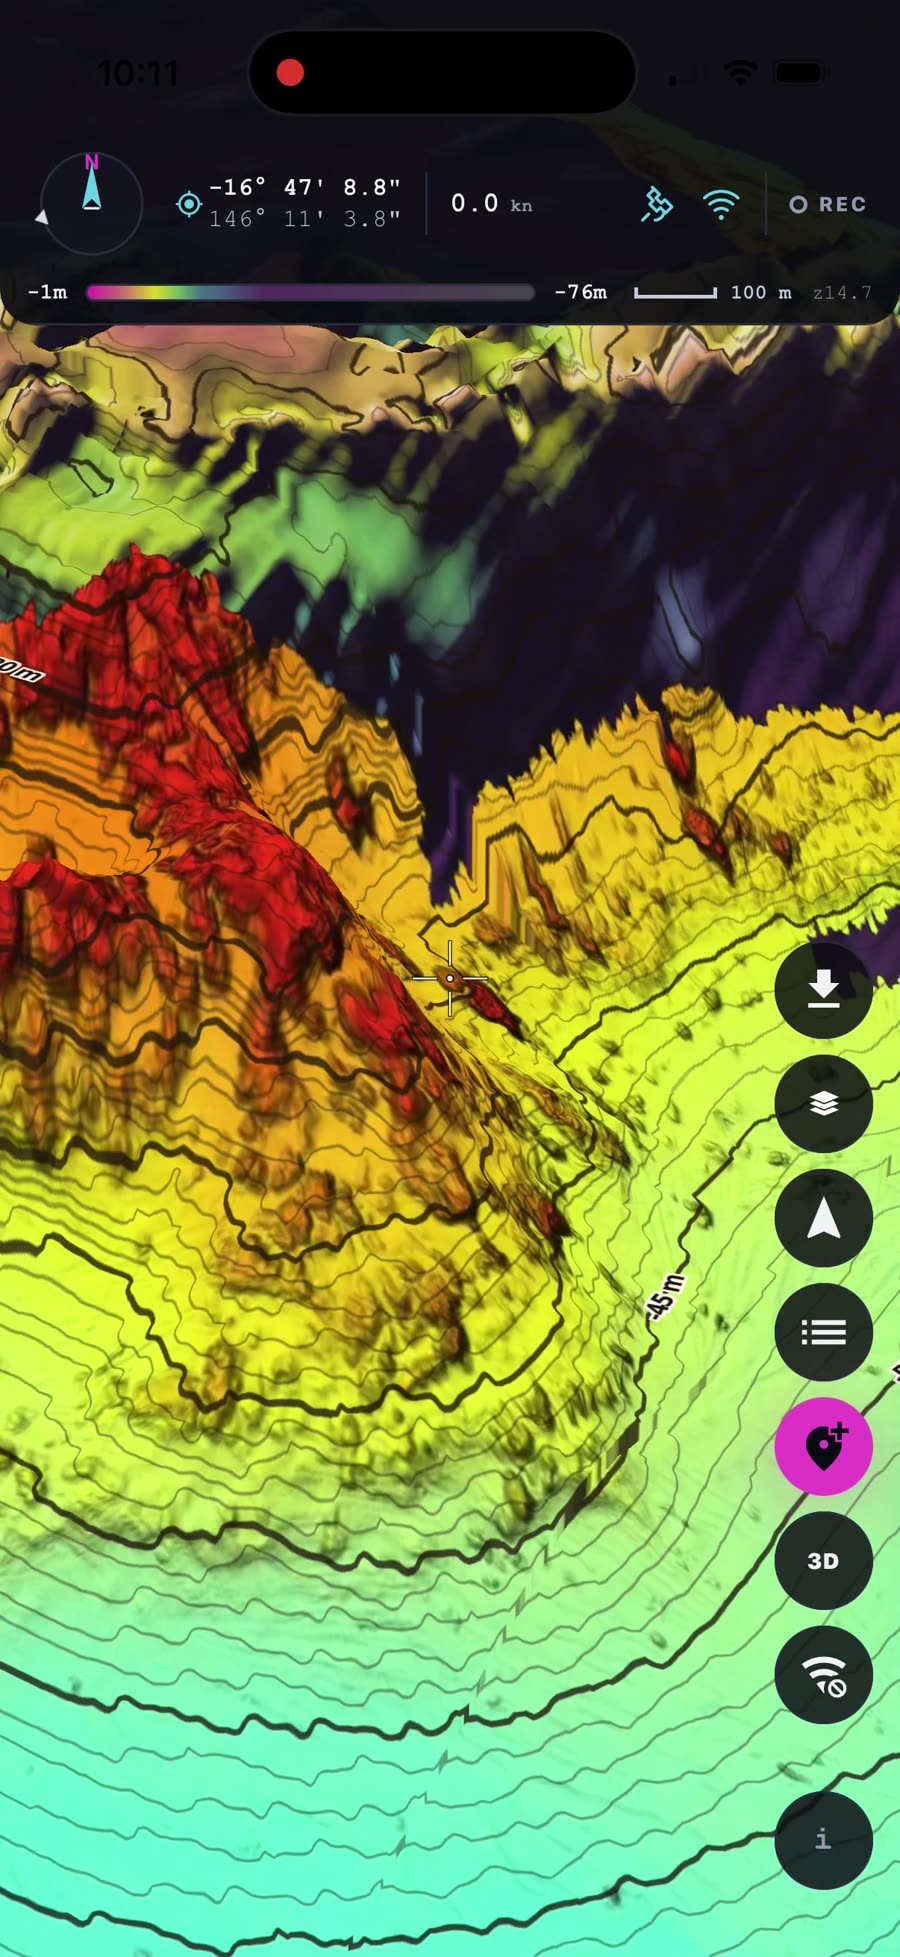
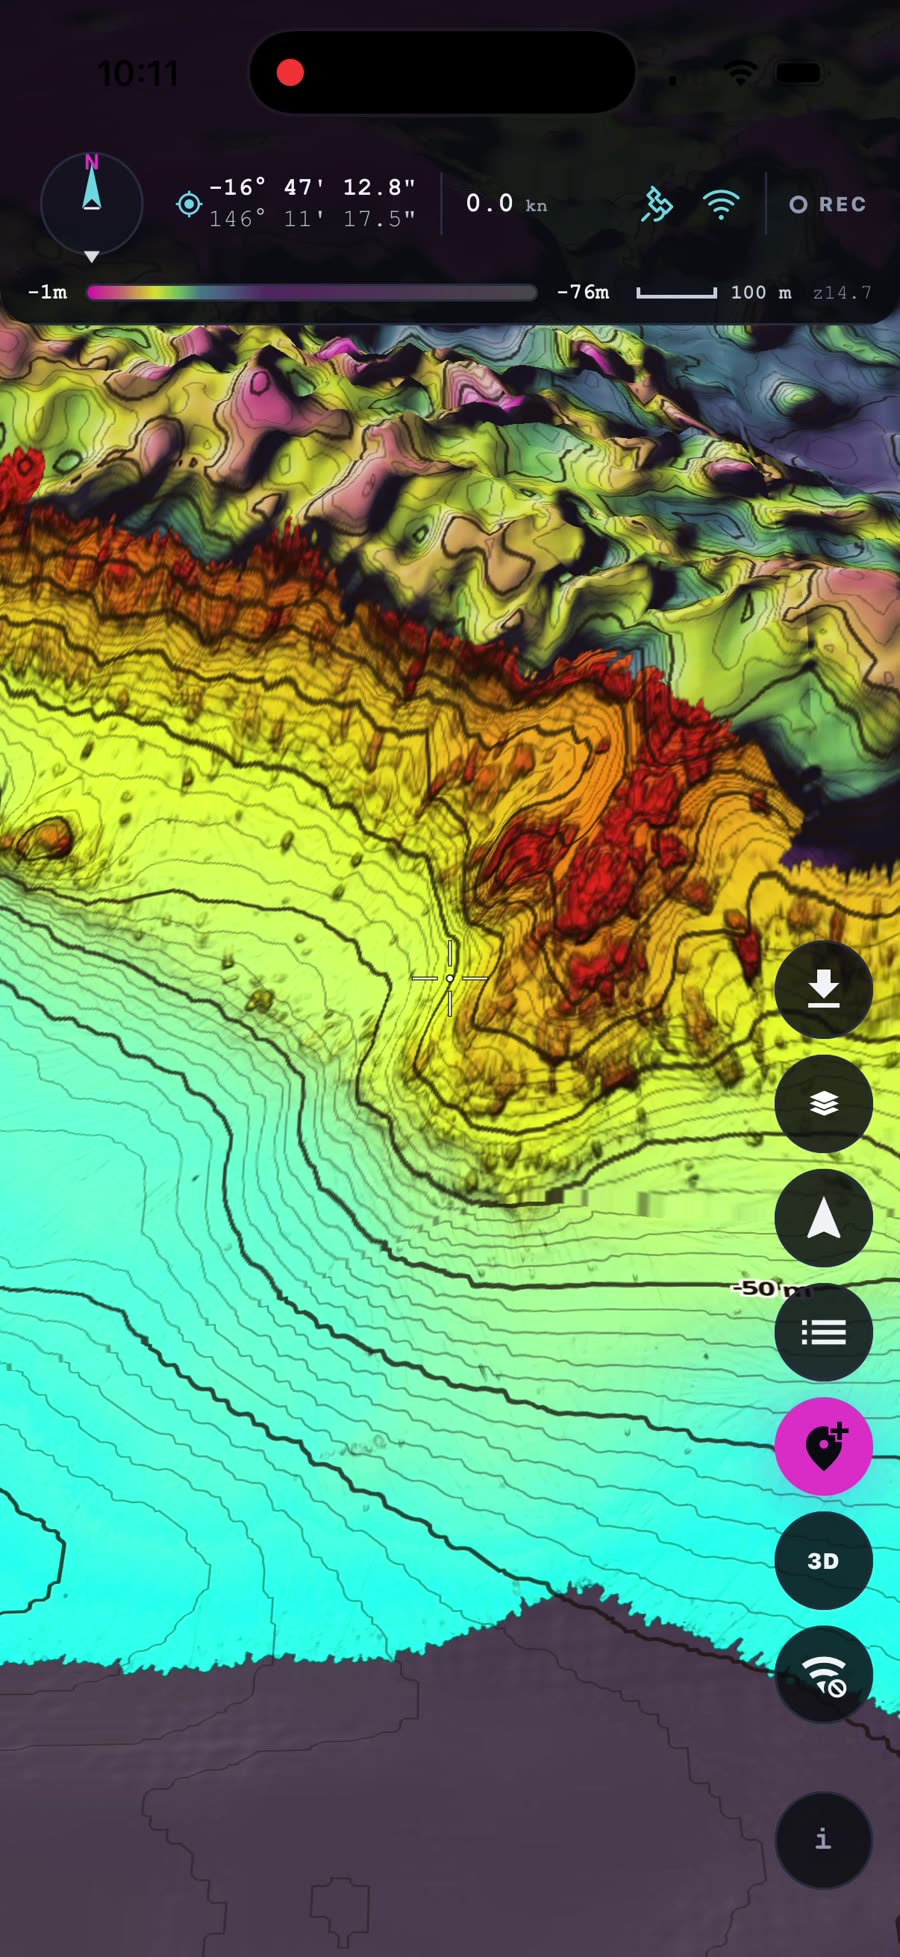
And like everything else in this guide, they're offline compatible — your purchases come along inside your downloaded regions, so the high-res detail is there when the signal isn't.
Downloaded, tested, ready. 🎣
Grab the region you fish, flick on the offline simulation, and head out knowing the map comes with you.
Open BathyMaps →